
Learning how to tile is an incredibly rewarding skill. But when you’re working with handmade cement tiles, the result is something else entirely—a one-of-a-kind surface with rich, deep color and a silky matte feel underfoot. Unlike standard ceramic, these artisan tiles from Original Mission Tile bring a unique character that only gets better with age.
This guide is your complete roadmap to a professional-quality installation, one that will look incredible for decades to come.
Why Handmade Cement Tile Is a Game Changer
WHAT ARE CEMENT TILES
When you decide on a tiling project, you aren’t just applying a finish; you’re installing a permanent part of your home. This is especially true for handmade cement tiles, which have an aesthetic depth and tactile quality that mass-produced materials just can’t replicate.
Every single tile is crafted by a skilled artisan using traditional methods, which means you’ll see slight, beautiful variations in color and texture. This isn’t a defect—it’s the signature of authentic craftsmanship. These subtle differences come together to create a cohesive, living surface that’s full of movement and personality. You can learn more about what makes this material so special by exploring https://originalmissiontile.com/the-timeless-beauty-of-handmade-cement-tiles/.
The Practical Value of a Permanent Finish
Choosing a high-quality tile is a smart investment in your property’s future. The pros now treat tile as a permanent fixture, and the market data backs this up. The global ceramic tiles market is projected to expand by 74% between 2025 and 2033, growing from around USD 228.9 billion to nearly USD 399.3 billion. That’s a huge indicator of a strong preference for durable, low-maintenance surfaces.
A properly installed tile floor or wall can easily last 20–50 years, outliving multiple cycles of paint or vinyl while adding real resale value. As you plan your project, it’s helpful to explore the full range of options, including the different bathroom tile types available and their unique characteristics.
Before diving in, it’s a good idea to map out your project. Here’s a quick overview of what a typical tiling timeline looks like, helping you plan for each phase from prep to finish.
Tiling Project Timeline at a Glance
| Project Phase | Key Activities | Estimated Time |
|---|---|---|
| Planning & Acclimation | Finalize layout, order materials, let tiles acclimate in the room. | 2-4 days |
| Substrate Preparation | Clean, level, and prime the surface. Install backer board if needed. | 1-2 days |
| Layout & Dry-Fitting | Snap chalk lines for reference and do a dry run of the pattern. | 3-5 hours |
| Setting the Tile | Mix thin-set mortar and install tiles, cutting as needed. | 1-3 days |
| Curing & Sealing (Pre-Grout) | Allow mortar to cure. Apply first coat of sealer to cement tiles. | 24-48 hours |
| Grouting & Final Seal | Apply grout, clean haze, and apply final coats of sealer. | 1-2 days |
| Final Curing | Allow the entire installation to fully cure before heavy use. | 3-7 days |
This timeline gives you a framework, but remember that every project is unique. The key is to avoid rushing the critical steps like preparation and curing.
Understanding the Unique Needs of Cement Tile
Unlike non-porous ceramic or porcelain, handmade cement tile demands a different mindset. Its porous nature means it can absorb water and pigments, making certain steps—like sealing—absolutely non-negotiable.
Key Takeaway: The single biggest mistake you can make with cement tile is treating it like generic ceramic. Proper sealing before and after grouting is not optional; it’s essential to prevent staining and ensure longevity.
We’ll cover these specialized techniques in detail. So whether you’re a designer mapping out a custom pattern or a homeowner tackling a kitchen renovation, you’ll have the confidence to achieve a flawless, lasting finish.
Laying the Groundwork for a Flawless Finish
A jaw-dropping tile installation has a secret weapon: the painstaking, invisible work done before a single tile ever touches mortar. This is, without a doubt, the most important part of the job. Cutting corners here is the #1 reason projects fail, leading to cracked tiles, wonky surfaces, and crumbling grout down the line.
Think of your substrate—the floor or wall you’re tiling—as the bedrock of your design. Whether it’s a concrete slab or fresh cement backer board, it has to be perfect. That means it needs to be solid as a rock, dead flat, squeaky clean, and ready to grab onto the mortar for dear life.
How to Measure and Order Your Tile (The Right Way)
Before you even think about prep, you need a solid plan. Start by measuring the length and width of the area you’re tiling. Multiply those two numbers together to get your square footage. A 10-foot by 12-foot room? That’s 120 square feet.
But hold on—you can’t just order 120 square feet of tile. You absolutely have to account for cuts, the occasional “oops,” and tiles for any future repairs. This is where overage comes in, and it’s not optional.
- Simple grid layouts: Add 10% for overage. Easy peasy.
- More complex patterns: For herringbone or diagonal layouts that need more angle cuts, bump that up to 15%.
- Intricate, multi-tile patterns: Playing it safe with 20% is a smart move.
For our 120-square-foot room, a 15% overage means you’d order 138 square feet of tile (120 x 1.15). Having those extra boxes is your insurance policy. It’s so much better than running out mid-job and discovering the new batch doesn’t quite match.
Mapping Out a Layout That Looks Professional
Once your tile has arrived and is sitting in the room (let it acclimate to the temperature!), it’s time to plan your layout. The whole point here is to create a balanced look and, most importantly, avoid those awkward, skinny slivers of tile along the most visible walls.
First, find the center of your two longest walls and snap a chalk line connecting them. Do the same for the shorter walls. Where those two lines cross is the exact center of your room. Use this as your starting point for a “dry run”—lay out tiles from the center toward the walls, using spacers to see how everything lands.
Pro Tip: Your goal is to end up with cuts at the edges that are at least half a tile wide. If your dry layout gives you tiny, frustrating slivers, just shift your starting line over by half a tile’s width and check again. This tiny adjustment makes a huge difference in the final look.
Getting the Substrate Ready for Action
Layout locked in? Great. Now clear the room and get laser-focused on the substrate. A tile job that lasts a lifetime depends on a surface that is four things: flat, clean, rigid, and ready for mortar.
1. Make It Flat
And I mean really flat. Use a long, straight level (at least 6-8 feet long) and slide it across the floor in every direction, looking for high and low spots. The industry standard allows no more than a 1/4-inch dip or rise over 10 feet.
- Grind down high spots on concrete with an angle grinder fitted with a diamond cup wheel.
- Fill in any low spots with a self-leveling compound. Just follow the bag’s instructions to the letter.
2. Make It Clean
Your substrate needs to be totally free of anything that could get between it and the mortar. We’re talking dust, dirt, grease, paint blobs, or old glue.
- Scrape off any gunk.
- Sweep, then vacuum the entire area like you mean it.
- On concrete, I like to do a final wipe-down with a barely damp sponge to pick up that last bit of fine dust.
3. Make Sure It’s Rigid
The floor can’t have any bounce. None. If you’re tiling over a plywood subfloor, it has to be beefed up to prevent any flexing that will absolutely crack your grout and tiles. The go-to standard is a total subfloor thickness of at least 1-1/4 inches, which you can usually achieve by adding a layer of cement backer board over your plywood.
A Quick Word on Membranes
If you’re working in a wet area like a bathroom or even a kitchen backsplash, a waterproofing membrane is a must. You’ll apply this over the backer board to create a watertight seal that stops moisture from ever reaching the studs or subfloor.
For tiling over a concrete slab, a crack-isolation or uncoupling membrane is a brilliant investment. These membranes absorb tiny shifts and movements in the concrete, preventing those forces from traveling up and cracking your beautiful new tile. Think of it as cheap insurance for all your hard work. Getting this foundation right is what separates a project that lasts for decades from one that fails within a year.
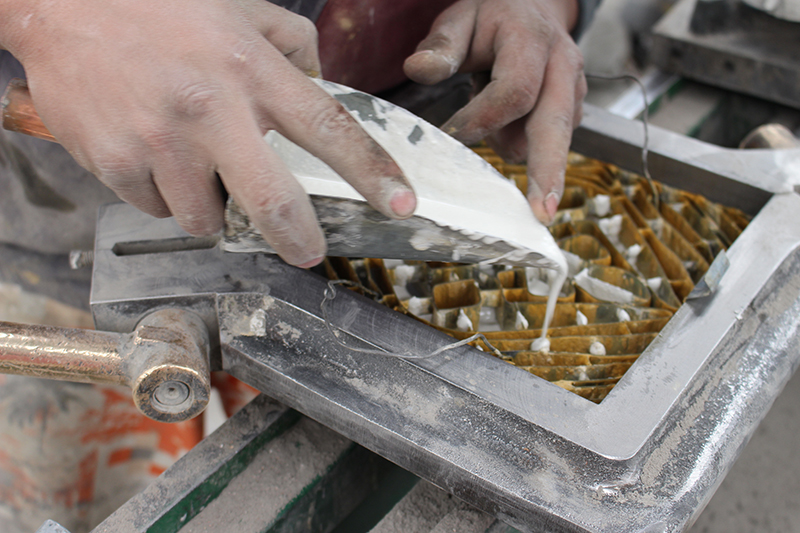
Setting Your Cement Tiles Like a Professional
Okay, your surface is prepped and perfect. Now for the best part—the moment your design comes off the paper and onto the floor. This is where you really learn how to tile. But remember, setting handmade cement tiles is different. Their porous, handcrafted nature calls for a specific technique and the right materials. This is no time to cut corners.
This visual guide breaks down the essential pre-setting steps into a clear, three-part process: measure, layout, and prep.
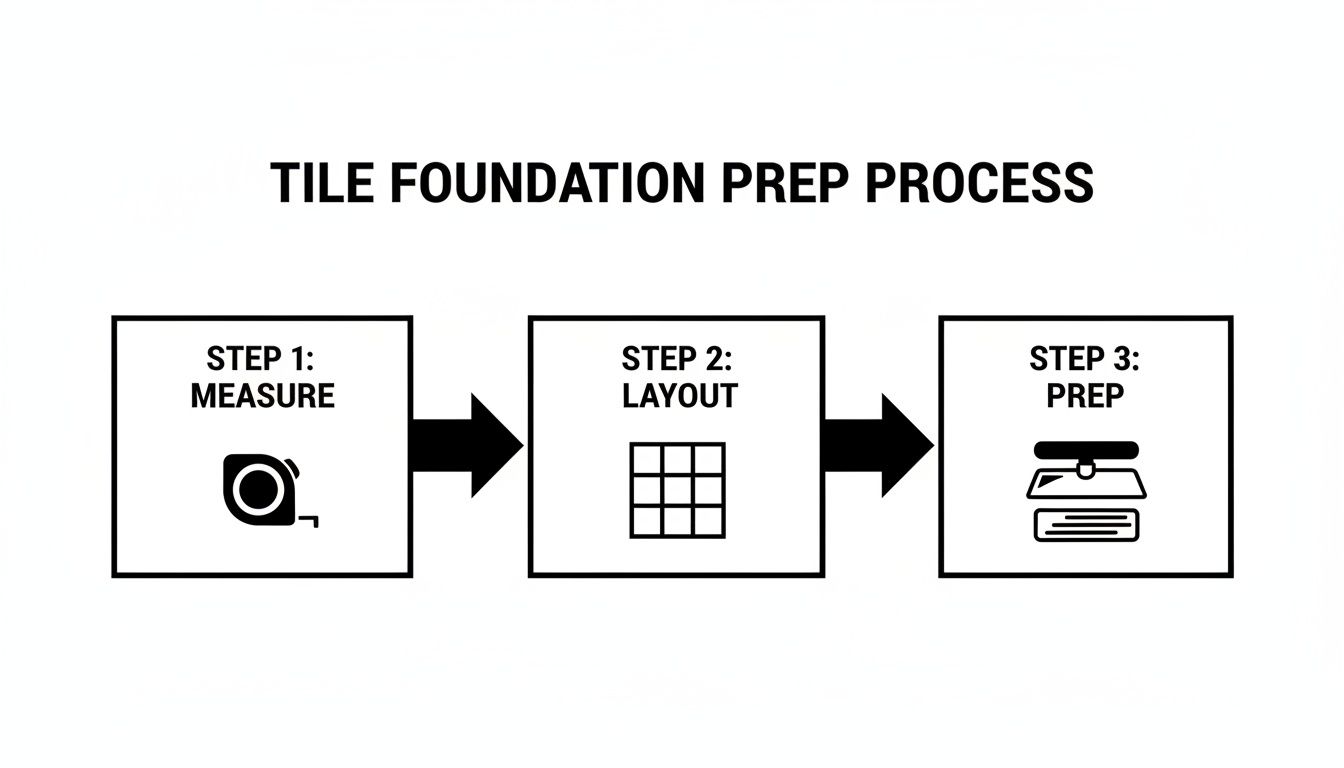
Think of it this way: a flawless installation is built on careful planning before you even think about mixing mortar. Getting these first stages right is how you avoid the most common headaches later on.
Choosing and Mixing Your Mortar
Let’s talk about the single most important material you’ll choose at this stage: your thin-set mortar. For cement tiles, you absolutely must use a white, polymer-modified thin-set. Using standard grey mortar is a rookie mistake that can ruin your project. Its dark pigments can actually bleed through the porous tile, creating permanent, shadowy stains from the back.
Getting the mixing consistency right is just as critical for a strong, permanent bond. You’re aiming for a smooth, creamy texture, a lot like peanut butter. It needs to hold its shape on the trowel without being stiff or crumbly.
Here’s how to nail that perfect mix every time:
- Start by adding the correct amount of cool, clean water to your bucket.
- Slowly add the dry thin-set powder while mixing on low speed with a paddle mixer.
- Mix until everything is blended and the consistency is smooth.
- Now, let it slake for 5-10 minutes. This is when the polymers fully activate. Don’t skip this.
- Give it one final, quick mix—without adding more water—and you’re good to go.
That slaking step? It’s the secret to unlocking the mortar’s maximum bonding strength. Many DIYers blow right past it, but it’s what separates an amateur job from a professional one.
The Art of the Trowel and Back-Buttering
With your mortar ready, it’s time to get it on the substrate. Grab a notched trowel (a 1/2″ x 1/2″ square-notch is a good starting point for our 8×8 tiles) and spread a layer of thin-set. Hold the trowel at a consistent 45-degree angle to create clean, uniform ridges.
Now for the most important technique for any handmade tile: back-buttering. This just means spreading a thin, flat layer of thin-set across the entire back of each tile before you place it. Why? Because it guarantees 100% mortar coverage. No air pockets, no weak spots, and no cracked tiles down the road.
Key Insight: Back-buttering isn’t just a “pro tip”—for thick, handmade cement tiles, it’s mandatory. It ensures full adhesion and provides critical support across the whole tile, something this material needs to perform for a lifetime.
Once you place the back-buttered tile into the mortar bed, give it a little back-and-forth twist. This collapses the ridges and locks it into place. Keep your level handy and check that each tile sits perfectly flush with its neighbors.
Achieving a Natural and Cohesive Look
One of the things people love about handmade cement tile is the subtle color variation from piece to piece. To get that beautiful, organic look and avoid accidental splotches of color, make sure you pull tiles from several different boxes as you work. This blends the natural variations evenly across the entire surface for a seamless finish.
Perfectly consistent grout lines are another hallmark of a pro installation. Use high-quality tile spacers, and remember to pull them out before the mortar sets up completely. For a deeper dive, our official cement tiles installation guidelines are an invaluable resource.
The global tile market is massive, with revenues expected to hit the USD 196–228 billion range in 2025. With so much tile being installed, the cost of failures from bad technique really adds up. That’s why specialty producers like us are so focused on providing detailed guidance—it protects your investment.
Remember, patience is your best tool here. Work in small, manageable sections. If you get any mortar on the face of a tile, clean it off immediately with a damp sponge. And check your work with a level, constantly. For those tackling a bigger job, you can find some excellent tile flooring installation and maintenance tips that cover all sorts of materials. Taking your time now will pay off with a perfectly level, beautiful surface that will last a lifetime.
Making Precision Cuts and Navigating Obstacles
Clean, precise cuts are what separate a good tile job from a great one. When you’re working with handmade cement tiles, you’ll quickly realize this isn’t like dealing with brittle ceramic. The material is much softer and denser, more like slicing through a cured concrete paver than snapping a thin piece of clay.
That’s why a high-quality wet saw equipped with a new diamond blade is an absolute must. Don’t even think about using a cheap snap cutter—it will just crush the edge and ruin the tile. A wet saw gives you the power and cooling needed to glide through the dense body without chipping the pigmented surface, leaving you with a crisp, factory-perfect edge every single time.
Mastering Different Types of Cuts
Most of your work will involve simple straight cuts to fit tiles along walls and into corners. But every project has its quirks, and knowing how to handle those tricky spots is the key to a flawless layout.
- Straight Cuts: These are your bread and butter, used for the perimeter of the room. Just measure the gap, mark your tile, and guide it slowly through the wet saw. Let the blade do the work; never force the tile through.
- L-Shaped Cuts: You’ll run into these when tiling around inside corners or cabinets. Mark both lines on the tile, then make two separate straight cuts that meet at the corner. The small piece from the inside corner will simply fall away.
- Circular Cuts: These are essential for fitting tile around plumbing like toilet flanges and shower valves. The cleanest way to do this is with a diamond-grit hole saw attached to your drill. Mark the center point, start the drill at a slight angle to create a groove, then slowly straighten it to a 90-degree angle to core through the tile.
Pro Tip: Always cut your cement tiles with the patterned side facing up. This lets you see your pencil marks clearly and dramatically reduces the risk of chipping the visible surface, which is crucial for preserving those beautiful, intricate patterns.
Don’t forget to account for your grout joint when measuring. If you’re using a 1/8-inch grout space, make sure to subtract that from your measurement before you mark the tile for cutting.
Tiling Around Tricky Obstacles
No room is a perfect square. You’re going to face obstacles like outlets, vents, and door frames that demand careful, custom cuts. For these jobs, your best friends will be an angle grinder with a diamond blade and a pair of tile nippers for the fine-tuning.
When you hit an electrical outlet, you’ll usually need to cut a square or rectangle out of a tile’s center. A good technique is to make several parallel cuts inside the marked area with your wet saw or grinder. From there, you can use tile nippers to carefully snap out the small strips, cleaning up the edges with the grinder for a perfect fit.
Door frames are another classic challenge. Instead of trying to painstakingly cut the tile to the exact shape of the wood trim—a task that rarely ends well—the professional approach is to undercut the door jamb. Use a small handsaw or an oscillating multi-tool to slice away the bottom of the trim, letting you slide the tile right underneath for a truly seamless finish.
How to Finish Exposed Tile Edges
What about those spots where a tile edge is left exposed, like at the end of a backsplash or on a half-wall? A raw, cut edge looks unfinished and can be sharp. Luckily, you have a few elegant ways to handle this.
- Custom Bullnose Pieces: We can create custom bullnose pieces at Original Mission Tile with a rounded, finished edge that perfectly matches your field tile. This is the ultimate solution for a cohesive, high-end look.
- Metal Profiles: Sleek metal trim, often called a Schluter strip, is a popular modern option. These profiles are available in finishes like brass, chrome, or matte black and get installed behind the tile to provide a clean, protective metal edge.
- Caulk Joint: For a very simple finish, you can run a neat bead of color-matched sanded caulk along the exposed edge. This smooths the transition to the wall and seals the edge nicely.
The right edge treatment really comes down to your design style, but planning for it from the start is what ensures your project looks polished and complete from every angle.
The Critical Final Steps: Grouting and Sealing

You’ve made it this far, and the finish line is in sight. It’s so tempting to rush through grouting and sealing just to start enjoying your new space, but this is where your patience truly pays off. These final steps are what protect your beautiful, porous cement tiles from the realities of daily life—moisture, dirt, and stains.
With handmade cement tiles, this stage demands a completely different approach than you’d use for ceramic or porcelain. Getting it right ensures your installation looks incredible for years to come; getting it wrong can cause irreversible damage. The secret is understanding how the porous nature of cement tile interacts with both grout and sealer.
The Non-Negotiable Pre-Grout Seal
Before a single speck of grout touches your tile, you must apply a pre-grout sealer. This is hands-down the most critical step unique to a cement tile installation.
Think of an unsealed cement tile as a dry sponge. If you smear pigmented grout directly onto it, the tile will instantly absorb the color, leaving a permanent, hazy stain that clouds the pattern. No amount of scrubbing will fix it.
Applying a high-quality penetrating sealer first acts as a “grout release.” It fills the microscopic pores just enough to stop the grout pigment from seeping in, but it does so without creating a film on top.
- Application: Use a dense foam roller or a clean, lint-free cloth to apply a thin, even coat.
- Coverage: Work in small, manageable sections. Make sure you don’t let sealer pool in the grout joints.
- Curing: Let the sealer cure completely according to the manufacturer’s instructions, which is usually a few hours.
This simple action is your number one defense against staining and is absolutely mandatory for a clean, professional finish.
Choosing and Applying Grout the Right Way
Once the pre-grout seal has fully cured, you’re ready for grout. The type you choose really matters. An unsanded grout is almost always the best choice for cement tiles, especially if you have tight grout lines (1/16″ to 1/8″). Sanded grout is more abrasive and can easily scratch the tile surface during application.
Mixing your grout to the right consistency—again, think smooth peanut butter—is key for easy application and proper curing. Apply it with a grout float held at a 45-degree angle, pressing the material firmly into the joints to squeeze out any air pockets.
Key Takeaway: Work methodically in small areas. Grout a section, and then clean it completely before moving on. If you let grout dry on the face of cement tile for too long, it becomes incredibly difficult to remove without damaging the surface.
Use a large, damp sponge to gently wipe away the excess grout, rinsing your sponge often in a bucket of clean water. The goal is to clean the surface without pulling fresh grout out of the joints. A slight haze will probably remain, which you can easily buff off with a dry microfiber cloth after a few hours.
The Final Seal for Lasting Protection
After the grout has had plenty of time to cure (check the manufacturer’s directions, but expect at least 24-72 hours), it’s time for the final, most important step: sealing the entire surface. This means sealing both the tiles and the grout lines. Applying multiple coats of a high-quality penetrating sealer is what gives your installation its long-term defense against water, oil, and other potential stains.
The demand for high-quality, design-led tile is a huge driver in the global market. In 2024, the ceramic tiles market alone was valued between USD 213.6 billion and USD 226.4 billion. With North American and European markets representing over 30% of these revenues, there’s a strong appetite for premium, handmade options where expert guidance on finishing techniques like sealing is essential.
So, How Many Coats Do You Really Need?
This isn’t a one-size-fits-all answer. The goal is simple: keep applying coats until the tile and grout stop drinking up the sealer.
- Apply the first coat evenly across the entire surface.
- Wait about an hour, then apply a second coat.
- Continue applying coats until the sealer begins to sit on the surface rather than soaking in. Most installations will need 2-4 coats.
For a deeper dive into this crucial process, our guide on how to seal encaustic cement tiles offers a complete walkthrough. It’s packed with specific tips to ensure your surface is perfectly protected.
Finally, do a simple water test. Put a few drops of water on a tile and on a grout joint. If the water beads up and sits on the surface, your job is done. If it darkens the tile or soaks in, you need another coat of sealer. Don’t skip this test—it’s your final confirmation that your beautiful new surface is ready for a lifetime of use.
Your Tiling Questions, Answered
Even the best guides can’t cover every real-world scenario that pops up during a project. When you’re working with a special material like handmade cement tile, a few questions are bound to come up.
We’ve gathered the most common queries we hear from designers, contractors, and DIYers. Getting these answers straight will save you headaches, prevent costly mistakes, and give you the confidence to get a flawless finish.
Can I Install Cement Tiles Over an Existing Tiled Floor?
It’s a tempting shortcut, but tiling over an existing tiled floor is almost always a bad idea. First, you’re adding significant height and weight to the floor, which can cause a cascade of other issues—suddenly, doors don’t clear, appliances don’t fit, and you have awkward, chunky transitions to other rooms.
For a stable, durable installation that will last for decades, there’s only one right way: remove the old tile completely. This gives you a clean slate to work with, allowing you to properly prep a clean and level substrate. If you’re in a situation where you absolutely must tile over tile (a scenario we strongly advise against), the existing surface has to be perfectly level, structurally solid, and mechanically scuffed up to give the new mortar something to grab onto. But honestly, for a result you can trust, always start fresh.
The Bottom Line: Don’t tile over old tile. The risk of a failed installation, from poor adhesion to structural problems, just isn’t worth the time you might save. Demolition is a small price to pay for a lifetime of beautiful, reliable floors.
What Is the Biggest Mistake DIYers Make When Tiling?
The single most common—and most expensive—mistake is rushing the prep work. It’s easy to get excited about laying the beautiful new tiles, but skipping the critical step of ensuring the substrate is perfectly flat, clean, and rigid is a recipe for disaster. An uneven subfloor is the number one cause of lippage, where tiles sit at slightly different heights, giving you an unprofessional look and a tripping hazard.
Even a little bit of dust or debris left on the substrate will weaken the thin-set’s bond, leading to loose or cracked tiles later on. It’s the unglamorous work that truly makes or breaks the project.
With cement tiles, there’s a second huge mistake that’s heartbreakingly permanent: skipping the pre-grout sealer. This crucial step stops grout from staining the porous tile surface, protecting the rich, vibrant color you chose. Rushing these foundational steps will lead to a project you’ll end up regretting.
How Do I Clean and Maintain My New Cement Tiles?
Keeping your new cement tile surface beautiful is simple, but it requires the right approach. The golden rule is to always use a pH-neutral cleaner made for natural stone or cement. Never, ever use harsh or acidic cleaners like vinegar, or abrasive products with bleach. They will literally eat away at the tile surface and strip off the protective sealer.
- Daily Care: A quick sweep or vacuum (with a soft brush attachment) is all you need to handle everyday dust and grit.
- Deeper Cleaning: For a more thorough wash, use a damp mop and your pH-neutral cleaner. Don’t soak the floor; a little goes a long way.
- Long-Term Protection: Plan on resealing your tiles every 2-3 years. You might need to do it more often in high-traffic zones or wet areas like kitchens, bathrooms, and entryways. This quick job renews their defense against stains and moisture.
Stick to this simple routine, and your handmade tiles will stay as stunning as the day they were installed.
Ready to bring the timeless beauty of artisan craftsmanship to your next project? At Original Mission Tile, we’ve been perfecting the art of handmade cement tile since 1900. Explore our in-stock collections or create a completely custom design at https://originalmissiontile.com.
Article created using Outrank