
Planning your perfect shower starts long before you pick out a single tile. The best designs—the ones that feel custom-built and truly elevate your daily routine—begin with a smart, practical plan that balances aesthetics with the realities of your space and lifestyle.
Crafting Your Perfect Shower Sanctuary
Before you fall in love with a finish or a fixture, the first and most critical step is creating a functional blueprint. This is where you put pen to paper (or mouse to screen) and map out your existing bathroom, spotting opportunities and defining exactly how your new shower needs to perform. Think of it as translating your vision into a buildable, real-world plan.
Getting this foundation right is everything. It sets the stage for the entire project, ensuring every decision that follows is intentional and contributes to a shower that not only looks incredible but works beautifully for years to come.
First, Assess Your Existing Layout
Grab a tape measure and sketch out your entire bathroom. Note the exact locations of the toilet, vanity, and the current tub or shower. Pay special attention to the “wet wall”—that’s the one hiding the main plumbing lines for your showerhead and controls. While you can move this plumbing, it’s a decision that will add significant cost and complexity to your project.
Next, look for hidden potential. Is there a bulky, underused linen closet you could reclaim to expand the shower’s footprint? Could you borrow a few square feet from an adjacent bedroom closet? Thinking creatively about the existing architecture can unlock surprising possibilities without knocking down major walls. For an extra touch of openness, consider unique elements like small bathroom skylight ideas to flood the space with natural light.
This move toward larger, more luxurious showers isn’t just a hunch; it’s a major trend. A recent industry report found that a striking 55% of design experts say a larger shower is now more important to homeowners than a bathtub. It’s a clear shift toward creating a spa-like retreat at home, and it often starts by being clever with your existing space.
Consider Key Layout Decisions
Once you have a handle on your spatial constraints and opportunities, you can start making the big-picture decisions about the type of shower that makes the most sense for your home.
Here are a few common shower remodel options to help you choose the best fit for your space, budget, and lifestyle.
Shower Remodel Options at a Glance
| Shower Type | Ideal For | Typical Cost | Key Considerations |
|---|---|---|---|
| Tub-to-Shower Conversion | Anyone looking to modernize a standard bathroom and gain a more spacious shower within the existing footprint. | $$$$ | Highly efficient and popular. Instantly improves accessibility and updates the room’s look. |
| Walk-In / Doorless Shower | Larger bathrooms where you want a seamless, open-concept feel. | $$$$ | Requires careful planning for water containment, including an extended pan and strategic drain/head placement. |
| Curbless (Zero-Entry) | Creating a universal design that’s accessible for all ages and mobilities; making a small space feel larger. | $$$$ | The floor flows seamlessly from the bathroom into the shower. Looks incredibly sleek and integrated. |
| Integrated Bench & Niches | Adding built-in comfort and storage for a custom, high-end feel without clutter. | $$$$ | These features must be planned from the start and properly waterproofed. Adds huge functional value. |
Deciding on these foundational elements early on ensures your design choices are purposeful, not just pretty.
A well-planned layout does more than just prevent expensive changes mid-project. It guarantees the final result is a perfect fusion of beautiful style and everyday usability.
With your layout locked in, you can finally move on to the fun part: the visual design. A great way to get inspired is to see how different materials and patterns work together in real-world spaces. Check out our https://originalmissiontile.com/category/gallery/ to see how a thoughtful layout provides the perfect canvas for stunning tilework.
Choosing Tile That Defines Your Style
If the shower layout is the blueprint, then tile is the soul of the design. It’s the single most dominant visual in the room, setting the tone for everything from color and texture to the overall vibe. The right choice can make a small bathroom feel huge, turn a simple niche into a showstopper, and give your shower a completely custom, high-end look.
This is where your vision really starts to take shape. Let’s get into selecting the perfect material, with a special focus on handmade cement tiles—a choice that beautifully marries authentic artistry with serious practicality.
Why Cement Tile Is a Smart Choice for Showers
When most people picture shower tile, their minds jump straight to porcelain or ceramic. While those are both solid, reliable options, handmade cement tile brings a unique warmth and durability to the table that makes it a fantastic choice for wet areas.
The key difference? Unlike ceramic tiles where the design is just a glaze on top, the color in a cement tile runs all the way through the body. This means that even if a tile were to chip after decades of use—which is highly unlikely, given how tough they are—the color underneath would be the same. The pigment isn’t a thin layer; it’s part of the tile itself. That inherent durability makes it a true investment in style that lasts.
Another huge plus is the finish. Cement tiles have this silky, matte surface that feels amazing underfoot and provides natural slip resistance. It’s an ideal, safe option for shower floors and adds an organic, luxurious texture you just can’t get from a glossy surface.
Bringing Your Vision to Life with Shape and Pattern
Now for the fun part: playing with shapes and patterns to inject personality and create a shower that feels 100% yours. Classic subway tile is a safe bet, of course, but don’t shy away from exploring more dynamic options.
Consider these popular formats to get your ideas flowing:
- Classic Hexagons: A timeless geometric that adds interest without overwhelming the space. They look just as great on floors as they do on walls.
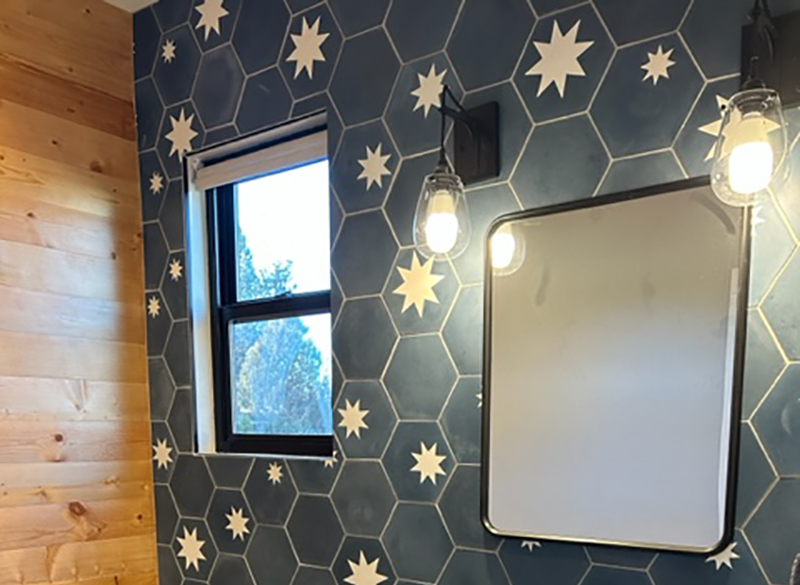
- Intricate Star and Cross: This combination creates a stunning, interlocking pattern that feels both historic and totally current. It’s a guaranteed showstopper for a feature wall or floor.
- Elegant Arabesque: The soft, curving lines of arabesque or fish scale tiles can break up all the hard angles in a bathroom, adding a touch of sophisticated movement.
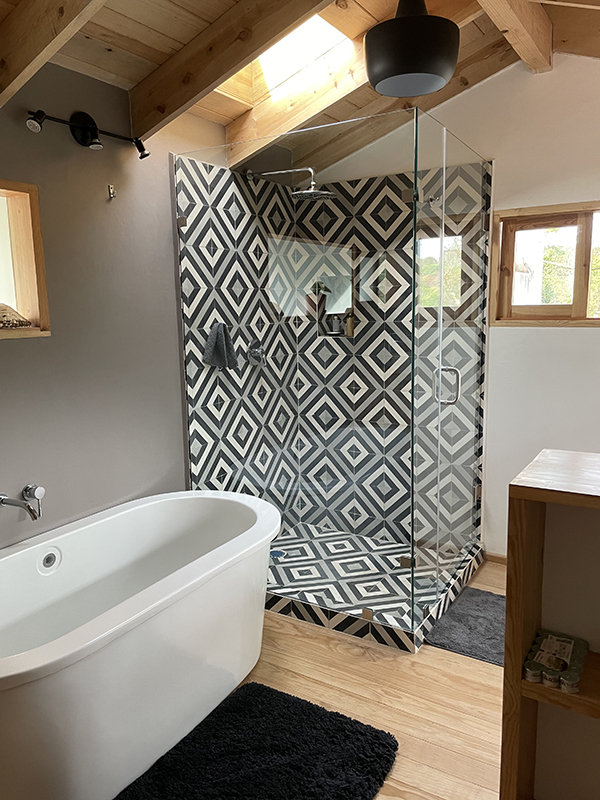
- Bold Squares in Creative Layouts: Never underestimate the power of a simple square. Arranged in a checkerboard, set on a diagonal, or used in a single vibrant color, 8×8 squares can make a powerful modern statement.
Pro Tip: For a perfectly cohesive design, try using a bold pattern on the floor, then pull one of the simpler colors from that pattern for the wall tiles. This creates a balanced look that’s visually interesting but not chaotic.
Design Strategies Using Tile
Beyond just picking a pattern, how you use tile can dramatically change the feel of your bathroom. With a few strategic moves, you can solve common design challenges and make the whole room feel more intentional and elevated.
Making a Small Bathroom Feel Bigger
If you’re working with a tight space, your tile choice is your secret weapon. Using large-format tiles with thin, color-matched grout lines creates an illusion of more space. The fewer visual interruptions, the bigger the surface feels.
Another killer trick is to run the same floor tile from the main bathroom right into a curbless shower. This seamless flow erases the shower’s boundary, making the entire room feel like one continuous, open space.
Creating a Statement Niche
A recessed shower niche is a must-have for shampoo and soap, but it’s also the perfect canvas for a design moment. This is where you can use a contrasting tile—a bold pattern or a pop of vibrant color—to create an eye-catching focal point.
For instance, if your shower walls are a quiet, neutral tile, dropping in a dynamic hexagonal or star-and-cross pattern inside the niche adds a custom touch. It’s an affordable way to bring in a high-impact design element without tiling an entire wall in a busy pattern. To see just how much personality a pattern can add, you can discover countless cement tile designs by style that bring both color and character to any project.
Building a Shower That’s Built to Last
Even the most beautiful tile and high-end fixtures are worthless if the structure behind them fails. Every great shower is built on an invisible—but absolutely critical—waterproofing system that protects your home from moisture. This is the unglamorous part of the job, but getting it right is non-negotiable for a shower that lasts.
Think of it like building a watertight box inside your walls. Every single component, from the base layer to the final bead of sealant, has to work together perfectly. One tiny weak point, like a poorly sealed drain or a gap in a corner, can lead to slow, hidden leaks that cause thousands in damage down the road.
Understanding the Layers of Protection
Your shower’s durability starts with the substrate, the material you tile over. For years, the standard was a hand-sloped “mud bed” mortar pan with cement board walls. While it works when done by a true master, this old-school method is slow, heavy, and leaves a lot of room for error.
Thankfully, modern systems give us a much more reliable path. Pre-formed foam shower pans and benches have the slope built right in, guaranteeing perfect drainage every time. These components are lightweight, fully waterproof, and much faster to install. They also add a layer of insulation, which can help your shower warm up faster. It’s a huge leap forward in building a consistently solid foundation.
Choosing Your Waterproofing Membrane
With the substrate and pan in place, the next critical layer is the waterproof membrane. This is the impenetrable barrier that stops water dead in its tracks. You’ve basically got two main options, and the best one often comes down to the installer’s preference and the project’s complexity.
- Sheet Membranes: Think of these as large, fabric-like sheets (like the popular orange Schluter-KERDI) that are applied to the walls and pan using thin-set mortar. All the seams, corners, and screw penetrations are meticulously overlapped and sealed with special banding to create one continuous, unified barrier.
- Liquid-Applied Membranes: Products like RedGard are literally painted or rolled onto the substrate. As they dry, they cure into a seamless, rubbery membrane. This method is fantastic for handling tricky curves or complex shapes, but it demands careful application of multiple coats to achieve the correct thickness—a detail measured in mils (thousandths of an inch).
This process flow shows how the key decisions, from material to finish, build on one another.
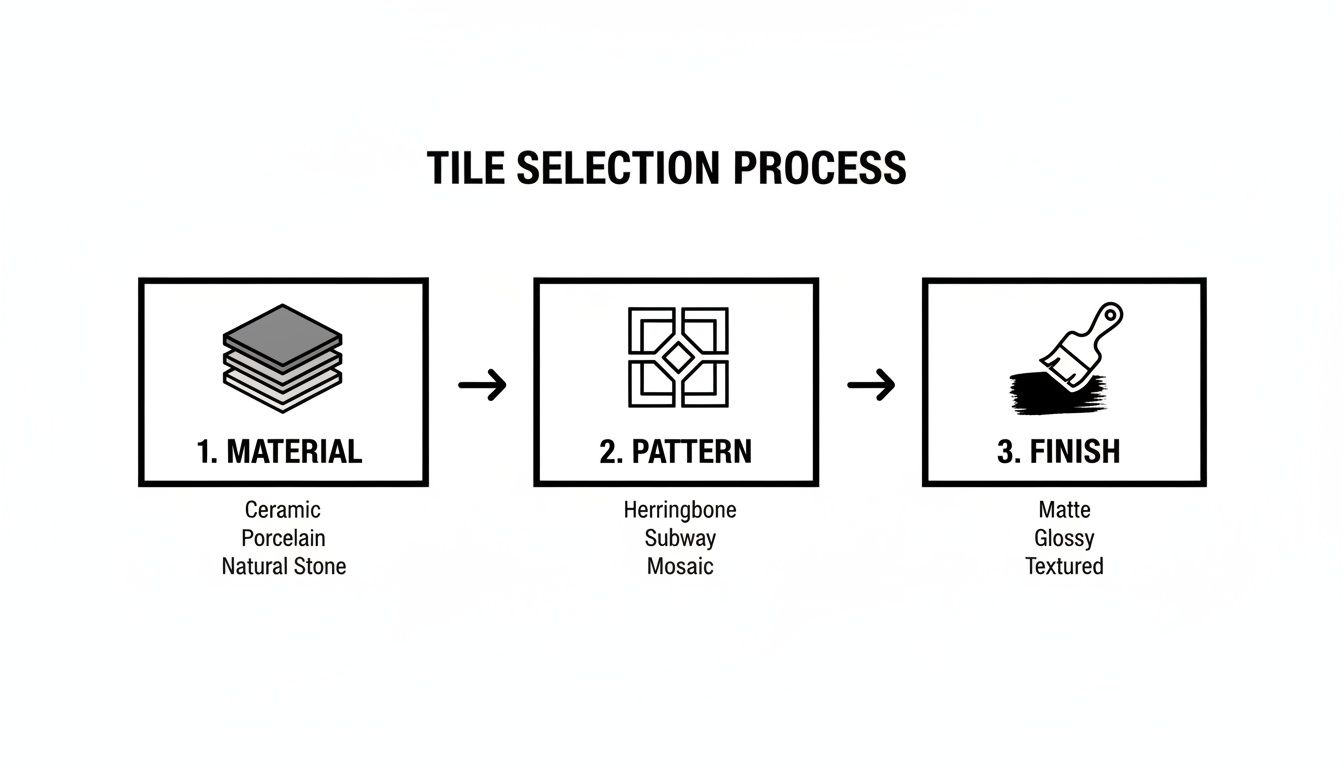
As you can see, a successful design is a sequence of thoughtful choices, where the foundation is every bit as important as the final look.
Mastering the Critical Failure Points
The vast majority of shower leaks don’t happen in the middle of a wall—they happen at transitions and penetrations. These are the spots that demand absolute perfection during the install.
Pay extra close attention here:
- The Drain Connection: This is the single most important seal in the entire shower. A modern integrated bonding flange drain, properly sealed to the membrane, is the gold standard for preventing leaks at this highly vulnerable spot.
- Corners and Seams: Every inside and outside corner needs to be reinforced. For sheet membranes, this means using pre-formed corner pieces. For liquid-applied products, it usually means embedding a reinforcing fabric into the first coat.
- Benches, Niches, and Curbs: Any time the surface changes plane, you have a potential weak point. These features have to be fully wrapped and integrated into the waterproofing system, with every edge and seam treated with the same precision as the walls and floor.
Building a shower is less like construction and more like boat building. The goal isn’t just to be water-resistant; it’s to be completely, unequivocally waterproof. Don’t be afraid to ask your contractor detailed questions about their methods for these specific areas.
A properly built shower system is all about peace of mind. When you know the structure is bulletproof, you can truly enjoy the beautiful design elements, like the vibrant patterns found in our in-stock cement tiles, without ever worrying about what’s going on behind the scenes. Your investment is protected from the inside out.
Selecting Fixtures and Glass Enclosures

If tile and waterproofing are the foundation, then the fixtures and glass are where your shower’s personality really shines. This is the hardware you’ll interact with every single day, turning a functional box into a personalized retreat. Getting these choices right is critical, not just for the look, but for your daily enjoyment.
These elements aren’t just decorative afterthoughts; they define the entire shower experience. From the feel of the water to the sense of openness in the room, your selections here will have a huge impact.
Choosing Your Showerhead System
Long gone are the days of a single, sputtering spout. You can now layer different types of fixtures to create a completely custom water experience, catering to everything from a quick morning rinse to a long, therapeutic soak.
Let’s break down the most popular options you’ll see in modern bathroom designs.
- Rainfall Showerheads: These large, ceiling- or wall-mounted heads deliver a gentle, drenching flow that feels incredibly luxurious. The downside? They often have lower pressure and can make it tough to keep your hair dry if you don’t want to wash it.
- Standard Wall-Mount Heads: The classic workhorse. These offer strong, targeted pressure and haven’t gone out of style for a reason. Modern versions come with multiple spray patterns, from a fine mist to a powerful massage jet, making them a versatile go-to.
- Handheld Wands: I consider this a non-negotiable for practicality. A handheld sprayer makes rinsing down shower walls a breeze and is invaluable for washing kids, pets, or just your feet. It’s the perfect sidekick to a fixed showerhead.
- Body Jets: For the ultimate spa-at-home setup, multiple jets can be installed on the shower walls. Just know that these require pretty complex plumbing and careful planning with your plumber to ensure your home’s water pressure can actually power them effectively.
In my experience, a combination is almost always the best approach. A fantastic setup is a primary rainfall head for that spa-like feel, paired with a practical handheld wand on a slide bar. It truly gives you the best of both worlds.
Selecting a Glass Enclosure
The glass enclosure has a massive effect on how spacious and bright your bathroom feels. The trend has moved decisively toward minimalism, with less metal framing and more clear, uninterrupted glass.
Your main options really boil down to how much framing you want to see.
- Framed Doors: This is the most traditional and budget-friendly option. The glass is fully enclosed in a metal frame, which provides solid stability but can feel visually heavy and creates tracks that are a pain to clean.
- Semi-Frameless Doors: A great middle ground. These enclosures typically have framing around the main structure but leave the door panel itself unframed. This delivers a cleaner, more modern look without the premium price tag of a fully frameless system.
- Frameless Doors: This is the top-tier choice for a modern, open-concept bathroom. Using thick, heavy glass (3/8″ to 1/2″) and minimal hardware clips, these enclosures look sleek, airy, and are so much easier to keep clean.
Once you’ve invested in sleek glass, keeping it pristine is key. It’s worth learning how to clean glass shower doors for a lasting sparkle.
For a small bathroom, a frameless glass enclosure is one of the single most effective upgrades you can make. By eliminating visual barriers, it tricks the eye into seeing one large, continuous space, making the entire room feel significantly bigger and brighter.
The Rise of the Doorless Walk-In Shower
An increasingly popular choice, especially in larger bathrooms, is the walk-in shower with no door at all. This design creates a completely seamless flow from the rest of the bathroom, enhancing that open-concept feel and offering fantastic accessibility.
But a successful doorless design requires smart planning to manage water splash. The shower area must be large enough—I’d recommend at least 60 inches deep—to contain the spray. Other smart moves include using a rainfall showerhead that directs water straight down, installing a low curb or a linear drain at the entry, and making sure the floor is properly sloped to guide every drop toward the drain.
One thing to keep in mind: without a door to trap steam, some people find these open showers can feel a bit chilly. It’s a factor to consider based on your home’s climate and personal preference.
Getting Lighting and Ventilation Right
You can pick the most incredible tile and the perfect fixtures, but if the lighting is dim and the air is steamy, the whole design falls flat. Lighting and ventilation are the unsung heroes of any great bathroom remodel. They’re the behind-the-scenes systems that make a shower feel safe and inviting while protecting your investment from moisture damage.
Honestly, getting these two elements right is just as critical as the tile you choose. Good lighting makes a space feel open and clean. A powerful fan stops the slow, silent creep of mold and mildew that can ruin beautiful grout work. Let’s get practical about planning these essential systems.
Layer Your Lighting for Mood and Function
A single, lonely light fixture in the middle of the bathroom ceiling just doesn’t work. To create a shower that’s both safe and feels like a retreat, you need to think in layers—just like a professional lighting designer would. This approach ensures you have the right kind of light, exactly where you need it.
An effective shower lighting plan combines a few key sources:
- Ambient Light: This is your general, room-filling light. Think recessed cans outside the shower or a central fixture that illuminates the entire bathroom.
- Task Lighting: This is non-negotiable. You need a direct, focused light inside the shower. It has to be a wet-rated recessed can light placed right overhead so you can actually see what you’re doing. Safety first.
- Accent Lighting: This is where the magic happens. A low-voltage, wet-rated LED strip tucked into a niche can create a stunning focal point. It adds a soft, luxurious glow perfect for a relaxing evening shower.
Layering your light gives you total control over the atmosphere. You can have it bright and energizing for your morning routine or soft and tranquil for winding down at night, all with the flick of a switch—or better yet, a dimmer.
Your Best Defense: A High-Performance Fan
Moisture is the number one enemy of any bathroom. An undersized or poorly placed fan is an invitation for trouble, letting steam and condensation linger. This leads to peeling paint, damaged drywall, and the dreaded growth of mold. Choosing the right fan and putting it in the right spot is your best line of defense.
A fan’s power is measured in CFM, or cubic feet per minute, which tells you how much air it can move. The rule of thumb is simple: you need at least 1 CFM for every square foot of bathroom floor area. So, for an 8×10 foot bathroom (80 square feet), you need a fan rated for at least 80 CFM.
When in doubt, it’s always better to go a little bigger. You’ll never regret having a fan that’s slightly more powerful than you need.
Smart Placement and Modern Features
Where you put the fan is just as important as how powerful it is. The ideal spot is in the ceiling somewhere between the shower and the toilet. This placement allows it to grab steam right from the source while also helping with odors.
Today’s fans also come with some brilliant features that blend performance with convenience. Keep an eye out for models that include:
- Humidity Sensors: These are fantastic. The fan automatically kicks on when it senses a rise in humidity and turns itself off once the air is clear. No more forgetting to flip the switch.
- Integrated Lighting: Many high-quality fans now have built-in LED lights, which can easily serve as your shower’s main task light, solving two problems with one fixture.
- Ultra-Quiet Operation: Fan noise is measured in sones—the lower the number, the quieter the fan. Look for a fan rated at 1.0 sone or less. It’ll be so quiet you’ll barely know it’s running.
Answering Your Top Shower Remodel Questions
Even the best-laid plans come with questions. As you get closer to demo day, certain details can feel a bit fuzzy. This is where we clear things up, tackling the most common uncertainties we hear from designers and homeowners alike.
Think of this as the practical Q&A for all those “what ifs” and “should Is” that pop up. Getting these answers right makes all the difference between a project that feels overwhelming and one you can manage with confidence.
Are Cement Tiles a Good Choice for Shower Floors and Walls?
Yes, absolutely. Handmade cement tiles are a fantastic choice for showers, bringing a unique character and performance that other materials can’t quite match. Their signature silky, matte finish offers a natural slip resistance, making them a much safer bet for wet shower floors than many slick, highly glazed ceramics.
On the walls, their rich, through-body color creates a stunning visual that won’t fade or wear away. The secret to making them last in a wet zone is proper sealing. You have to seal the tiles both before and after grouting to lock out moisture and prevent stains. With the right install and care, you get a timeless, high-performance surface that feels completely custom.
How Much Should I Realistically Budget for a Shower Remodel?
This is the big one, and the answer varies wildly depending on the size of your shower, the complexity of the job, and the materials you choose. A basic tub-to-shower conversion using standard, off-the-shelf materials might land somewhere between $3,000 to $7,000.
However, a more custom project—think high-end tile, a frameless glass enclosure, and premium fixtures—could easily run from $8,000 to $20,000 or more. That number climbs quickly if you need to move plumbing around.
A good rule of thumb for breaking down your budget is:
- 40% for labor: This is almost always the biggest chunk of the pie.
- 30% for tile and materials: This covers your tile, waterproofing, and substrate.
- 20% for fixtures and glass: Showerheads, controls, and the enclosure.
- 10% for a contingency fund: Do not skip this. It’s for the unknowns.
That 10% contingency fund is your project’s safety net. When your contractor opens up a wall and finds old water damage—and it happens—that fund keeps a small surprise from derailing your entire timeline and budget.
What Exactly Is a Curbless Shower and Should I Consider One?
A curbless shower, often called a zero-entry or walk-in shower, is built so the shower floor is completely flush with the main bathroom floor. It gets rid of that curb or threshold you normally have to step over, creating a clean, seamless transition from the dry area to the wet one.
The look is undeniably modern and can make the whole bathroom feel larger and more cohesive. But its real superpower is accessibility. As a key feature of universal design, it makes the shower safer and easier for everyone to use, regardless of age or mobility. It’s a brilliant feature for anyone planning to age in place and adds serious long-term value to your home.
What Are Some Tricks to Make a Small Shower Feel Bigger?
You can absolutely make a compact shower feel more spacious without knocking down walls. It’s all about playing with light and minimizing visual clutter.
First, go with a frameless glass enclosure. Getting rid of the bulky metal framing creates an uninterrupted sightline, making the entire bathroom feel like one open space.
Second, choose light-colored tiles. Shades like white, cream, or pale gray are your best friends here. They reflect light, making the area feel brighter and more expansive. Using the same tile on the floor and walls doubles down on this effect by erasing the visual borders of the shower stall.
Third, think big. Use large-format tiles with thin, color-matched grout lines. Fewer grout lines mean less visual noise, which our brains read as a larger, calmer surface.
And finally, always build a recessed niche into the wall for your shampoo and soap. It’s a small detail that makes a huge difference, freeing up physical and visual space by getting rid of those clunky hanging caddies.
At Original Mission Tile, we believe the right tile is the foundation of any unforgettable shower design. Explore our collection of handmade cement tiles to find the perfect pattern and color to bring your vision to life.
Discover our authentic tile collections at https://originalmissiontile.com.