Choosing the right bathroom shower tiles is about so much more than just looks. It’s about building a durable, safe, and beautiful space that can handle the reality of daily use. Your tile choice is the foundation—get it right, and your whole bathroom renovation will feel like a success.
Your Guide to Finding the Perfect Shower Tiles
The shower is the heart of your bathroom, the place where you start or end your day. Picking the right tile transforms it from a purely functional box into a personal retreat. This decision isn’t just about color; it involves a little material science, a lot of design vision, and some smart planning for an installation that lasts.
Think of it like composing a piece of music. Every element—the tile, the grout, the pattern—has to work in harmony to create something special.

The process can feel like a lot, but breaking it down makes it manageable. Here’s what you really need to focus on:
- Material Performance: How well does the tile stand up to water? Is it easy to clean, or will it stain?
- Safety: Is the surface slip-resistant? This is non-negotiable for shower floors.
- Design and Style: Does the tile fit your home’s look and your personal taste?
- Durability and Longevity: Will your choice look great for years to come, both in style and structure?
If you’re struggling to picture how different tiles will look in your bathroom, new technologies can really help. Trying out different options with AI bathroom design tools lets you experiment with layouts and materials before you make that final, costly commitment.
To give you a quick, high-level overview, here’s a comparison of the most popular shower tile materials. This table will help you make a fast initial assessment of what might work best for your project’s needs and budget.
Quick Comparison of Popular Shower Tile Materials
| Material | Best For | Durability | Maintenance | Cost |
|---|---|---|---|---|
| Porcelain | Floors and walls; high-use areas | Very High | Very Low | $$-$$$ |
| Ceramic | Walls and low-traffic areas | High | Very Low | $-$$ |
| Natural Stone | Luxury looks; feature walls | Varies (High if sealed) | High (Requires sealing) | $$$-$$$$ |
| Cement | Patterned floors and feature walls | High | Medium (Requires sealing) | $$$-$$$$ |
| Glass | Backsplashes and accent walls | Medium | Low | $$$-$$$$ |
While each material has its place, remember this is just a starting point. Your final choice will depend on the specific look you’re going for and how much maintenance you’re willing to do.
The global bathroom flooring market, which includes shower tiles, hit a massive USD 510.13 billion in 2024. This number shows just how much homeowners and designers are investing in waterproof, slip-resistant, and stylish wet areas.
It’s no surprise that ceramic and porcelain tiles still lead the pack, thanks to their incredible moisture resistance. In fact, the wall tile market alone is projected to climb to USD 228.7 billion by 2031, proving that a durable, beautiful shower enclosure is a top priority in modern homes.
With a clear roadmap, you can navigate all the choices with confidence and find the perfect bathroom shower tiles for your project.
A Deep Dive into Shower Tile Materials
Choosing the right material for your shower tiles is a lot like picking the right fabric for a raincoat. Some materials are born to repel water, while others look incredible but demand a bit more care to stay dry and beautiful for the long haul. To make a smart choice, you have to look past the color and pattern and get to know what makes each tile work.

The single most important factor here is porosity. Think of it as a simple measure of how much water a tile can absorb. A low-porosity tile is like a sheet of glass—water just beads up and rolls right off. A high-porosity tile, on the other hand, acts more like a sponge. It soaks up moisture, which is a recipe for staining, mold, and damage in a shower.
The Powerhouses: Porcelain and Ceramic
For good reason, porcelain and ceramic tiles are the undisputed champs in the shower. Both are made from clay and fired in a kiln, but the real difference comes down to the quality of the clay and how hot they get.
- Porcelain Tile: Think of porcelain as the stronger, denser sibling. It’s made from a finer, purer clay and fired at scorching-hot temperatures. This process creates a tile with a water absorption rate of 0.5% or less, making it nearly waterproof. It’s the go-to for both shower walls and floors.
- Ceramic Tile: Ceramic is a bit more porous than porcelain, but it’s still a fantastic—and often more budget-friendly—choice, especially for shower walls. Once it’s covered in a tough glaze, it becomes highly water-resistant and a breeze to clean.
The sheer demand for these materials proves their reliability. The global ceramic tile market, which sets the pace for bathroom trends, hit a massive USD 189.65 billion in 2024. Designers and builders consistently choose low-porosity options like porcelain—which makes up 42% of the market share—because it’s the best defense against water. You can see more on how market forces shape design in this detailed ceramic tile market report.
The Natural Beauty of Stone and Glass
If you’re after a touch of spa-like luxury or a one-of-a-kind visual, natural stone and glass tiles are beautiful options. They just come with their own set of rules.
Natural Stone (Marble, Travertine, Slate):
Every single piece of natural stone is unique, bringing an organic, high-end feel to a shower. The trade-off? Stone is naturally porous. It absolutely must be sealed before and after installation, with regular re-sealing to protect it from water damage and stains. If you skip this maintenance, its beauty can fade fast.
Glass Tile:
As a non-porous material, glass is a stellar pick for shower walls and decorative accents. It reflects light beautifully, which can make a small shower feel much brighter and more open. Its only real downside is that it gets slippery when wet, so we generally don’t recommend it for shower floors.
Key Takeaway: The lower the porosity, the better suited a tile is for a shower. Porcelain is the gold standard for any wet area, while glazed ceramic is a workhorse for walls. Natural stone brings unmatched beauty but requires a real commitment to maintenance.
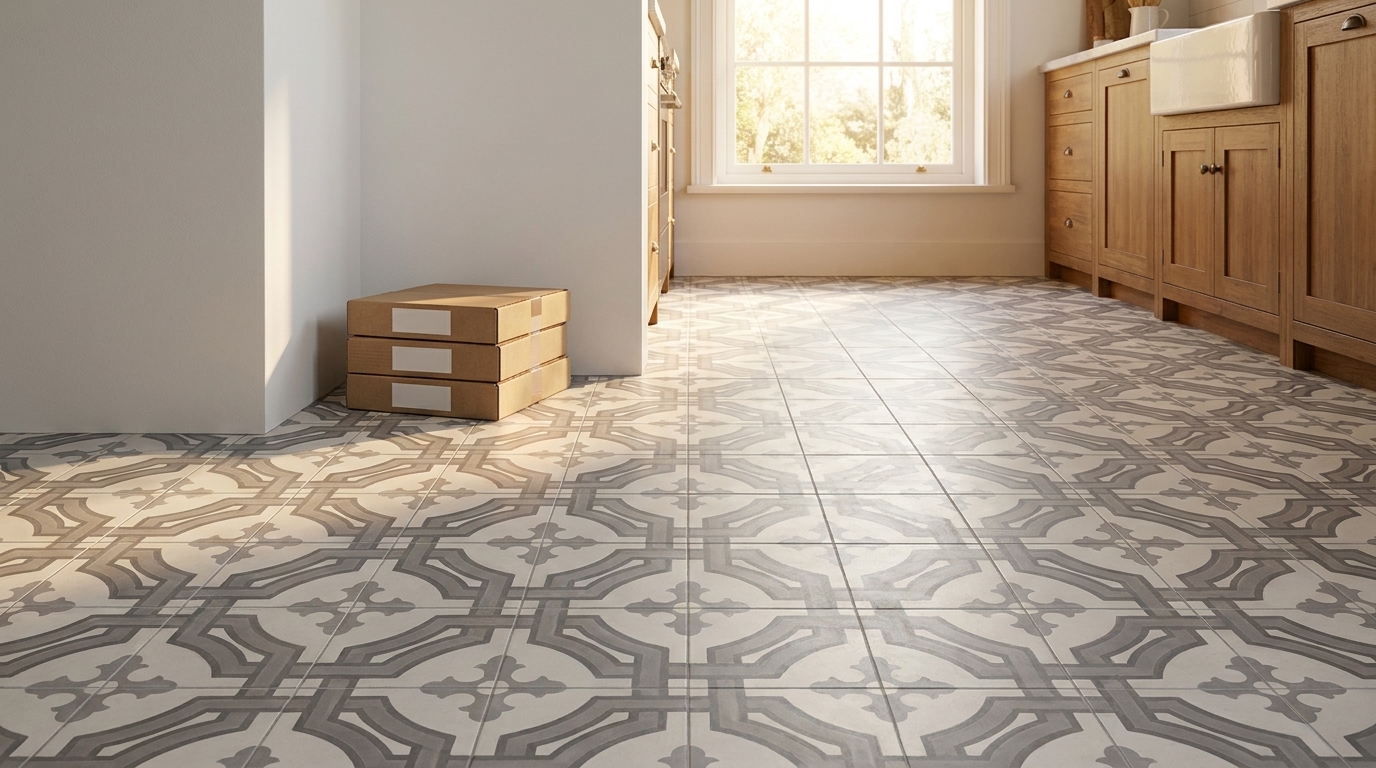
The Artisanal Charm of Handmade Cement Tiles
In a category all their own, handmade cement tiles offer a blend of artistry and soul that you just don’t find in mass-produced options. Unlike ceramic or porcelain, these tiles aren’t fired in a kiln at all. Instead, they’re crafted using a traditional method where a mix of cement, sand, marble dust, and mineral pigments is poured into a mold and hydraulically pressed.
This un-fired technique is what gives cement tiles their signature silky, matte finish and rich, through-body color. Because the pattern isn’t just a glaze printed on top, it won’t wear off with foot traffic or time. It also means cement tiles are naturally porous and, just like stone, require sealing to protect them in a shower.
But with proper sealing and care, they deliver a stunning and durable surface. They’re perfect for creating a bold feature wall or a beautifully patterned floor that feels both historic and completely personal. For a deeper look at all these materials, check out our guide on the different types of tile we offer.
Designing Your Dream Shower Tile Layout
Now for the fun part—turning your chosen tiles into a statement. The size, shape, and pattern of your bathroom shower tiles aren’t just minor details; they’re the tools you’ll use to shape the entire look and feel of your bathroom. This is where you go from just picking a material to actually designing a space that’s all yours.
Think of tile layout as the choreography for your shower. A simple shift in direction or scale can make a compact shower feel expansive or transform a plain wall into a work of art. It’s all about creating movement, drawing the eye, and establishing a sense of harmony.
Tile Size and Its Impact on Space
One of the most powerful tricks in a designer’s book is playing with tile size. The scale of your tile can completely change how big or small your shower feels.
-
Large-Format Tiles: Using big tiles (think 12×24 inches or larger) on shower walls means far fewer grout lines. This creates a clean, uninterrupted surface that makes a small shower feel much more spacious and modern. It’s like painting with a broad, sweeping brushstroke.
-
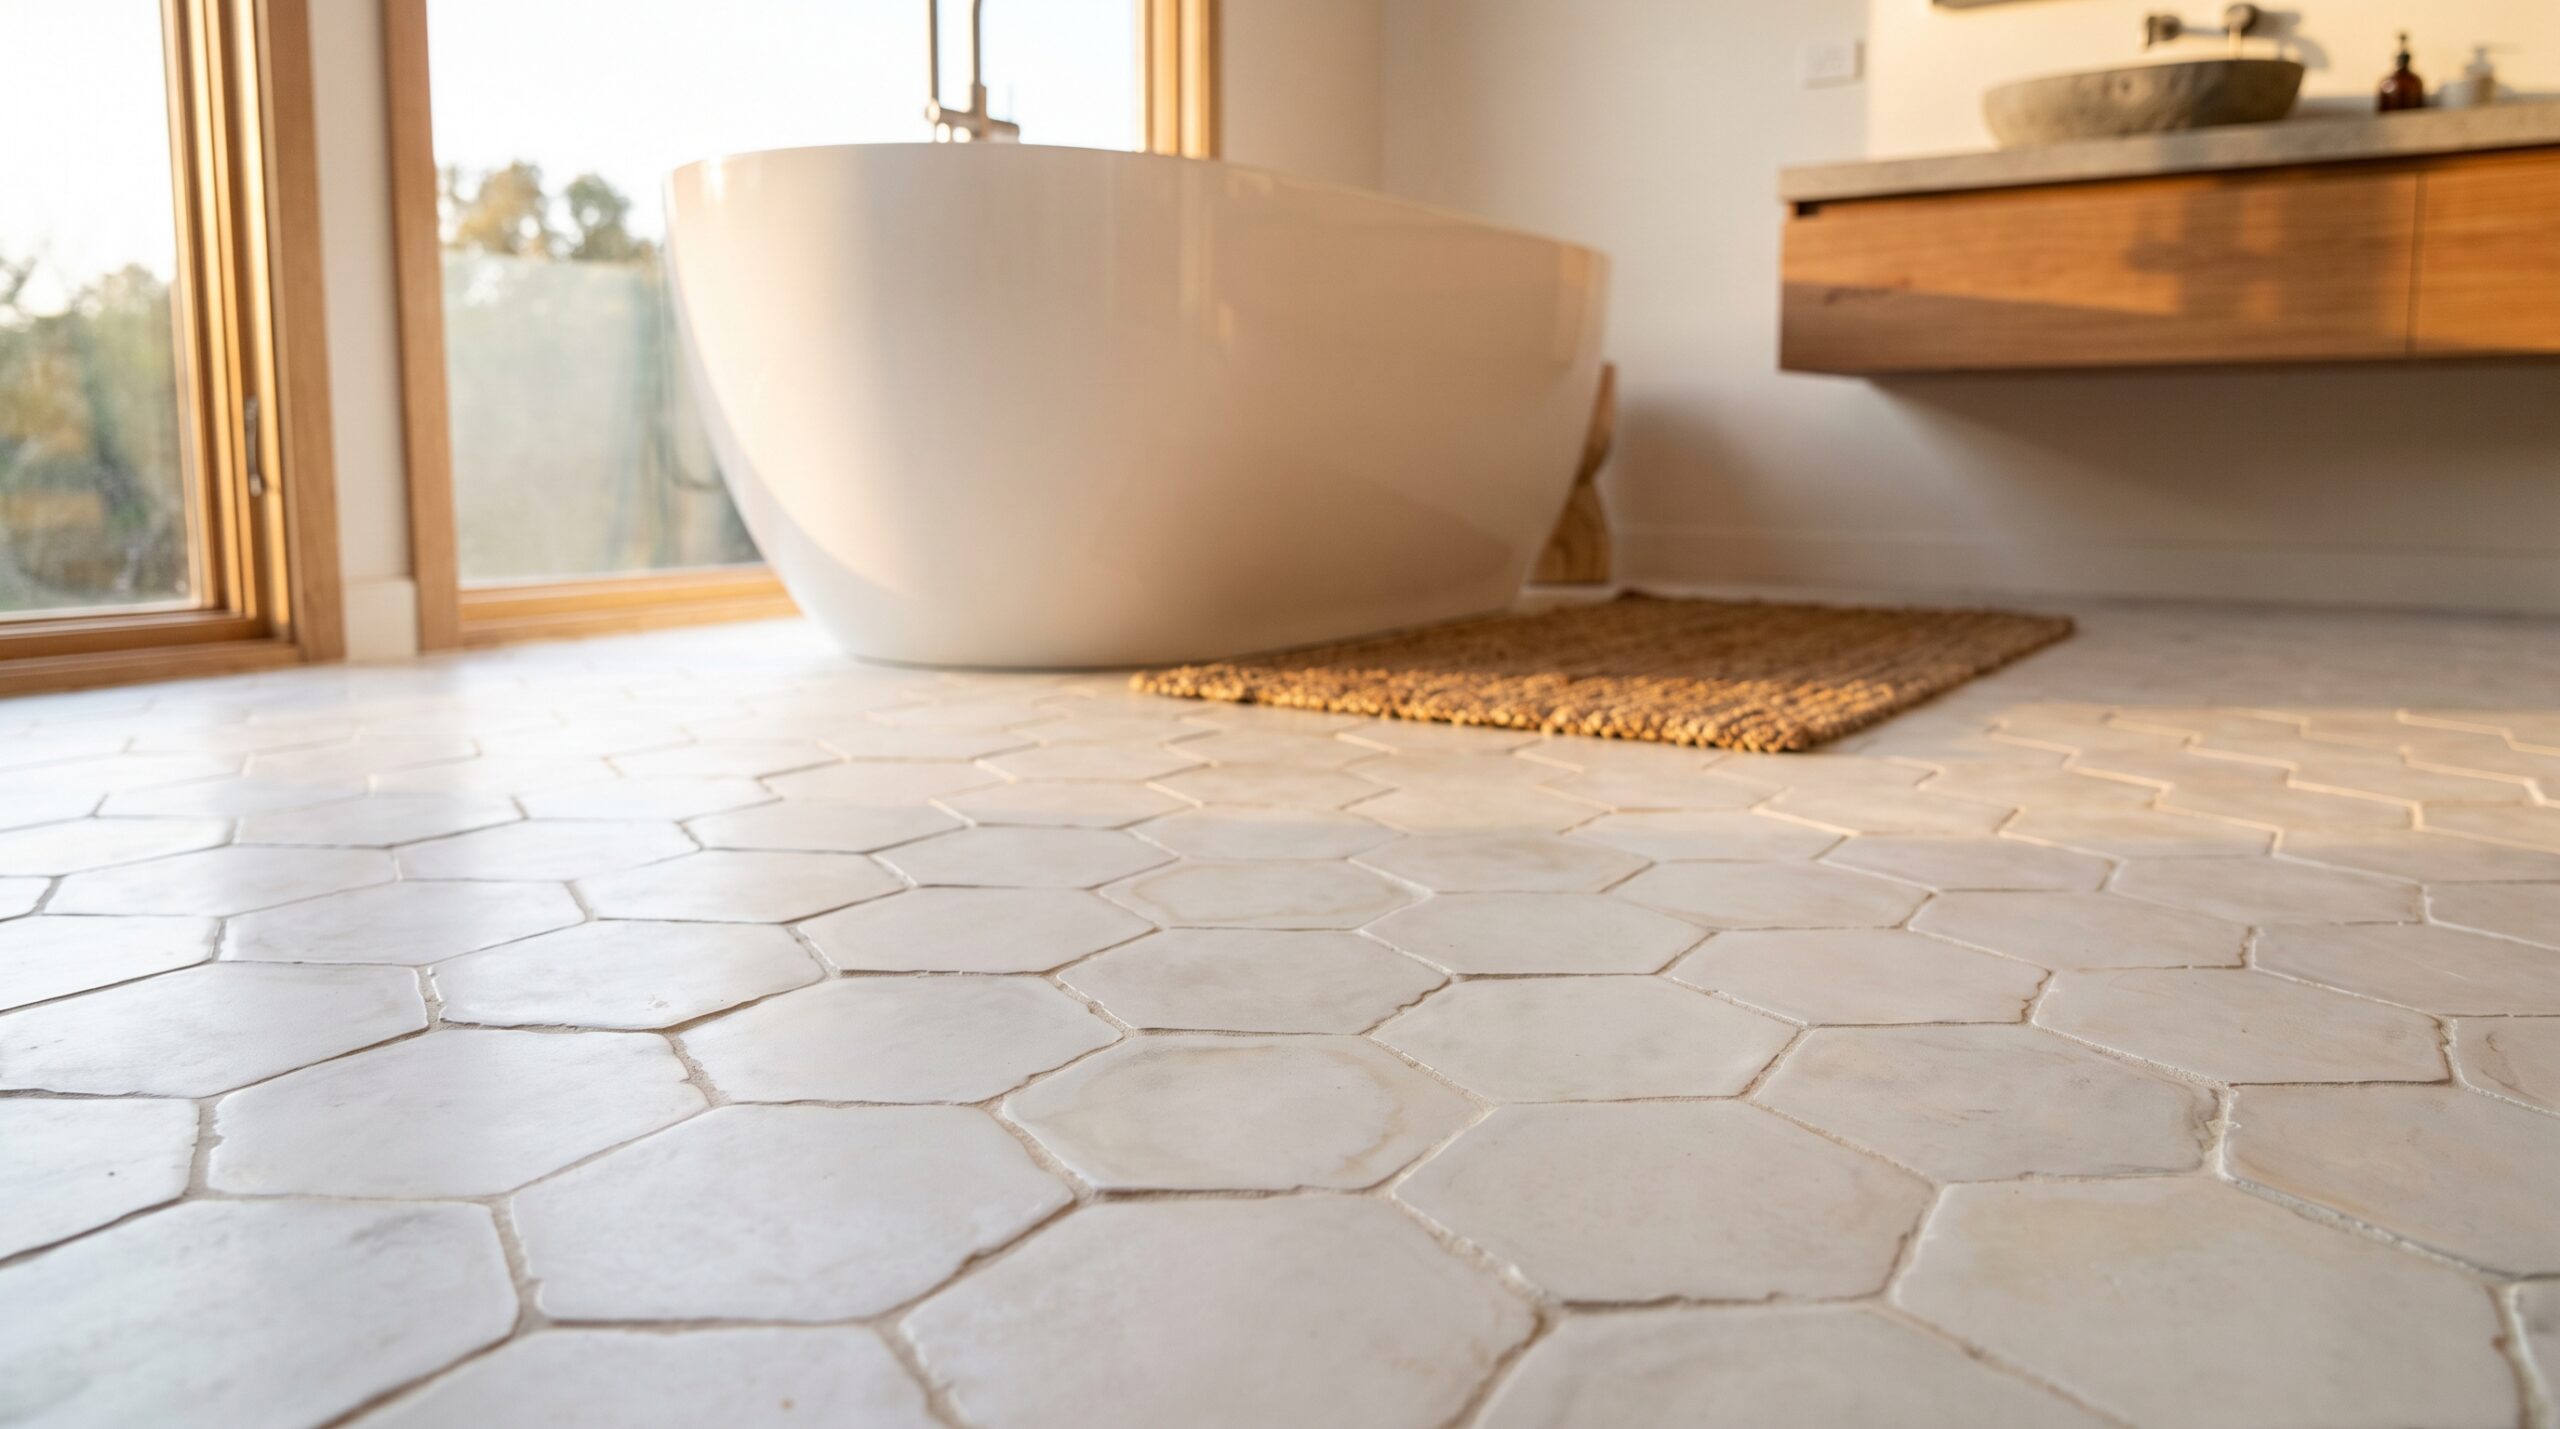
Small-Format Tiles: On the other hand, small tiles like mosaics or 2×2 inch squares bring a ton of texture and detail. All those grout lines add visual interest and, more importantly, create a fantastic non-slip surface for shower floors, where that extra grip is a huge safety win.
The demand for unique shower tiles is surging. The market for ceramic tiles in bathrooms is projected to climb from USD 230.06 million in 2025 to USD 504.77 million by 2035. We’re also seeing a huge revival of creative patterns—searches for ‘bathroom checkerboard’ have doubled recently. This is bringing earthy, natural palettes into shower design, a perfect fit for the rich pigments in handmade cement tiles, which offer the matte finishes needed to nail today’s zellige or fish-scale looks. You can dig deeper into these trends in this comprehensive ceramic tile report.
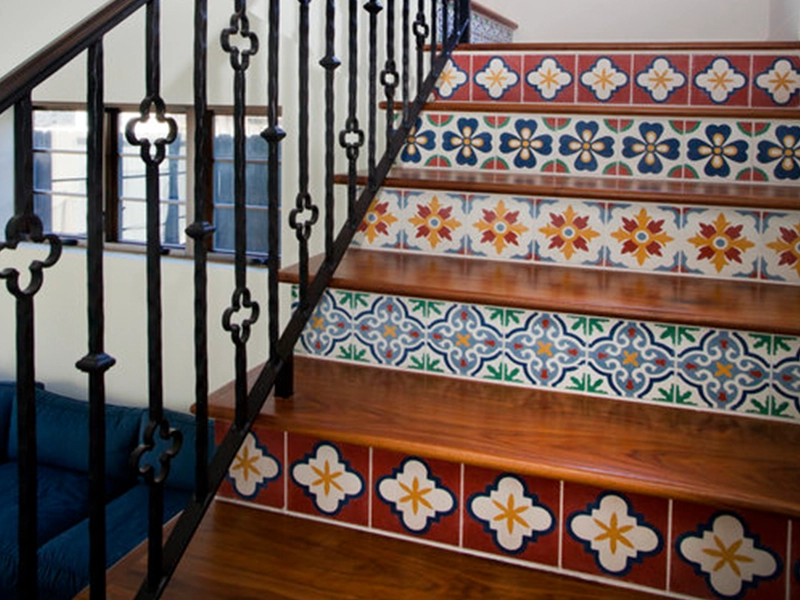
Exploring Classic and Creative Tile Patterns
The pattern you choose is your chance to really inject some personality. While some layouts are timeless classics, others give you a chance to be bold and artistic.
A good rule of thumb is to limit yourself to one dominant pattern. This prevents the space from feeling visually cluttered or “busy.” If you fall in love with a bold, patterned cement tile for a feature wall, let it be the star and keep the surrounding tiles simple and solid.
Design Tip: A single, show-stopping pattern has a much bigger impact than several designs competing for attention. Let one element take the lead, and the others will look better as its supporting cast.
Let’s look at how different patterns can shape your shower’s vibe. The right layout can make a room feel wider, taller, or more dynamic.
How Tile Patterns Affect Your Bathroom Space
| Pattern Type | Visual Effect | Best Suited For | Design Tip |
|---|---|---|---|
| Subway (Brick) | Classic, clean, and incredibly versatile. It can make a space feel wider or taller depending on the orientation. | Almost any shower style, from traditional to modern. | A 50% offset is the standard, but a 1/3 offset (staggered) gives a more contemporary, flowing look. |
| Herringbone | Dynamic and sophisticated. The “V” shape adds a sense of movement and luxury. | Feature walls or entire showers in transitional or upscale designs. | This works best with rectangular tiles. Just know that the intricate cuts mean higher labor costs. |
| Checkerboard | Bold, graphic, and a little bit retro. It creates a high-contrast focal point that’s full of personality. | Floors or feature walls in classic, eclectic, or vintage-inspired bathrooms. | Instead of classic black and white, try a softer checkerboard with sage-cream or other earthy tones for a modern twist. |
| Fish Scale (Scallop) | Whimsical and organic. It evokes a soft, Art Deco, or coastal feeling that’s very unique. | Accent walls, especially inside shower niches or behind the showerhead. | The rounded edges are a great way to soften all the hard lines in a bathroom, adding a beautiful textural element. |
The Unsung Hero: Grout Color
Finally, don’t overlook the power of grout. It might seem like a minor detail, but this humble component can completely change how your bathroom shower tiles look and feel.
-
Contrasting Grout: Using a dark grout with light tiles (or the other way around) makes each individual tile pop. This really emphasizes the pattern and shape, creating a bold, graphic look that’s perfect for highlighting a classic subway layout or an intricate geometric design.
-
Matching Grout: Choosing a grout color that blends in with your tile creates a more monolithic, seamless look. This minimizes the grid effect, making the wall feel like a single, continuous surface—ideal for crafting a serene, minimalist aesthetic.
By thoughtfully combining tile size, pattern, and grout color, you can create a shower that’s not just functional but is a true reflection of your style. For even more visual inspiration, you can browse a ton of shower ideas for your bathroom here.
Building a Waterproof Shower That Lasts
A shower full of beautiful bathroom shower tiles is only as good as the foundation it’s built on. The most gorgeous tile in the world will fail if water gets behind the scenes. Think of a proper shower installation as a high-performance raincoat for your walls and floor—one that has to protect your home’s structure from water, day in and day out.
Getting this right isn’t just a good idea; it’s the single most critical step to ensure your shower lasts for decades. Water damage is sneaky, expensive, and can lead to serious problems like mold and rotted framing. A truly durable shower is really a system of layers, all working together to create a completely sealed, waterproof box.
The Bones of a Watertight Shower
Before a single tile ever gets set, the walls and floor underneath need to be prepped to handle years of constant water exposure. This process starts with a solid, stable substrate that won’t turn to mush when it gets damp.
Here’s what that system looks like, from the studs out:
- Cement Backer Board: This is the first layer you’ll see attached to the wall studs. Unlike regular drywall, which disintegrates when wet, cement board is a tough, water-resistant panel that gives your tile a stable surface to bond to.
- Waterproofing Membrane: This is the real hero of the system. Whether it’s a fabric sheet or a liquid-applied coating, the membrane goes over the cement board to create a seamless, impenetrable barrier. It’s the final line of defense that stops water dead in its tracks.
- Properly Sloped Shower Pan: Down on the floor, a pre-sloped pan or a custom-built mortar bed is a must. This guarantees that every drop of water is channeled directly to the drain instead of pooling in corners. The industry standard is a slope of 1/4 inch per foot.
As you prepare for the install, it’s also vital to start with a clean slate. Understanding why you should not tile over existing tile is non-negotiable for a professional, long-lasting finish. A fresh, properly prepared substrate is the only way to go.
The Glue and the Finish
With the waterproof shell in place, it’s time for the layers that actually hold your bathroom shower tiles. People often misunderstand these two materials, but they each have a distinct and vital job.
Thin-Set Mortar: This isn’t glue. It’s a cement-based adhesive designed to bond tiles to the waterproofed backer board. It provides the structural connection, locking everything securely in place for good.
Grout: Grout simply fills the spaces between the tiles. Let’s be clear: by itself, grout is not waterproof. Its purpose is to lock the tiles together, keep debris out of the joints, and give the installation a clean, finished look.
This diagram breaks down the key decisions in the shower tile design process, connecting the dots between tile choice, layout, and finishing steps like grout.

As you can see, design and installation are completely intertwined. Your decisions about tile size and pattern directly impact the waterproofing and grouting details down the line.
Special Care for Handmade Cement Tiles
Handmade cement tiles bring a beautiful, velvety matte finish to a shower, but their porous nature means they need a bit of extra attention during installation. To protect them from moisture and stains, they absolutely must be sealed.
The sealing process for cement tiles is a critical two-part step. First, a penetrating sealer must be applied before grouting. This prevents the grout’s pigments from bleeding into the tile and causing stains. After the grout cures, a second (and sometimes third) coat of sealer is applied over both the tile and the grout lines to create a fully protected, water-resistant surface.
If you skip this, your tiles will be vulnerable to water spots and discoloration. But by understanding and following these key steps, you can confidently build a shower that is not only stunning but also built to stand the test of time.
For a deeper dive into the methods and materials, you can learn more about https://originalmissiontile.com/how-to-waterproof-shower-walls/ in our detailed guide.
Maintaining the Beauty of Your Shower Tiles
Your gorgeous new shower is an investment in your home, not to mention your daily peace of mind. Keeping it looking brand new is simpler than you might think—it’s all about working smart, not hard. The real key is using the right products and stopping buildup before it ever gets a foothold.
Forget the aggressive, abrasive cleaners and harsh chemicals marketed for bathrooms. Many of these can strip the finish from your bathroom shower tiles and, even worse, slowly eat away at the grout and sealant. This creates microscopic holes where soap scum, mildew, and grime can dig in, making your shower harder and harder to clean over time.
Gentle Cleaning for a Lasting Shine
The best defense for any shower tile is a gentle, proactive routine. Instead of gearing up for a weekly battle with heavy-duty scrubbing, a few simple habits can keep your shower looking as good as the day it was installed.
Here’s a simple schedule that works for any tile material:
- After Every Shower: Grab a small squeegee or a microfiber cloth and wipe down the walls and glass. This quick, 30-second task is the single most effective way to prevent soap scum and hard water spots from ever forming.
- Once a Week: Lightly spray the tiles and grout with a pH-neutral cleaner. Let it sit for a few minutes to dissolve any oils or soap residue, then rinse it all down with warm water. This is gentle enough for everything from standard ceramic to sensitive natural stone.
For tougher spots, especially in grout lines, a soft-bristle brush and a simple paste made from baking soda and water will do the trick without causing any damage.
Think of your tile cleaner like skincare. You wouldn’t use a harsh, stripping cleanser on your face every day, and the same idea applies to your tiles. A gentle, pH-balanced approach maintains the material’s integrity and natural beauty for the long haul.
Special Care for Handmade Cement Tiles
Handmade cement tiles, with their signature matte finish and naturally porous body, need a little extra attention to keep their rich color vibrant. While they come with a factory-applied sealer that provides excellent initial protection, that shield isn’t permanent. It requires regular upkeep to guard against stains and water absorption.
Unlike glazed ceramic or porcelain, the surface of a cement tile is vulnerable to acidic cleaners—think vinegar or citrus-based products. These can actually etch the surface, leaving behind dull, permanent marks. Always stick to pH-neutral, non-acidic cleaners made for delicate surfaces.
Most importantly, you’ll need to periodically reseal your cement tiles. How often depends entirely on how much the shower gets used, but a good rule of thumb is:
- High-Use Showers: Reseal every 12 to 18 months.
- Guest or Low-Use Showers: Reseal every 2 to 3 years.
Not sure if it’s time? Just splash some water on the tile. If it beads up neatly, your sealer is still doing its job. If the water soaks in and darkens the tile, it’s time to apply a fresh coat of a high-quality penetrating sealer to restore that protective barrier. This simple step is vital for ensuring your artisan tiles remain a stunning feature for years to come.
Alright, let’s talk about the money. Planning a shower remodel is the fun part, but figuring out the budget is what makes it happen without any nasty surprises. A realistic budget is your roadmap to getting the look you want without the financial stress.
The final price for your new shower really boils down to three key things: the tile itself, the skilled labor to install it, and all the behind-the-scenes materials that make it last.
The Three Pillars of Shower Tile Cost
Think of your total project cost as a simple sum of these three parts. But don’t be fooled—the cost of each part can swing wildly depending on the choices you make.
-
Pillar 1: The Tile: This is where the budget can really change. The cost of bathroom shower tiles varies dramatically. You might find basic ceramic tile for a few dollars a square foot, but handmade cement tiles, natural stone, or other artisanal options will be a much bigger investment. Your tile choice is the single biggest factor in your materials budget.
-
Pillar 2: The Labor: Installation fees typically run from $10 to $25 per square foot, but that’s just a starting point. A simple, stacked subway tile layout is quick and straightforward for a pro. But if you want an intricate herringbone, a complex mosaic, or a custom pattern, expect labor costs to climb. Those detailed cuts take time and skill.
-
Pillar 3: The Setting Materials: This is everything but the tile—and it’s all non-negotiable. You’ll need to budget for a top-notch waterproofing system, cement backer board, the right thin-set mortar for your tile, grout, and sealant. These are the foundational items that guarantee a durable, leak-proof shower for years to come. Skimping here is a recipe for disaster.
What Else Moves the Needle on Your Budget?
Beyond those three pillars, a few other things can nudge your total cost up or down. The biggest wild card is the condition of your existing bathroom. If the installer opens up the wall and finds rotted studs or plumbing that needs to be moved, that’s an immediate add-on to both the timeline and the bill.
A standard shower tile installation can take a professional anywhere from 2 to 5 days, but that’s assuming the walls are sound and ready to go. Discovering unexpected repairs can easily tack on several days and hundreds—if not thousands—of dollars to the project.
It’s also smart to follow the “one pattern” rule when you’re budgeting. A single, show-stopping patterned tile can be an amazing focal point. But trying to mix two or three different complex patterns often looks visually chaotic and sends installation costs soaring.
A timeless design strategy—and a smart financial one—is to pick one hero pattern and surround it with simpler, more affordable field tiles. This lets your feature tile shine without overwhelming the space or your wallet.
By understanding where the money goes, you can walk into your shower project with confidence. Set a clear budget, set aside a 10-15% contingency fund for those “just in case” moments, and you’ll be on track for a smooth, successful renovation.
Shower Tile FAQs
Even the best-laid plans come with a few last-minute questions. When you’re renovating a shower, those details can make all the difference. Here are some straight answers to the most common things we get asked about bathroom shower tiles—use them to finalize your choices with confidence.
What Is the Best Tile for a Shower Floor to Prevent Slips?
On a shower floor, grip is everything. The safest choices are tiles with a high Coefficient of Friction (COF), which is just a technical way of saying they’re not slippery. Look for a DCOF rating greater than 0.42 for wet areas like shower pans.
Your best bet is often smaller tiles, like 2×2 inch mosaics or tiny hexagons. All those extra grout lines act like tire treads, giving your feet more to grab onto. Unglazed porcelain, matte-finished ceramic, and properly sealed cement tiles are all fantastic, safe options for the shower floor.
Can I Use Handmade Cement Tiles in a Steam Shower?
Absolutely, but you have to be meticulous about it. A steam shower is an extreme environment with constant high heat and moisture, so the waterproofing system behind the tiles needs to be bulletproof—no cutting corners.
Because cement tile is naturally porous, a multi-step sealing process is non-negotiable for steam showers. The tiles need a deep soak with a high-quality penetrating sealer before you grout. Then, after the grout cures, you seal the whole surface again to create a water-repellent shield. You’ll also want to check that seal regularly to ensure it’s holding up.
How Do I Choose Between Porcelain and Ceramic Tiles?
While they look similar, the real difference is density and where you should use them. Porcelain is fired at much higher temperatures, making it incredibly dense and almost waterproof, with a water absorption rate of 0.5% or less. This makes it the undisputed champion for high-moisture zones like shower floors.
Ceramic tiles are a bit more porous but are a great, budget-friendly choice for shower walls where they aren’t sitting in water. A smart strategy is to put affordable ceramic on the walls and spend the extra on ultra-durable porcelain for the floor. You get the best of both worlds—performance where it counts and savings where it makes sense.
Ready to bring the timeless, artistic beauty of handmade cement tiles to your own shower project? Original Mission Tile has been crafting artisan tiles since 1900. Explore our in-stock collections or create a custom design at https://originalmissiontile.com.