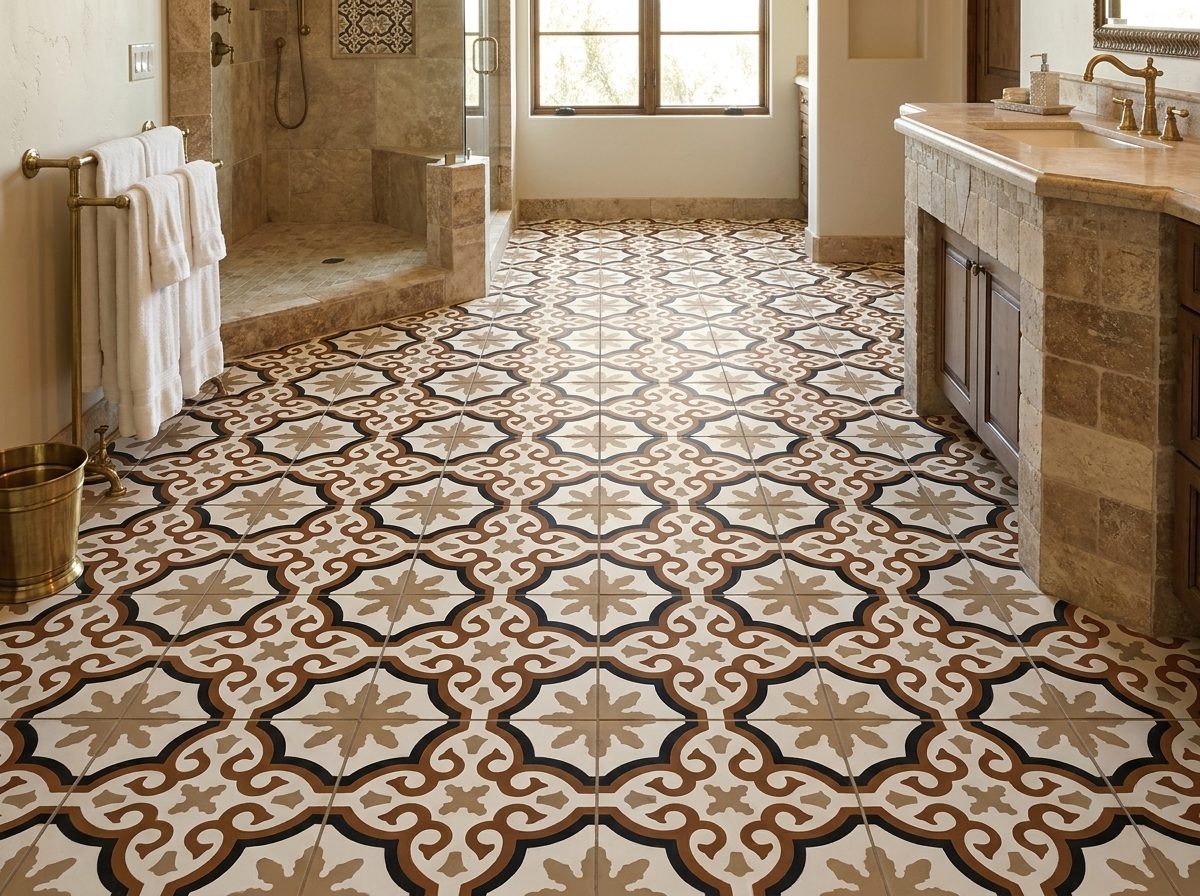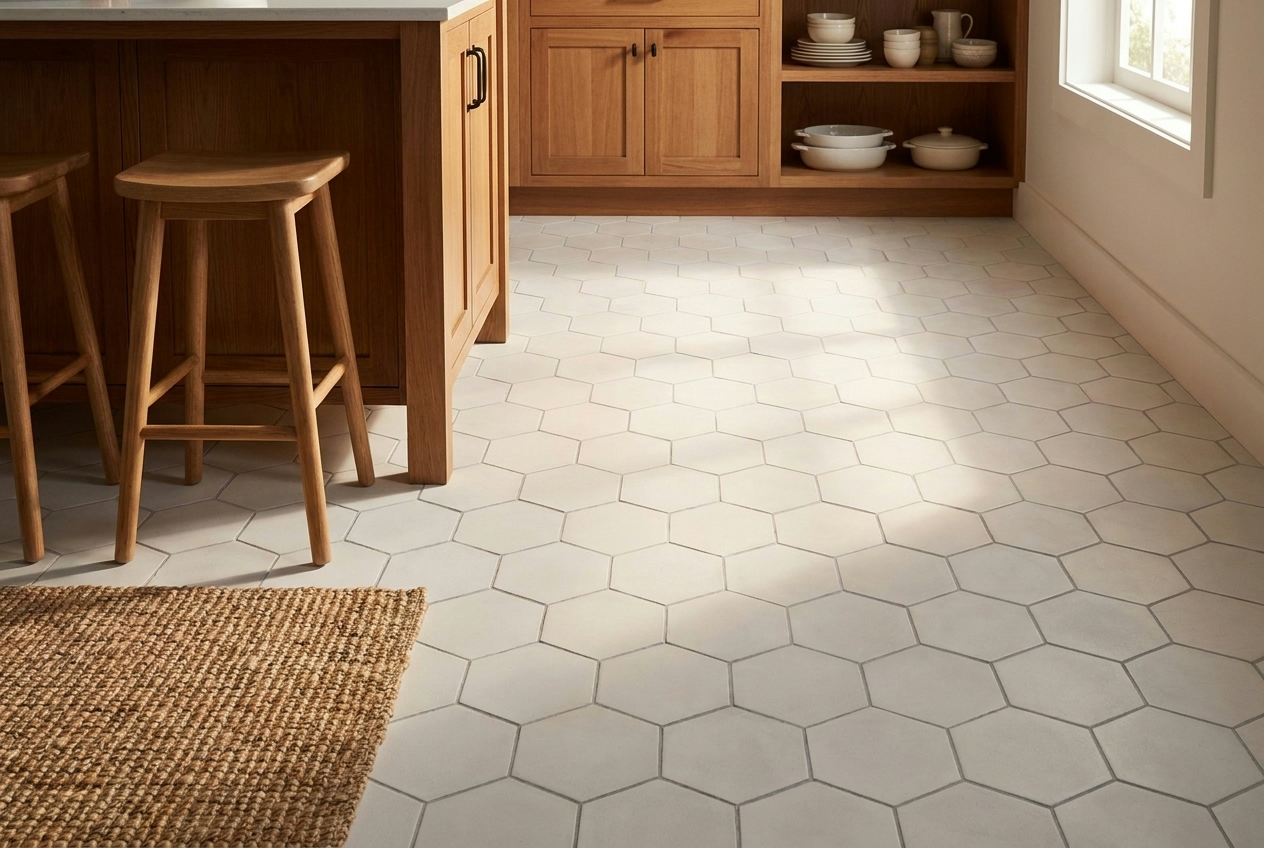
You're usually thinking about the big pieces when a tile project nears the finish line. The field tile is set. The floor pattern is reading correctly. The grout color finally makes sense in the room. Then your eye drops to the perimeter, and that's where many otherwise strong installations lose their authority.
A cheap base, an awkward edge, or a poorly planned transition can make a carefully designed room feel unresolved. The opposite is also true. A well-chosen tile baseboard trim pulls the floor into the architecture, protects the wall where brooms, mops, shoes, and water do their worst, and gives the room the kind of finish people recognize immediately, even if they can't name why it feels better.
In bathrooms, mudrooms, laundry spaces, and commercial interiors, this detail isn't decorative trim pretending to be useful. It's part of the performance layer. In formal rooms and heritage work, it also carries visual weight. That's why designers specify it early and good installers refuse to treat it like an afterthought.
The Unsung Hero of a Flawless Finish
The most common moment for regret comes late. A floor has been installed beautifully, the walls are painted, and someone realizes the planned baseboard no longer matches the room. Standard painted wood looks too soft against porcelain. MDF feels wrong beside a handmade tile floor. A thin metal edge reads too commercial in a traditional bath.
That final band at the bottom of the wall does more than hide a gap. It establishes how the room meets itself. In a restrained interior, tile baseboard trim can quiet the perimeter so the floor pattern stays in control. In a more decorative scheme, it can frame the room and reinforce the geometry of the tile layout.
I've seen excellent floors diminished by a base treatment that belonged to a different project. I've also seen modest tile look far more expensive once the base was handled with the same discipline as the field.
A finished floor always asks one last question: what happens when it reaches the wall?
That answer has to work visually and physically. A baseboard takes impact from vacuums and mop handles. It catches splash at sinks, tubs, and entry doors. In older homes, it often has to conceal uneven plaster, old paint lines, or the scar left by removed trim. If the detail is too thin, too low, or too fussy, every one of those issues becomes visible.
The right tile baseboard trim does three jobs at once:
- It protects the perimeter where walls take the most abuse.
- It resolves the design language between floor, wall, and trim.
- It makes maintenance easier because the room has fewer vulnerable edges.
When that detail is chosen with intent, the installation stops looking like tile applied to a room and starts looking like the room was designed as a whole.
What Is Tile Baseboard Trim and Why Is It Essential
Tile baseboard trim is the tiled skirting that runs at the base of a wall, usually formed from matching field tile, a dedicated base piece, a cove profile, bullnose, or another finished edge. It protects the wall, but in wet rooms it also becomes part of the room's moisture strategy.
The simplest way to think about it is this: tile baseboard trim works like a gasket at the room perimeter. It carries the durable, washable floor surface up the wall so water doesn't stop at the most vulnerable junction.

Why wet areas benefit most
In bathrooms, laundry rooms, and commercial kitchens, the wall-to-floor joint is where trouble starts. According to Apollo Tile's tile trim guide, tile baseboard trim extends the waterproof floor surface up the wall, creating a continuous transition that eliminates the joint where water typically intrudes. The same guide notes that in wet areas, standard wood or MDF baseboards are prone to absorbing moisture, which can lead to warping, rot, and mold growth within 12 to 24 months of exposure, while resilient tile baseboards reduce maintenance calls by approximately 40% compared to traditional wood alternatives.
That's the functional case in one sentence. If water and repeated cleaning are part of normal use, a water-tolerant base belongs there.
Apollo Tile also notes that matching the tile baseboard to the floor tile depth, typically 10mm to 12mm, helps maintain structural integrity, and installation should include a 1mm to 2mm gap between the tile baseboard and adjacent floor tile, filled with grout for a watertight seal that still allows slight substrate movement. Too tight and you compromise the waterproofing. Too wide and the grout bond weakens.
More than a practical strip
Tile at the base of the wall has deep architectural roots. The broader use of ceramic tile as a functional wall surface dates back to the fourth millennium B.C., and the Romans had formalized tile-making techniques in Western architecture by the first century A.D. The modern tile baseboard as a distinct architectural feature became prominent in the early 1900s, especially with the rise of mass-produced hexagon and square mosaic floors in kitchens and baths, as described in this historic floor tile overview.
That history matters because tile baseboards don't look like a trend when they're done correctly. They look established. They belong equally well in a restored period bath and a contemporary room that wants crisp, uninterrupted lines.
Practical rule: If the floor is designed as a permanent surface, the base should look and perform like it belongs to the same system.
For designers, that means specifying the base as part of the room composition, not as leftover trim. For contractors, it means treating it like finish work that carries waterproofing, alignment, and edge quality all at once.
Exploring Tile Baseboard Profiles and Materials
Once you decide to use tile baseboard trim, the next question isn't whether it's useful. It's which profile best fits the room, the cleaning demands, and the architectural language.

Cove base for hygiene and durability
Cove base is the workhorse profile. Instead of a hard inside angle where dirt and water collect, it introduces a curved transition from floor to wall. In commercial work, that geometry isn't arbitrary. Fireclay's cove base guidance states that cove base trim should have a minimum radius of ⅜ inch and extend at least 4 inches up the wall for durability and code-aligned performance in commercial settings.
That curve matters in spaces cleaned aggressively. Mops don't snag on it. Debris doesn't lodge in the corner as easily. The wall base takes impact better from carts and cleaning equipment.
Use cove base when the brief includes hygiene, heavy use, or a floor that needs a very deliberate perimeter treatment. Restaurants, locker rooms, utility rooms, pet wash areas, and serious primary baths all benefit from it.
Flat and straight base for cleaner architecture
Flat base has a different personality. It gives you a crisp vertical plane with a clean top edge and minimal visual drama. In modern interiors, that restraint is often exactly the point. It allows the floor tile, wall finish, or cabinet lines to carry the design.
Flat base also gives installers flexibility when a project uses field tile cut into strips. If the tile body looks good on the edge, or if a separate finishing trim is planned, a straight base can feel rigorous and contemporary.
The trade-off is maintenance. A sharp inside angle at the floor line is less forgiving to clean than a cove. It can still perform well, but it asks for cleaner detailing and more care in execution.
Bullnose and eased-edge options
Bullnose softens the top edge of the base. That rounded finish reads familiar because it has a long history in residential tile work. It's a strong choice when you want the tile base to look finished without drawing too much attention to itself.
Bullnose works especially well with smaller format tile, traditional baths, and transitional interiors where a metal profile would look too severe. It also protects the top edge from chipping better than a raw cut.
For contractors, bullnose can simplify edge decisions. For designers, it can bridge old-house character with a more disciplined tile palette.
Material choices and what they change
Profile is only half the decision. Material shifts the visual weight and the wear characteristics.
- Ceramic often gives you broad color availability and easier coordination with wall tile.
- Porcelain is usually the tougher choice for wet or high-traffic areas because it's dense and resilient.
- Natural stone can be elegant, but the edge treatment and ongoing care have to be considered carefully.
- Cement tile and related artisan materials bring exceptional pattern and surface character, especially in heritage work, but they demand a specification that respects their craft qualities.
If you're comparing tile edges with other perimeter treatments across the whole home, it can help to explore floor molding options so the tile base doesn't get specified in isolation from adjoining rooms.
For projects that need wall trim pieces and tile-compatible edge solutions, it's also worth reviewing tile trim and wall details to understand what finished accessory pieces are available before drawings are finalized.
Tile Baseboard Trim Comparison
| Trim Type | Primary Use | Aesthetic | Best For |
|---|---|---|---|
| Cove Base | Moisture control and easy cleaning | Functional, tailored, often commercial-to-classic | Bathrooms, hospitality, utility spaces, food service |
| Flat Straight Base | Clean wall termination | Minimal, modern, quiet | Contemporary interiors, large-format tile rooms |
| Bullnose Base | Finished top edge with softer profile | Classic, familiar, residential | Traditional baths, transitional spaces, remodels |
| Stone Base | Decorative perimeter with material continuity | Rich, substantial | Formal interiors, stone floors, luxury baths |
| Metal Edge with Tile Base | Sharp protection at exposed edges | Crisp, technical | Contemporary projects with precise detailing |
Design and Specification for Lasting Impact
A tile base can be technically correct and still look wrong. Most failures in specification come from proportion, not material. The installer may have executed the work perfectly, but if the base is too short, too busy, or disconnected from the floor language, the room feels unsettled.

Get the height right
Base height changes how the room sits on the floor. A skimpy base often looks accidental, especially in remodels where old caulk lines, patched paint, or wall damage remain visible. A taller base gives the room a stronger plinth and often solves those practical issues at the same time.
A useful benchmark comes from this installation discussion on recommended tile base heights, which notes that tile baseboards typically use a 4 to 5 inch height, and many installers advise going ½ inch greater than the standard wood baseboard being replaced, such as 4.5 inches instead of 4 inches, to cover old caulk lines and prior damage.
That recommendation aligns with what works on site. If the room is a remodel, don't specify the base height in isolation. Check the ghost line from the previous trim. It's often the detail that decides whether the finished room looks clean or patched.
Match or contrast with intention
There are two broad design paths, and both can work.
One approach is to match the baseboard to the floor tile. This creates continuity and makes the floor feel like an architectural surface rather than a product laid within a room. It's the stronger choice when the tile pattern is the visual anchor or when you want the walls to feel taller and cleaner.
The other is contrast. A contrasting base can frame the floor, sharpen the perimeter, and give the room more classical structure. That only works when the contrast is deliberate and repeated elsewhere, such as in grout, casing, plumbing trim, or hardware finish.
If the base color appears nowhere else in the room, it usually looks like a correction rather than a design move.
Draw the grout and movement joints before anyone orders tile
Designers often choose baseboard trim by elevation and material sample, but the room succeeds or fails at the joints. You need to know where cuts land, how the inside corners resolve, and whether the top edge aligns with a meaningful line in the room.
Three specification habits make a major difference:
- Coordinate grout color early. A matching grout quiets the base. A contrasting grout emphasizes every joint and every cut.
- Locate movement deliberately. Perimeter movement accommodation needs to be respected so the base doesn't become the room's stress point.
- Control corner conditions. Inside corners, outside corners, and terminations at door casings should be drawn, not improvised.
Moisture management belongs in that conversation too. When a room is exposed to repeated splash or vapor, the base detail should be coordinated with the waterproofing assembly, not treated as finish-only trim. That's where understanding a complete tile moisture barrier approach becomes important for both the design team and the installer.
What strong specifications usually share
Good tile base specifications aren't flashy. They're disciplined.
- Consistent top line: The top of the base should read level around the room, even when the floor isn't perfect.
- Planned termination: Stops at door jambs, cabinets, and transitions should feel deliberate.
- Appropriate edge treatment: Bullnose, eased edge, metal trim, or return pieces should match the room's language.
- Wall tolerance awareness: Old houses need enough coverage to absorb minor waviness without telegraphing every defect.
The best rooms rarely advertise these decisions. They just feel settled.
A Practical Guide to Tile Baseboard Installation
Design intent matters, but installation sequence determines whether that intent survives contact with the jobsite. Tile baseboard trim asks for more precision than many clients expect because it sits exactly where floors, walls, waterproofing, and finish tolerances collide.

Start with the substrate, not the trim
A perfect trim piece won't rescue a crooked wall or a dirty substrate. Before any base goes on, the installer should confirm that the wall is sound, flat enough for the selected tile, and compatible with the setting materials. Paint overspray, dust, crumbling patch compound, and loose skim coat all compromise bond.
The practice of experienced mechanics sets them apart. They don't rush to set base just because the room looks nearly done. They correct the surface first, establish a level control line, and work out where cuts will land at doorways and corners.
The base also has to relate to the floor that's installed, not the floor that was drawn. Minor variation in floor height, grout joint width, or room squareness changes what looks centered and what doesn't.
Before or after the floor
This is one of the most debated sequence questions on site, and the industry still lacks comparative long-term data. The available guidance remains largely anecdotal. As noted in this video discussion of baseboard sequencing methods, installers typically follow one of two paths: install the baseboards first and tile up to them, or tile the floor first and then install the base over the finished floor. The same discussion notes there's no published quantitative comparison on moisture resistance, labor time, or long-term durability by installation sequence.
In practice, each method has trade-offs.
If base goes on after the floor, the perimeter often looks more integrated and easier to clean because the base visibly belongs to the tile assembly. If the floor goes under a preinstalled wood base, the cuts can be hidden, but tile thickness may force added trim pieces that change the look.
That's one reason quarter-round still appears in some remodels. It solves a clearance problem, but it can also clutter the perimeter. In rooms where that profile suits the architecture, it's useful. In others, it feels like a concession. For anyone evaluating that detail, a dedicated 1-inch quarter-round molding reference can help clarify when the profile improves a transition and when it merely masks one.
The cleanest-looking solution on paper isn't always the cleanest-looking solution once real walls and real floors enter the job.
What a professional installation includes
A good installation sequence is less about rigid rules and more about controlling the vulnerable details.
- Layout first: The installer checks where full and cut pieces fall, especially at visible runs and door openings.
- Proper mortar coverage: The back of the trim needs consistent support so corners don't sound hollow or fracture later.
- Clean joint spacing: Base joints should align with the visual rhythm of the floor whenever possible.
- Careful corner work: Mitered or butted corners need to suit the tile body and profile. Poor corners are what is often noticed first.
- Managed bottom joint: The base-to-floor condition has to be deliberate, tight, and compatible with the room's waterproofing logic.
For readers who want to watch a craftsman handle perimeter tile in context, this installation video gives useful visual cues about pacing, alignment, and hand control:
What homeowners and specifiers should ask
You don't need to dictate technique, but you should ask questions that reveal whether the installer has thought the detail through.
Ask how corners will be finished. Ask whether the top edge is factory-finished, profiled, or cut. Ask where the first visible termination lands. Ask how the wall condition affects the base height. Ask what happens at flooring transitions outside the tiled room.
Those conversations tend to improve the work before a single piece is set.
Sourcing Cost and Long-Term Maintenance
A tile baseboard is often judged by its price per linear foot. That misses how these details are bought and built.
The cost sits at the intersection of material choice, profile selection, fabrication time, and wall conditions. A base cut from field tile can lower the material bill, especially on larger jobs where the floor tile is already in production. A purpose-made cove or bullnose profile usually costs more upfront, but it can save labor, reduce edge-finishing work, and deliver a cleaner result at the top line. The right choice depends on who is doing the fabrication, how visible the perimeter is, and whether the tile body can tolerate exposed cuts without looking unfinished.
Room geometry changes the budget fast. Long straight runs install efficiently. Alcoves, door casings, out-of-square corners, built-ins, and curved walls require more fitting, more cuts, and more time spent keeping the sightlines consistent. Designers sometimes specify a refined profile without accounting for this labor. Contractors sometimes price only the footage and discover later that every corner is a custom exercise. Good estimating accounts for both the design intent and the time needed to execute it properly.
Maintenance is where tile baseboard often proves its value over time. In bathrooms, laundry rooms, mudrooms, and commercial interiors, tile stands up to water, mop splash, cleaning chemicals, and abrasion far better than painted wood or MDF. It does not need repainting after routine wear, and it is less likely to swell, dent, or delaminate at the floor line. That matters for owners managing lifecycle cost, not just first cost.
What keeps maintenance straightforward
- Clean with products that suit the finish: Glazed ceramic and porcelain are forgiving. Natural stone and unglazed surfaces need more care, especially with acidic cleaners.
- Watch the joints, not just the tile: Hairline cracking at a change of plane or at outside corners should be repaired early so moisture and dirt do not work behind the assembly.
- Save attic stock: A few spare pieces from the same run can turn a difficult future repair into a simple one, particularly if the profile is custom or the glaze lot is discontinued.
Procurement timing matters too. Order the base pieces, corner components, and any coordinating trims with the main tile package. That improves shade consistency, reduces the risk of profile mismatch, and gives the installer a complete system to work with instead of a late substitute that almost matches.
Frequently Asked Questions About Tile Baseboards
Are tile baseboards better than painted wood in bathrooms
In bathrooms and other splash-prone rooms, tile is usually the better specification. It tolerates water, routine cleaning, and floor-level abrasion without the swelling, peeling, and edge wear that often show up on painted wood or MDF.
The main trade-off is visual softness versus durability. Painted wood can feel warmer in a powder room or a dry guest bath. In a primary bath, laundry room, or mudroom, tile baseboard usually holds its line better over time and asks for less upkeep.
Can you add tile baseboard trim in an existing room
Yes, if the wall is flat enough and the termination points are planned before installation starts.
Retrofits succeed or fail at the edges. Old adhesive ridges, chipped paint buildup, and an uneven floor can telegraph through a new baseboard line. I usually check three things first: whether the wall needs skim coating, whether the new tile height will cover the previous trim shadow, and whether outside corners and door casings have enough room for a clean stop. Designers often focus on profile and color first. Installers know the fit at those transition points is what makes the job look intentional.
Should the baseboard match the floor tile
Matching the floor is the safest choice because it makes the room read as one finished assembly. It also simplifies specification. One tile body, one finish family, and fewer surprises at the edges.
A contrast base can work well, especially in traditional interiors or rooms with strong wall color and detailed millwork elsewhere. The contrast needs a reason. Repeat it in the threshold, vanity stone, wall tile, or trim palette so the baseboard feels designed, not substituted at the end of the job.
How do you transition from tiled baseboard to hardwood areas
Set the transition at a natural break such as a casing, jamb, or threshold. That keeps each room's trim language consistent and avoids a stop in the middle of a wall that looks unresolved.
Height matters here. If the tile base in the wet room is much shorter or taller than the wood base outside, the eye will catch the mismatch immediately. In remodel work, I often adjust the tile base height or add a return detail so the change feels deliberate rather than abrupt.
Is cove base only for commercial interiors
No. Commercial projects use cove base because it cleans easily and protects the wall at the floor line, but the profile also makes sense in residential spaces that deal with water and frequent washing.
It suits baths, laundry rooms, mudrooms, pool houses, and some kitchens. The design question is not whether cove base looks commercial. The question is whether the room benefits from a softer floor-to-wall transition and whether the rest of the detailing supports that choice.
If you're planning a project that needs tile baseboard trim to look resolved rather than improvised, Original Mission Tile is worth a close look. Their heritage manufacturing, handmade cement tile expertise, and range of trim-compatible formats make them a strong resource for designers, builders, and homeowners who want period character, durable materials, and informed guidance from people who understand both craft and specification.