You’re probably standing in one of two places right now. Either you have a kitchen that works fine but feels forgettable, or you’re deep into a remodel and trying to choose a backsplash that won’t look dated the moment the dust settles.
A moroccan tile backsplash solves that problem when it’s chosen and installed with discipline. It brings pattern, color, and hand-made depth to a room that often needs exactly that. It also asks more of you than a flat, factory-made wall tile. Handmade Moroccan surfaces carry variation. Edges shift. Faces undulate. Pigment behaves differently across glaze and cement. If you treat them like commodity tile, the finished wall will show it.
Craft matters significantly here. The strongest Moroccan backsplash projects begin long before the first tile touches mortar. They start with proportion, material selection, layout logic, and a clear understanding of what the tile wants to do. They finish with careful setting, restrained grouting, and sealing that respects the material rather than smothering it.
Envisioning Your Moroccan Backsplash Design
A good backsplash doesn’t begin with a sample chip. It begins with the room.
Look at your cabinet style, your countertop movement, your hardware finish, and the amount of daylight in the kitchen. Moroccan tile can carry a lot of visual weight. Used well, it anchors the room. Used carelessly, it competes with everything around it.

Start with the material character
Moroccan tile carries a long design lineage. Moroccan tiles originated around 711 A.D. as Zellige, a handmade Moorish art form, and that 1,300+ year heritage is a large part of why the material still feels substantial in a modern kitchen (Riad Tile history of Moroccan tile). Early tiles in the 10th century were limited to white and brown, and by the 14th century under the Nasrid and Marinid dynasties, green, blue, and yellow entered the palette (same source).
That history still shows up in today’s choices.
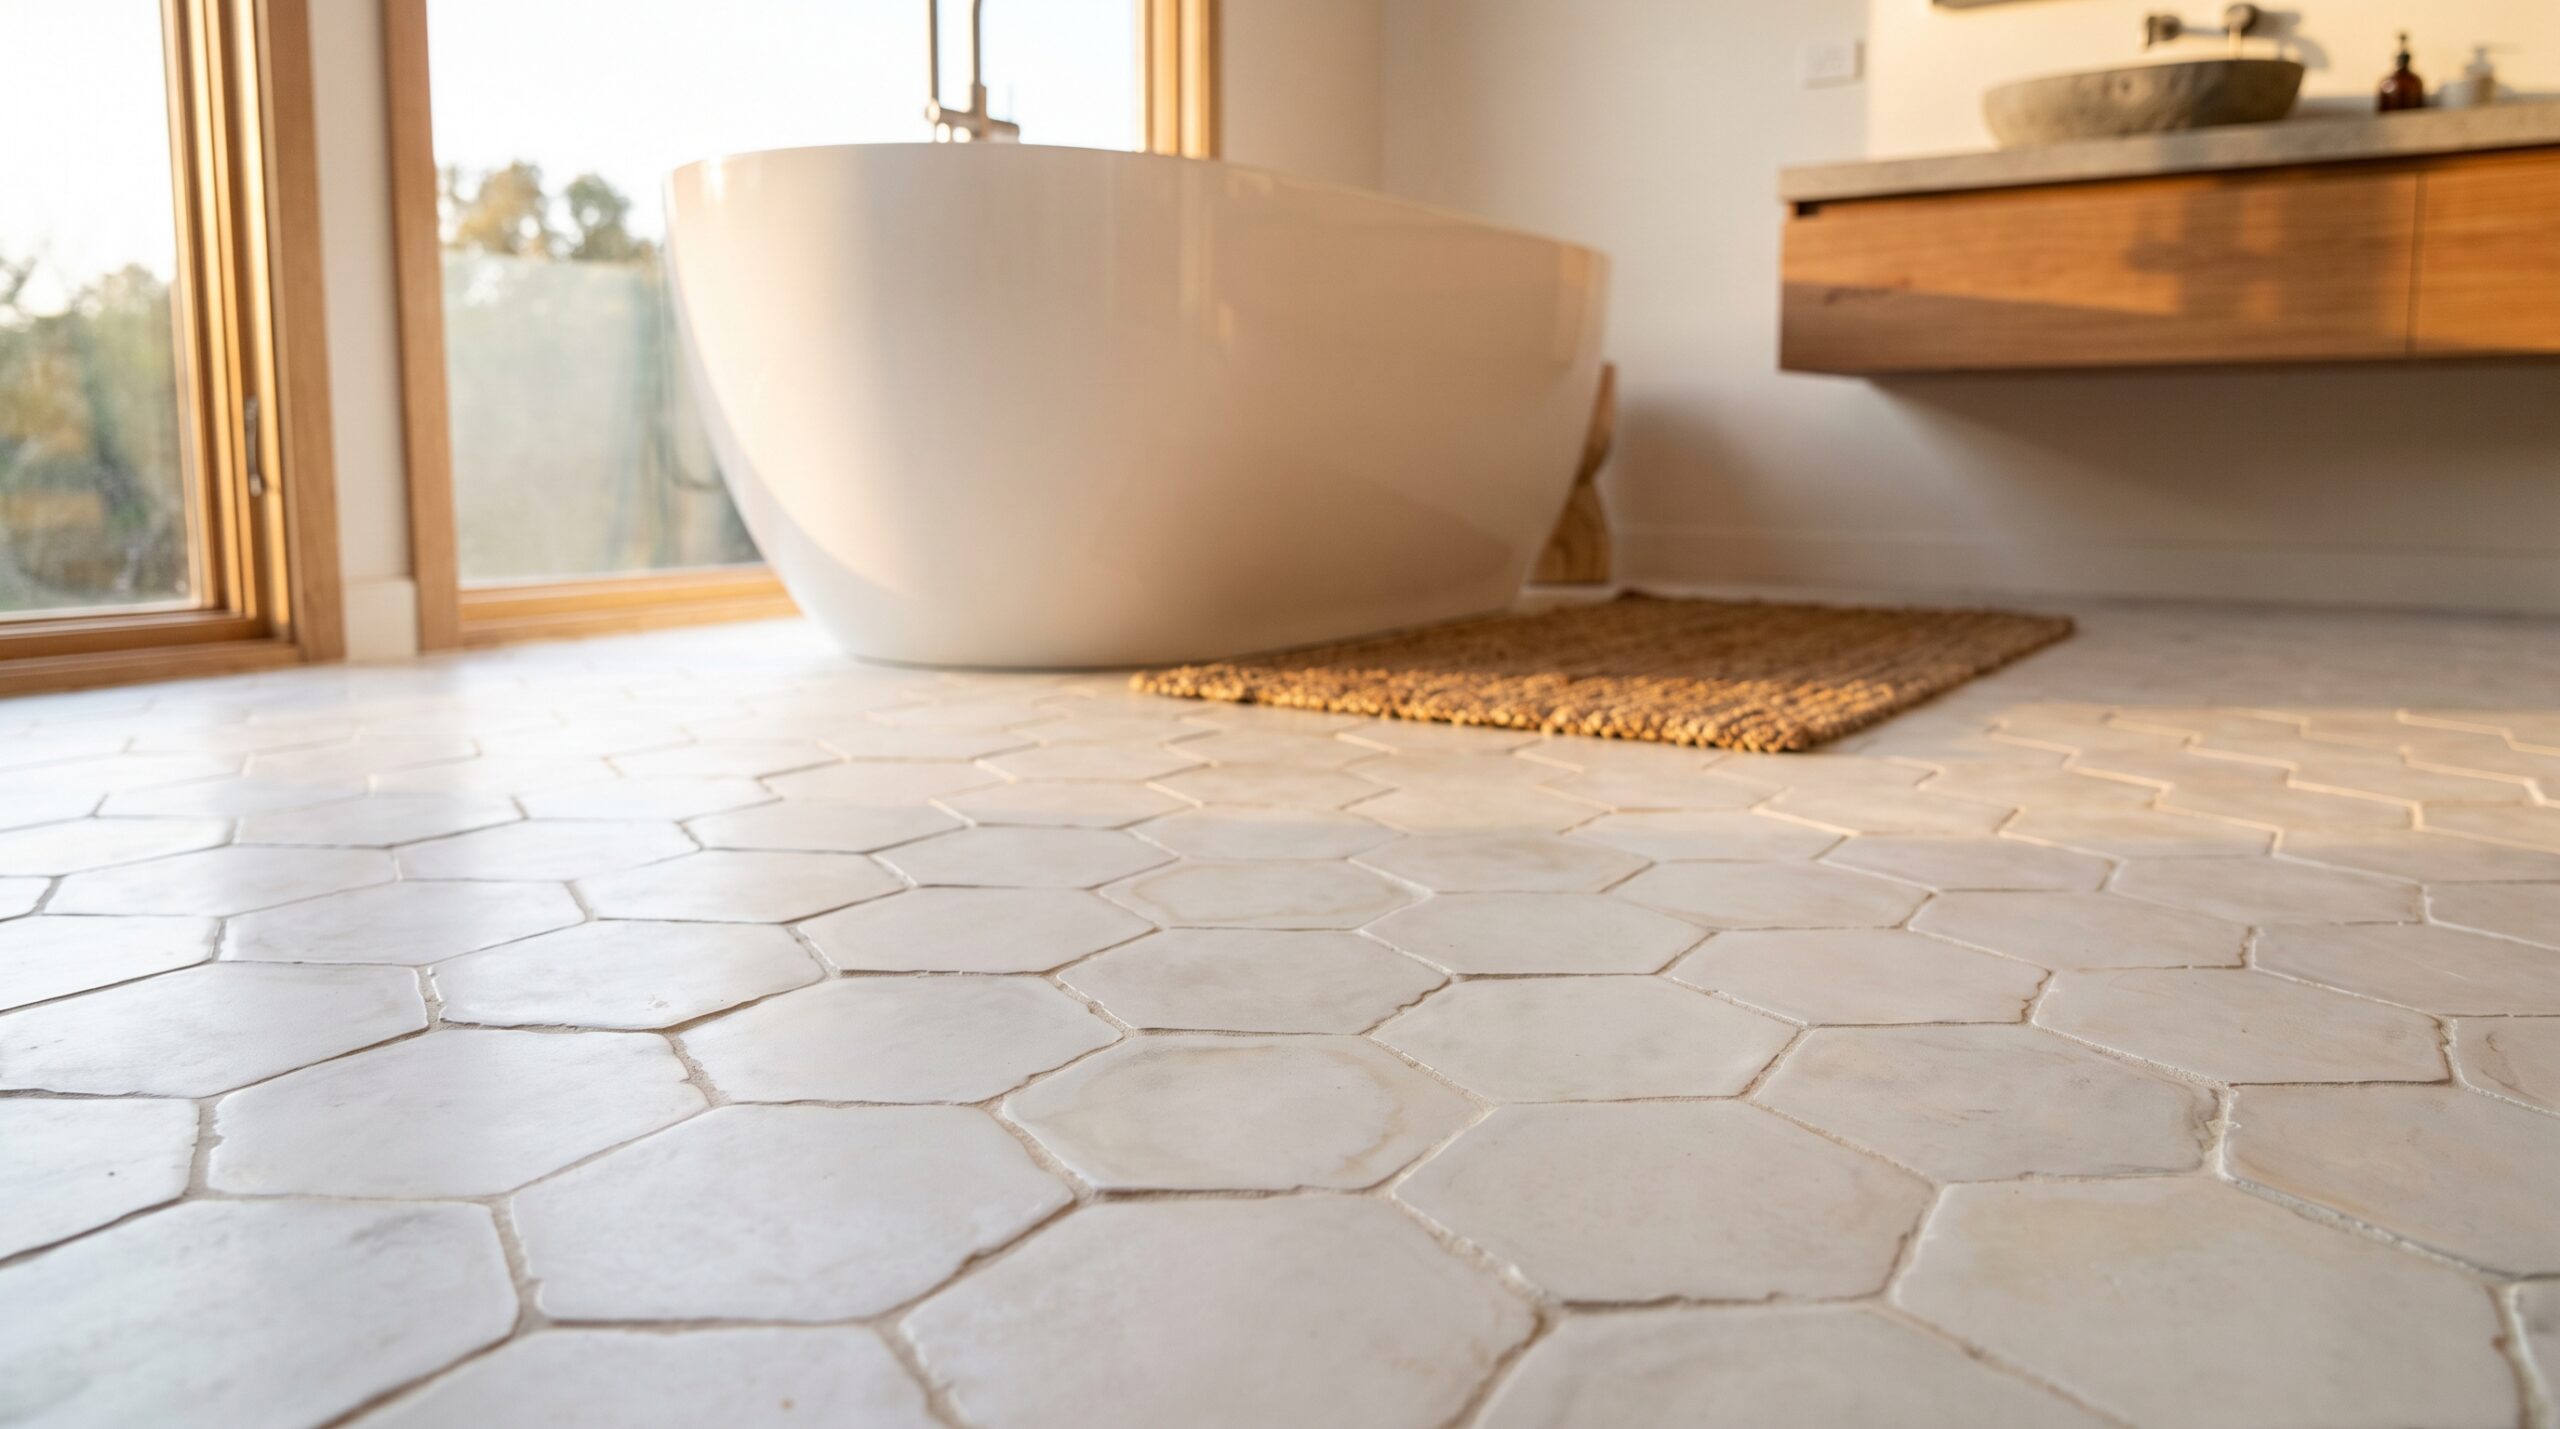
- Glossy zellige gives you shimmer, reflected light, and irregularity on the face.
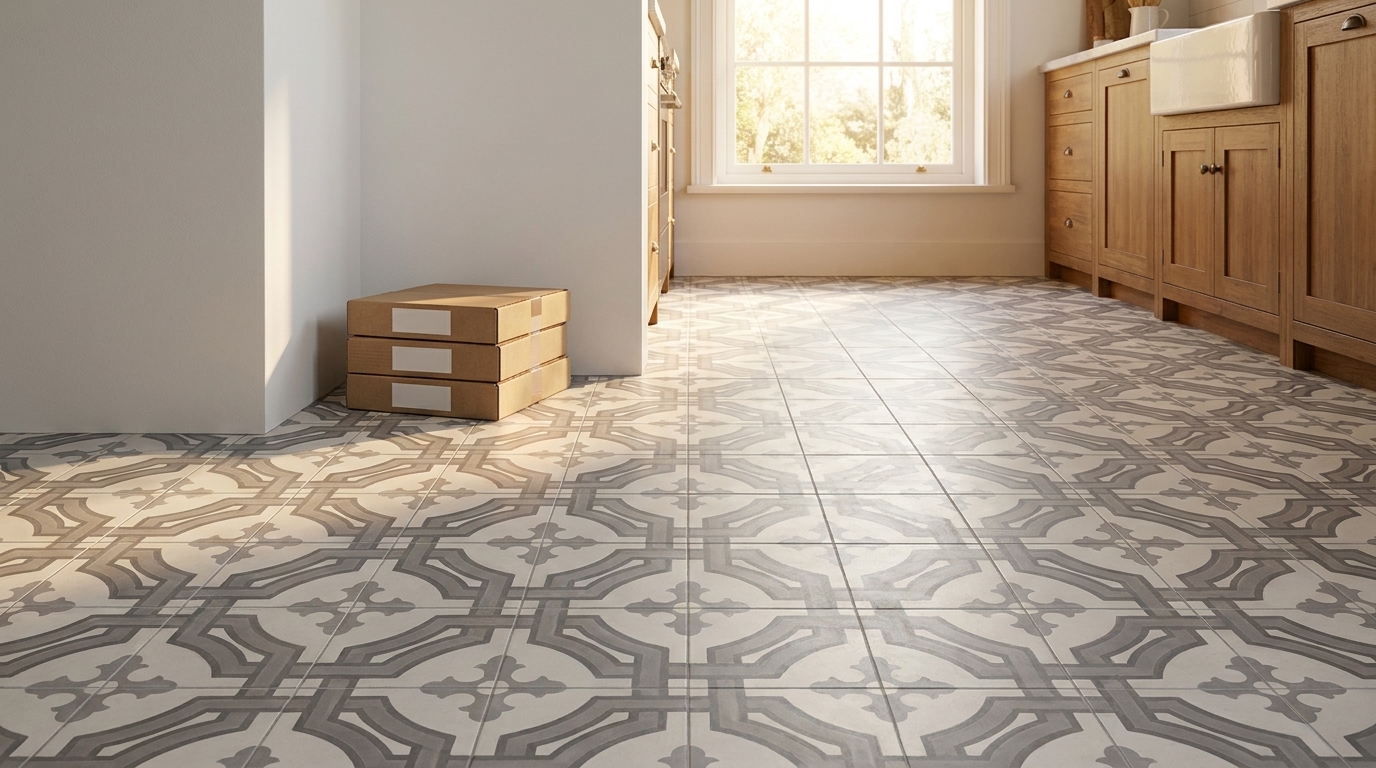
- Handmade cement tile gives you a matte, velvety surface with inlaid pattern and a more grounded architectural presence.
- Plain field tile with patterned inserts works when you want Moroccan influence without covering the entire wall in ornament.
- Star and cross, arabesque, fish scale, and 8×8 square formats each change the room’s rhythm before color even enters the conversation.
Match pattern to architecture
Pattern should answer the house.
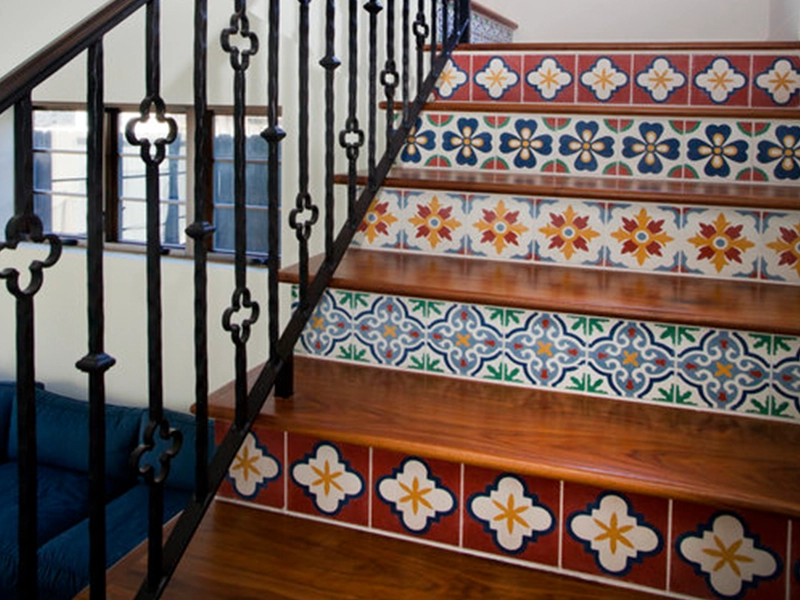
A Spanish Revival kitchen can handle stronger geometry and saturated color without strain. A quieter transitional kitchen often benefits from a restrained field with one dominant tone. In a loft or contemporary renovation, a matte cement tile in a disciplined repeat usually lands better than a highly reflective, jewel-toned spread over every wall.
Use these pairings as a working guide:
| Home style | Tile direction | Why it works |
|---|---|---|
| Spanish Colonial or Mediterranean | Star and cross, arabesque, multi-color cement patterns | The architecture already supports ornament and historical references |
| Traditional or farmhouse | 8×8 cement patterns, softened palettes, border restraint | The tile adds character without overwhelming wood cabinetry |
| Contemporary | Monochrome or two-tone geometric layouts | Cleaner pattern reads as architectural rather than decorative |
| Eclectic or collected interiors | Patchwork or bolder color combinations | Variation feels intentional in rooms with layered materials |
Practical rule: If your countertop has dramatic veining, calm the backsplash pattern. If the countertop is quiet, the backsplash can take the lead.
Choose color by light, not by sample board alone
Color in Moroccan tile changes with daylight, under-cabinet lighting, and shadow. A blue-green glaze that looks restrained in a showroom can read electric over a bright white counter. A matte clay-toned cement tile may look muted in hand but become the warmest surface in the room once sunlight hits it.
When clients are unsure, I usually narrow the decision to three questions:
- Do you want reflection or absorption of light
- Should the backsplash read as a focal point or a backdrop
- Do you want age and patina to show more clearly over time
If you’re still comparing styles, collections of luxury wall tile designs can help clarify how different wall surfaces behave in real rooms, especially when you’re balancing tile against cabinetry, stone, and metal finishes.
For kitchens leaning toward zellige, this visual reference is also useful: https://originalmissiontile.com/zellige-tile-backsplash/
Define the mood before you define the pattern
The best Moroccan backsplash projects have a clear emotional target.
Some kitchens want depth and calm. Others want brightness and pulse. A dark walnut kitchen with unlacquered brass may call for deep green, off-white, or smoky blue. A pale oak kitchen often handles terracotta, charcoal, or a muted patterned cement tile beautifully.
A backsplash should feel inevitable once it’s installed. Not busy. Not timid. Just right for the room around it.
That’s the standard to hold. Don’t choose a pattern because it looks striking in isolation. Choose the one that improves the whole kitchen.
Planning Your Project from Layout to Order
Most backsplash mistakes happen on paper before they happen on the wall.
A handmade Moroccan installation needs planning that respects variation. That means tighter measuring, clearer layout decisions, and a realistic ordering strategy. It also means accepting that a beautiful wall often depends on choices nobody notices later, such as where a pattern starts, how cuts die into a cabinet end, and whether the field centers on the range or the sink.

Measure the wall like an installer
Measure each backsplash area separately. Don’t treat one long kitchen wall as a single clean rectangle if it includes windows, cabinet offsets, a vent hood, or open shelving.
Record:
- Overall width and height of each run
- Countertop to upper cabinet distance
- Window trim interruptions
- Outlet and switch positions
- Any exposed ends or wrapped returns
Subtracting outlets for tile quantity sounds tidy, but in practice those cut areas still consume material. For handmade tile, it’s safer to count the wall field and let your overage absorb the cutting loss.
For help on the measurement side, this guide is a useful reference: https://originalmissiontile.com/how-to-measure-for-tile/
Build your layout before you order
At this stage, many patterned backsplashes either become elegant or awkward.
A centered layout often works best behind a range or sink wall, but not always. If the room has an off-center window, or if one side dies into a tall pantry cabinet, visual balance may matter more than pure symmetry. Dry layout matters even more when using star and cross, fish scale, arabesque, or repeating cement patterns.
A full mock-up on the floor or a scaled drawing will expose problems early:
- motifs cut in half at the most visible point
- tiny slivers at the end of a run
- outlets interrupting the center of a medallion or repeat
- corners where the pattern dies badly
Dry-fit the important moments first. The range wall, the sink wall, and any exposed edge decide whether the installation looks resolved.
Order enough for handwork, not just square footage
This part is not optional with Moroccan tile. Handmade material carries variation and produces more selective waste than factory-true porcelain.
For installation planning, guidance for handmade Moroccan tile recommends allowing 15-20% extra waste to account for cuts and natural variation (TileMart zellige installation guide). That overage protects you from the usual realities: chipped cuts, pattern matching, outlet notches, corner adjustments, and the simple fact that not every handmade piece belongs in the most visible section of the wall.
Use color planning with intention
Moroccan tile colors didn’t arrive all at once. Their palette expanded over 700 years, moving from 10th-century white and brown to green, blue, and yellow in the 14th century, with red added by the 17th century. Today, over a dozen vibrant options are still hand-glazed using natural mineral pigments (Global Brands Magazine overview of Moroccan tiles).
That matters in a practical way. It gives you permission to think historically about palette.
- White and brown sit well in restrained kitchens.
- Blue and green cool a bright room and play well with brass or dark wood.
- Red and earth-based tones warm painted cabinetry and natural stone.
- Mixed palettes can be beautiful, but only if the room around them stays disciplined.
If your backsplash is part of a wider remodel, broad planning resources like how to plan a home renovation can help sequence decisions so tile selection aligns with cabinetry, counters, and electrical placement instead of fighting them.
Ready-made or custom
Some projects need speed. Others need a pattern tuned to the room.
If you already know the field size, palette, and layout, ready-to-ship inventory can keep a schedule moving. If the room has a strong architectural personality, or if you need a color story tied to cabinetry or branding in a hospitality setting, custom design is the better route.
In this context, a design tool also earns its keep. Original Mission Tile offers an online Design Studio that lets designers and homeowners build custom motifs and color combinations, which is useful when an off-the-shelf pattern is close but not quite right.
The order should happen only after you’ve resolved three things: field dimensions, edge condition, and layout center. Anything earlier is guesswork dressed as progress.
Preparing Your Substrate and Materials
You can spot a rushed backsplash before the grout cures. Corners drift. Tile edges kick out where the wall bellies. Light from an under-cabinet strip catches every hollow and hump. Handmade Moroccan tile has too much presence to forgive that kind of prep.
Cement tile and zellige-style material both demand a wall that is clean, stable, and flat enough to support the variation already built into the tile. If the substrate is dirty, powdery, greasy, glossy, or patched without being flattened, the setting bed has to fight the wall before it can hold the tile.
Start with the wall, not the mortar
Put a straightedge on the surface first. Check across the full run, around outlets, and where backsplash meets counter and upper cabinets. Old kitchen walls often have more patchwork than expected, especially after demolition. Torn drywall paper, leftover mastic, heavy paint texture, and proud joint compound all need attention.
The goal is a surface that lets each tile sit with intention. Handmade material already carries slight thickness and edge variation. Add a wavy wall and the installer loses control of the finished plane.
Remove grease and dust completely. Scrape off residue. Sand or skim high and low spots as needed. Let repairs cure. Then prepare the surface according to what is present on the wall, whether that is new drywall, properly bonded paint, or a repaired plaster area.
For a broader overview of wall-tile prep and setting conditions, see Original Mission Tile’s guide to installing wall tile.
Match the setting materials to the tile body
Habit causes a lot of failures. Handmade cement tile is porous and thirsty. Glazed Moroccan tile is far less absorbent and presents a different surface at the face and edges. They should not be treated as if they were the same product with different colors.
For cement tile, white polymer-modified thin-set is usually the safer starting point on a backsplash because it supports bond and avoids muddying lighter tones. A penetrating sealer applied before grouting helps reduce staining on the face, especially with pale colors and intricate patterns. Grout choice matters too. Joint width, tile edge condition, and glaze hardness should guide whether sanded or unsanded grout makes sense.
Use a test board if there is any doubt. That small step settles questions about sealer compatibility, grout haze, color shift, and cleanup before the wall is on the line.
| Material | Recommended Type | Key Benefit |
|---|---|---|
| Thin-set mortar | White polymer-modified thin-set rated for wall applications | Supports bond and keeps light-colored tile work cleaner |
| Grout for delicate glazed surfaces | Unsanded grout | Reduces scratching risk and works well in tighter joints |
| Pre-grout sealer for cement tile | Penetrating sealer | Limits grout staining on porous tile faces |
| Final protective sealer for cement tile | Penetrating topcoat sealer rated for interior wall use | Helps resist routine kitchen splashes and staining |
| Spacers and leveling aids | Small spacers used selectively | Keeps joints consistent while respecting handmade variation |
Gather tools that support careful work
Good prep also means setting up the right kit before mixing anything. On a backsplash, delays happen fast once mortar is on the wall.
Keep these tools within reach:
- Notched trowel sized for the tile and wall condition
- Margin trowel for mixing, scraping, and back-buttering
- Buckets and a mixing paddle reserved for clean mortar and grout batches
- Tile saw with a sharp blade for outlet cuts, edge trims, and clean returns
- Straightedge and level for checking plane and line
- Sponges and clean water buckets for controlled grout cleanup
- Soft cloths for final haze removal and sealer application
I also keep extra kraft paper or a clean padded surface nearby for sorting and staging handmade pieces. Cement tile chips when it is handled carelessly on a hard counter, and glazed edges can scar if tiles are stacked face to face without protection.
Preparation decides how much control you have later. On a well-corrected wall, handmade Moroccan tile reads as intentional craft. On a bad one, every natural variation looks like an installation mistake.
The Art of Setting Handmade Cement Tiles
A backsplash can look perfect on the bench and still fall apart on the wall if the setting work lacks discipline. Handmade cement tile asks for slower hands, sharper judgment, and a layout eye that stays active from the first course to the last cut.
Factory tile lets an installer repeat the same move across the field. Handmade Moroccan tile does not. Each piece has its own face, edge, and slight variation in thickness. Good setting work comes from reading those differences early and using them well.

Sort before you spread mortar
Lay the tiles out face-up in good light before mixing anything. That is where the wall starts to take shape.
Check for tonal range, pattern direction, minor edge irregularities, and pieces with surface character strong enough for a focal area. Pull aside any tiles better suited to cuts under cabinets, behind small appliances, or near outlets. With patterned cement tile, I like to assemble several repeats on a padded surface first. It prevents a directional mistake that is expensive to correct once the mortar has cured.
For broader wall-setting methods, see this wall tile installation guide.
Control mortar coverage without flooding the wall
On a backsplash, more mortar does not mean better support. It usually means more cleanup, more lippage, and more struggle around outlets and trim details.
Use a notch size that matches the tile dimensions and the flatness of the wall, then spread only as much mortar as you can set while it is still fresh. Back-butter handmade cement tiles as needed to fill shallow irregularities on the back and help each piece seat fully. Then press and shift the tile into place with enough pressure to collapse the ridges.
Pull a tile now and then and look at the back. Full contact matters, especially near a range or sink where the wall gets daily use. Hollow spots are easier to prevent than to explain later.
Set the field by reference, not by hope
The first rows establish the whole installation. If they drift, every course above them inherits the problem.
Start from your control lines and check them often with a straightedge and level. Spacers can help, but handmade tile should not be forced into a rigid grid that fights its own edges. Use them selectively, then adjust by eye so the joints look balanced across the wall rather than mechanically identical at every point.
A few habits keep the work honest:
- Check the first courses constantly for level and joint consistency
- Step back every few rows to judge the pattern from normal viewing distance
- Keep the strongest full tiles in the most visible field
- Absorb small variations near cuts, corners, and covered areas
That last point matters. Viewers notice a wandering motif in the center of the backsplash long before they notice a slightly adjusted joint beside a receptacle cover.
Handmade tile should read as deliberate craft. It should never read as installer drift.
Cut with the finished wall in mind
Most backsplash failures in appearance happen at the edges. The field may be beautiful, but a rough outlet cut or awkward termination pulls the eye straight to the mistake.
Mark outlet and switch cuts from the installed position. Dry measurements help, but final marks should account for the precise joint width and the tile you selected for that spot. Verify the cover plate before cutting. A concealed cut is acceptable. A chipped, exposed notch through a key part of the pattern is not.
Make edge decisions early. If the backsplash dies into a cabinet, turns a corner, or ends on open wall, choose that treatment before the field is halfway up. Pattern wrap, clean return, trim solution, or finished edge all create different visual results, and each needs planning before mortar starts to skin over.
The video below shows the pace and hand control that backsplash work often requires.
Keep cement tile and zellige methods separate
Moroccan tile is not one material. Handmade cement tile and glazed zellige ask for different handling, different expectations, and often different installation habits.
Cement tile needs careful mortar coverage, gentle handling, and close attention to face protection because the surface is porous. Zellige has its own behavior, especially in edge variation, sheen, and setting rhythm. Treating them as interchangeable leads to poor decisions on the wall. The right method starts with knowing what is in the box.
Original Mission Tile works with handmade surfaces that reflect these variations. The installer’s job is to use that variation with restraint, so the finished backsplash feels lively, balanced, and built to last.
A good setter knows when to stop and correct a line. Resetting one drifting course takes minutes. Ignoring it can compromise the entire wall.
Grouting and Sealing for Lasting Beauty
Grout and sealer aren’t the final cosmetics on a Moroccan backsplash. They are part of the installation system.
That’s especially true with handmade cement tile. The surface is porous. It can absorb pigment, cooking residue, and everyday kitchen splashes if you leave it unprotected. Even when the pattern is beautiful and the setting work is solid, careless grouting can stain the face and flatten the entire look of the wall.

Seal before grout when the tile is porous
For handmade cement tile, pre-sealing is the safer path. A penetrating sealer applied before grouting helps the face resist pigment grab and gives you a cleaner wash during cleanup.
This isn’t about creating a plastic film. It’s about giving the tile enough protection that grout can fill the joints without locking haze and staining into the face. After grouting and full cure, a final topcoat sealer adds another layer of practical defense for life in a working kitchen.
Respect the joint width
The grout joint on handmade Moroccan tile isn’t just a design detail. It’s a structural accommodation for variation.
Guidance for irregular handmade zellige notes that the natural edge variations from hand-cutting and firing call for moderate grout joints, and that this helps prevent lippage and cracking. The same source notes that 20-30% of general tile complaints stem from poor grouting of irregular tiles (Perini discussion of Moroccan tile grouting).
That’s why ultra-tight joints done for appearance alone often backfire. They leave no room for handmade edges to breathe. The wall may look sharp for a moment, then read uneven or stressed once the full field is in.
Grout for the tile, not against it
Choose a grout that suits the surface and the joint. On delicate glazed surfaces, unsanded grout is often the safer choice because it reduces the risk of scratching. On handmade cement tile, control is the primary issue. Mix carefully, test first, and don’t let a dark or highly contrasting grout hijack a pattern that should remain the focus.
A disciplined grouting process looks like this:
- Test on a spare tile first to understand how the surface responds.
- Pack the joints fully without smearing excess across the wall for too long.
- Clean in stages with fresh water and clean sponges.
- Buff remaining haze gently once the grout firms up.
- Apply final sealer only after the grout has cured properly
Sealing is cheaper than replacing stained tile. In backsplash work, prevention is the more elegant repair.
Don’t chase an overly perfect look
Handmade Moroccan work should look intentional, not sterile. A slightly varied joint can still read beautiful if the overall layout is steady and the surface has been grouted with care.
The mistake is assuming authenticity means roughness. It doesn’t. Good grouting on handmade tile finds the line between precision and character. The joint supports the tile. It doesn’t dominate it.
If the tile is porous, sealing is not optional. If the tile is irregular, joint planning is not optional. Those are the two decisions that protect the installation long after the mortar has cured.
Long-Term Care and Professional Troubleshooting
A Moroccan backsplash ages well when the owner treats it like a crafted surface, not an indestructible one.
Routine care is simple. Use pH-neutral cleaners and a soft cloth or sponge. Skip harsh acidic products, abrasive pads, and aggressive degreasers that can dull the finish, attack the sealer, or leave the surface looking tired before its time.
What to do when something goes wrong
Minor issues don’t always require major intervention.
- Light grout haze often responds to careful buffing and a measured cleaning approach rather than panic scrubbing.
- A chipped edge can sometimes be made far less visible if the damage falls near a joint or termination.
- Small lippage is usually better addressed by evaluating visibility first. Not every handmade irregularity is a defect worth tearing out.
- Staining or darkening on cement tile often points back to sealing or cleaner choice.
The useful habit is to diagnose before reacting. Many backsplash problems get worse when someone reaches for the strongest cleaner or starts digging at the joint without understanding the material.
Finish details that separate ordinary work from refined work
Edge treatment matters more than people expect. Plastic trim may solve a transition quickly, but it often interrupts Moroccan patterning in a way the eye catches immediately.
Trade professionals often prefer custom miters over standard trims for backsplash edges. That approach uses a 45° cut with a diamond blade wet saw and can reduce rework by 40% compared with field trims when done correctly (YouTube trade guidance on mitered edges).
A well-made edge tells you whether the installer understood the tile or merely attached it to the wall.
For a kitchen that will stay in service for years, that edge decision matters. So does cleaner choice, prompt wipe-down of cooking splatter, and occasional review of whether the sealer still performs as intended. Good maintenance isn’t complicated. It’s consistent.
Frequently Asked Questions
Is a moroccan tile backsplash hard to keep clean
Not if the material is chosen and finished properly. Glazed surfaces wipe down easily. Handmade cement tile needs sealing and sensible cleaners. The maintenance burden usually comes from poor installation decisions, not from the pattern itself.
Can I use handmade cement tile behind a range
Yes, in a standard backsplash application. The key is correct substrate prep, careful setting, proper grout selection, and sealing that suits a working kitchen. The wall should be easy to wipe without saturating the tile face.
Should the pattern center on the sink or the range
Usually on the strongest visual anchor. In many kitchens that’s the range wall, but not always. If the sink wall has the clearer sightline or a more important architectural feature, center there instead. The room decides.
Are tight joints better for an authentic look
Only when the tile can support them. Handmade Moroccan tile needs enough joint width to absorb variation gracefully. Forcing overly tight joints on irregular material usually creates a worse result, not a better one.
Is this a good DIY project
A simple field can be manageable for an experienced DIYer with patience. Intricate patterns, exposed edges, outlet-heavy walls, and porous cement tile raise the difficulty. If you don’t have a feel for layout, mortar coverage, and grout control, hiring a tile professional is often the less expensive decision in the long run.
What’s the most common design mistake
Too much competition. A loud countertop, busy backsplash, strong cabinet grain, and multiple metal finishes can fight each other. Moroccan tile works best when the room gives it enough quiet around the edges.
If you’re choosing a moroccan tile backsplash and want material guidance grounded in actual craft, Original Mission Tile offers handmade cement tile collections, custom pattern options, and practical resources for design, installation, and care.