Most wood to tile transition ideas start and end with one question: which strip covers the gap? That's too narrow. The joint between wood and tile decides how a room reads, how moisture is managed, and whether the installation still looks deliberate after years of movement and wear.
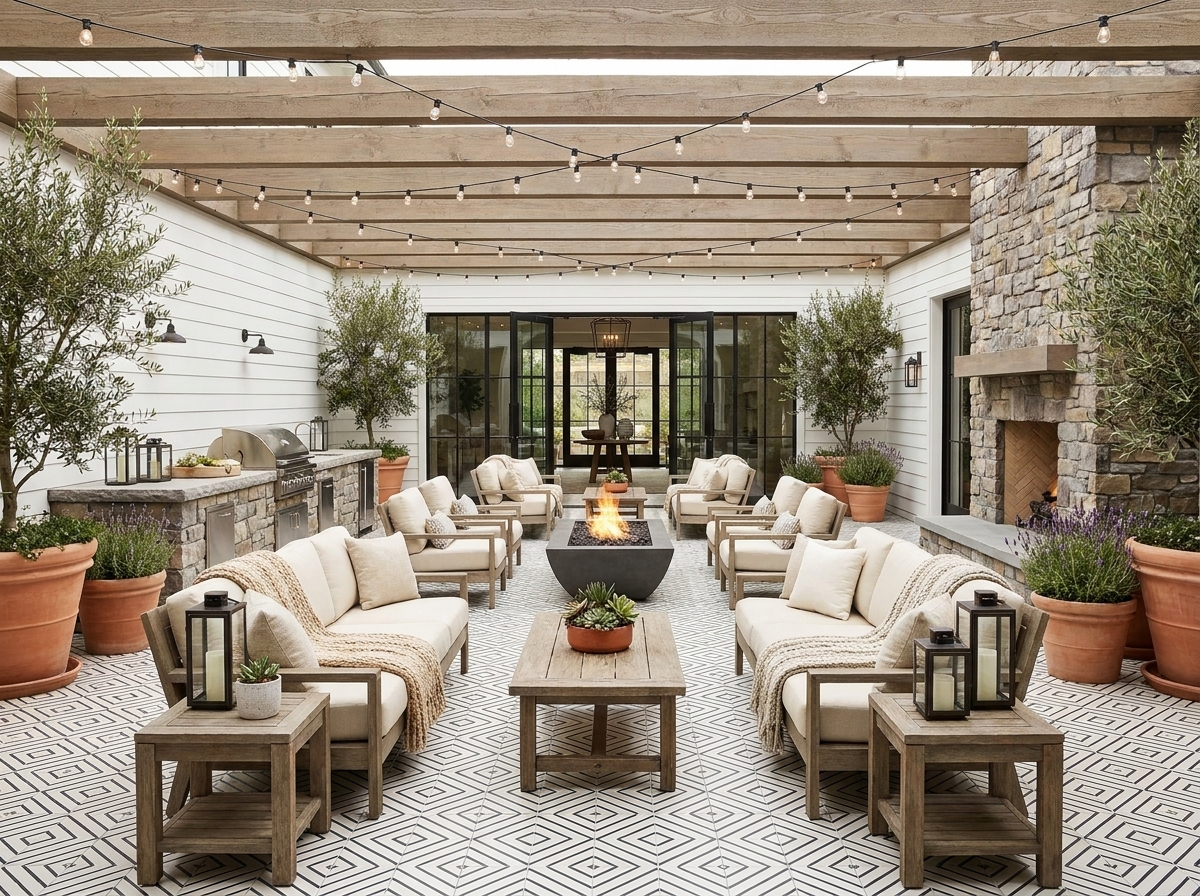
That matters even more in open layouts, where flooring often has to do double duty as both surface and spatial cue. Design guidance for kitchens increasingly treats tile around the sink, stove, and prep counters as the practical wet zone, with wood continuing into dining and circulation areas. In that setup, the transition isn't decorative trim tacked on at the end. It's part of the plan, and the method should match floor height, movement needs, and room geometry, whether that means a flush joint, T-mold, reducer, or threshold detail (Apollo Tile kitchen transition guidance).
There's also a longer material story behind this junction. A major reason homes moved from wood into tile in baths and kitchens was the industrial rise of ceramic tile, which made a durable, moisture-resistant finish broadly practical. That legacy still shows up in today's homes, where tile belongs in the highest-moisture zones and wood continues in adjacent living spaces, with the transition detail handling expansion gaps and uneven build-ups between the two materials (historical overview from America's Floor Source).
The best projects treat that seam as architecture. If you're working with handmade cement tile from Original Mission Tile, the transition deserves the same level of intention as the field tile, cabinetry, and lighting.
1. Threshold Strips and Metal Transitions
A metal threshold is still one of the most reliable wood to tile transition ideas. It survives traffic, protects the tile edge, and gives you a precise line when the room needs one. In kitchens and mudrooms, that crispness can be a strength, especially when the wood beyond has visible grain and movement.

Brass is especially effective with handmade cement tile, because it doesn't look like an afterthought. It reads as a finish choice. Original Mission Tile's brass-accented options pair naturally with a brass strip, and the result feels integrated instead of patched together.
Where Metal Works Best
Use this approach where one room needs a clear edge condition. Good examples include a hardwood living area opening into a tiled mudroom, a kitchen perimeter moving into a cement tile work zone, or a café-style residential kitchen where wood cabinetry and warm hardware already set the tone.
A few practical choices make or break the install:
- Match finishes intentionally: Coordinate the threshold with cabinet pulls, faucets, or lighting metals so the strip looks specified, not substituted.
- Route the wood accurately: If the profile sits in a groove, the groove depth has to match the strip thickness cleanly.
- Seal the edges properly: Use the right caulk at the perimeter so moisture doesn't migrate into the wood edge.
- Buy better hardware: If you're gathering supplies yourself, the category of important hardware for DIY homeowners is often underestimated.
Practical rule: A metal strip looks custom only when the line is dead straight. If the tile edge wanders, the metal will highlight every mistake.
For contractors who want a cleaner finish at the tile edge, it helps to review purpose-made tile trim and wall edge profiles before the tile is ordered. The transition should be selected while the floor build-up is still being planned, not when the setter is already mixing mortar.
2. Beveled and Bullnose Tile Edges
Not every transition wants a visible insert. In more handcrafted interiors, I often prefer the tile itself to solve the edge. A beveled or bullnose edge softens the meeting point and gives the tile a finished perimeter without adding a separate material.
That approach suits handmade cement tile particularly well. The slight irregularity and matte surface work in your favor, because the edge feels worked and intentional rather than factory-sharp. In a primary bath, for example, a patterned cement tile floor can meet adjacent wood with a rounded border tile that eases the visual shift.
Why This Feels More Architectural
Bullnose works best when you want the tile field to feel substantial. It frames the tile as a surface with thickness and presence. Beveled edges do something slightly different. They create a taper that guides the eye down to the wood instead of stopping abruptly at a hard corner.
This is especially effective in spaces where the transition is close to eye level from seated positions, such as kitchen islands with tile at the base or bath floors next to stained wood vanities.
A few things to watch:
- Start layout from the edge condition: Don't design the field first and hope the border works itself out.
- Sample the finish: Handmade cement tile varies subtly, and you want to see how the bevel or rounded edge reads under your actual lighting.
- Respect joint spacing: Narrow joints usually help the materials feel more unified, but handmade tile still needs enough tolerance for natural variation.
- Keep expectations realistic: Matte cement doesn't catch light the way glazed trim does. That's not a flaw. It's part of the material language.
The payoff is refinement. Done well, the transition looks like the tile was designed to terminate there from the beginning, which is always more convincing than retrofitting a stock strip.
3. V-Groove and Dado Rail Transitions
This one is less common, but in the right house it's excellent. A routed V-groove in the wood or a slim dado-style trim detail creates a controlled separation without introducing a standard floor strip. In heritage interiors, it often feels more appropriate than metal.
The V-groove version is subtle. The groove gives the seam a shadow line, which helps disguise the material change while preserving a flush feel underfoot. A dado rail approach is more pronounced. It uses a narrow stained wood trim or small upright detail at the boundary, often where the architecture is already traditional.
Best Fit for Period and Character Homes
Think Victorian, Edwardian, farmhouse, or mission-influenced interiors where the woodwork already carries visual weight. Original Mission Tile's classic patterns sit comfortably in that context, especially if the transition detail echoes nearby millwork instead of introducing an unrelated profile.
Good scenarios include:
- Restoration kitchens: Original oak flooring transitions into a patterned cement tile work zone.
- Mudrooms in older homes: A slim stained boundary detail helps the new tile feel consistent with existing trim language.
- Library or pantry entries: A shadow-line groove keeps the change discreet.
The more historic the room feels, the less convincing off-the-shelf metal usually looks.
This method does require careful execution. Router work has to be clean, stains have to match, and the wood detail must be sealed where it meets tile. If the floor sees frequent wet boots or pet bowls, I'd only use this approach if the moisture plan is solid. Otherwise, a more resilient transition detail is the smarter call.
4. Staggered or Offset Tile Layout
Some of the strongest wood to tile transition ideas avoid a straight line altogether. A staggered or offset layout lets the tile edge move with the pattern so the transition becomes part of the composition. That works especially well in open-plan spaces where flooring is expected to define zones instead of merely changing materials.
Recent design guidance has pushed this beyond doorway thinking. Curved edges, geometric inlays, and patterned borders are increasingly used to guide movement through kitchens, great rooms, and hospitality-style spaces. That's a more nuanced approach than hiding everything under a metal strip, and it treats the junction as a visual anchor when the room calls for one (Mercury Mosaics on unique tile transitions).

When to Break the Straight Line
This approach shines in open kitchens, large entries, and rooms where the tile has personality. Handmade patchworks, star and cross patterns, and geometric cement designs all benefit from a more expressive edge.
The trick is discipline. Freeform doesn't mean random.
- Draw it to scale: The transition shape should align with cabinetry, islands, door casings, or circulation paths.
- Use the tile pattern to carry the idea: Patchwork and directional patterns can make the edge feel intentional rather than jagged.
- Mind sightlines: What you see from the sofa, the island, and the front door should all support the same geometry.
- Hire for precision: Offset transitions expose sloppy cutting fast.
Where people go wrong is pushing too much pattern against highly active wood grain. If both sides compete, the floor gets noisy. Usually one side needs to lead and the other needs to support.
5. Grout-Line Caulking and Waterproof Barriers
This is the detail installers skip when they're focused only on appearance. At the exact point where wood meets tile, rigid grout is often the wrong material. Wood moves. Tile doesn't behave the same way. If you lock them together with a brittle joint, the seam usually tells you later.
A color-matched flexible caulk at the transition line does two jobs. It lets the joint move, and it helps block moisture at the most vulnerable edge. In kitchens, laundry areas, and bath-adjacent zones, that matters far more than people expect.
Where Flexibility Matters Most
If a cement tile floor wraps a sink wall, island, or prep zone and dies into wood, the edge should be treated like a movement joint, not just a grout line. The same applies where tile flooring meets wood cabinetry toe kicks or wood flooring near a bathroom threshold.
Use a methodical approach:
- Choose the right sealant: In wet locations, use a suitable silicone or urethane product rather than a paintable acrylic-latex shortcut.
- Prime or protect the wood edge: Raw wood at the seam is asking for trouble.
- Color-match the joint: When the sealant matches the grout, the transition reads cleaner.
- Inspect it over time: Flexible joints are maintenance items, not install-and-forget details.
Before setting tile over mixed substrates, it's worth reviewing subfloor moisture barrier guidance so the joint detail isn't working alone. A beautiful transition won't compensate for moisture moving up through the assembly.
A cracked joint at the wood edge is usually a materials problem first, and a cosmetic problem second.
This isn't the most glamorous option on the list, but it's one of the most important. The most elegant handmade tile installation in the room can be undermined by one poorly handled seam.
6. Sloped and Ramped Transitions
When the floor heights don't cooperate, I'd rather solve the geometry than pile trim on top of it. A sloped or ramped transition can make a difficult condition feel calm underfoot and visually deliberate. It's common in accessible design, but it also belongs in high-end residential work where abrupt lips would cheapen the result.
This method works well in spa baths, sunken tile zones, and hospitality-style interiors where the material change should feel gradual. Instead of announcing the problem, the floor absorbs it.
A Good Solution for Height Mismatches
Tile assemblies and wood floors rarely build to exactly the same finish height. If the discrepancy is meaningful, a ramped substrate or custom tapered transition is often better than a last-minute reducer, especially in broad openings where people pivot and carry things.
Good applications include a primary bath transitioning from wood into terracotta or cement tile, an aging-in-place remodel, or a large kitchen where the tile zone has to sit slightly proud for technical reasons.
Keep these points in view:
- Plan the structure early: This isn't a finish trick. The subfloor and underlayment need to be coordinated before flooring starts.
- Waterproof the full sloped area: In wet rooms, the transition zone is part of the assembly.
- Align the slope with the room: It should follow movement patterns and visual lines, not cut across them awkwardly.
- Use one tile language across the incline: Mixed tile formats on a ramp usually look busy.
The main trade-off is labor. A good ramped transition takes more planning and often more field adjustment. But when the alternative is a clumsy step between two premium materials, the extra effort is justified.
7. Mixed Material Borders and Transition Strips
If the transition deserves emphasis, a decorative border is one of the strongest moves available. A narrow band of contrasting or coordinating tile can bridge wood and field tile while acting as its own design event. Artisanal material really shines in such an application.
Design guidance repeatedly recommends narrow grout joints and closely related plank widths when you want wood and tile to feel visually fused in open layouts. By contrast, patterned borders and mixed-material curves work when the goal is to signal a zone change clearly, especially where kitchens, living areas, and thresholds overlap (Tile Club on tile-to-wood transition design).
Turn the Seam Into a Border Condition
A border can be quiet or expressive. A single-color band in a handmade format can soften the move from wood into patterned tile. An arabesque, hex, or zellige-inspired strip can make the transition feel ceremonial, which is often right for entries, powder rooms, and feature kitchens.
Smart uses include:
- Kitchen perimeters: A narrow handmade border outlines the work zone around the island or sink run.
- Vanity areas: A decorative band separates wood-front cabinetry from the tile field below.
- Entry thresholds: The border acts like a rug edge, but it's permanent and easier to maintain.
What works best is proportion. If the room is small, the border should stay disciplined. If the room is large and open, the border can carry more pattern. I also like tying the border to another surface, such as the backsplash, stair riser tile, or fireplace surround, so the detail doesn't feel isolated.
8. Floating Floor and Underlayment Solutions
Some transitions look simple only because the substrate work was excellent. When one side is a floating wood floor and the other is adhered tile, the assembly matters as much as the finish detail. You need both materials to move the way they're supposed to move without telegraphing stress into the seam.
Underlayment, uncoupling layers, and movement planning earn their keep. With handmade cement tile, which can have slight natural thickness variation, that preparation becomes even more important because the setter has less room to fake a flush result after the fact.
A useful visual reference appears below.
Build the Transition Before You Finish It
In larger renovations, especially over concrete slabs, radiant systems, or mixed old and new subfloors, the right underlayment strategy can save the finished edge. The goal is straightforward. Let the wood floor remain independent where it needs to, and support the tile field so movement and minor substrate irregularities don't crack the installation.
Useful priorities include:
- Select the underlayment with the tile in mind: Handmade cement tile needs a flat, appropriate base.
- Account for total floor build-up: Door clearances and adjacent room transitions should be known before finish materials are fixed.
- Document the assembly: Future repairs get harder when nobody remembers what sits under the floor.
- Use professional flooring tools when needed: For wood-side installation, something like a Dewalt 2-in-1 pneumatic flooring tool can help maintain consistency on the plank side of the seam.
For projects using mixed flooring systems, Original Mission Tile's guidance on floor underlayment for tile is worth reviewing before layout begins. By the time the trim profile is being debated, the important decisions should already be made.
8-Point Wood-to-Tile Transition Comparison
| Transition Type | Implementation Complexity 🔄 | Resource Requirements ⚡ | Expected Outcomes ⭐📊 | Ideal Use Cases | Key Advantages 💡 |
|---|---|---|---|---|---|
| Threshold Strips and Metal Transitions | Moderate, precise routing or thin‑set installation | Low–Moderate, metal strips, fasteners, routing tools, caulk | ⭐ Clean, finished look; 📊 Protects edge and moisture entry | Kitchens, entryways, commercial thresholds with small height differences | Durable, replaceable, coordinates with hardware |
| Beveled and Bullnose Tile Edges | Moderate–High, custom tile edges and exact placement | Moderate, custom bullnose/bevel tiles, skilled tiler, longer lead times | ⭐ Elegant, seamless edge; 📊 Reduces trip hazard, high aesthetic value | Baths, islands, decorative perimeters, artisan tile installations | Matches tile for seamless finish; highlights craftsmanship |
| V‑Groove and Dado Rail Transitions | High, carpentry/routing precision required | Moderate, router/CNC, wood trim, sealant, carpenter | ⭐ Subtle, understated transition; 📊 Minimal visual interruption | Heritage restorations, period interiors, mission‑style projects | Historically accurate, removable/replaceable trim |
| Staggered or Offset Tile Layout | High, advanced planning and pattern execution | Moderate–High, extra tile, design time, experienced installer | ⭐ Transition becomes a design feature; 📊 Masks irregularities, adds flow | Open plans, patchwork or artistic tile schemes, focal entryways | Flexible, transformative aesthetic; custom pattern integration |
| Grout‑Line Caulking and Waterproof Barriers | Low–Moderate, prep and correct product application | Low, quality caulk, waterproof membrane/primer, tooling | ⭐ Flexible waterproof seal; 📊 Protects wood, accommodates movement | Wet areas (kitchens, bathrooms, laundry) where moisture control is critical | Repairable, essential moisture protection for wood/tile junctions |
| Sloped and Ramped Transitions | Very High, subfloor regrading and structural work | High, contractor/engineer, waterproofing, extended materials | ⭐ Eliminates trip hazards; 📊 Provides accessibility (ADA possible) | Accessible design, luxury spa baths, commercial/ADA‑compliant spaces | Full accessibility and refined architectural expression |
| Mixed Material Borders and Transition Strips | Moderate, design coordination and precise layout | Moderate, decorative tiles/borders, design services, installer | ⭐ Intentional visual bridge; 📊 Enhances continuity and richness | Entryways, kitchens, feature thresholds, custom design schemes | Customizable, showcases artisan tiles and materials |
| Floating Floor and Underlayment Solutions | Very High, engineered systems, uncoupling and joints | High, membranes/underlayments, expansion joints, pro installers | ⭐ High‑performance, movement‑tolerant system; 📊 Prevents cracking, improves longevity | High‑end residential, radiant heat systems, mixed‑material installations | Long‑term reliability; accommodates handmade tile variation |
Choosing the Right Transition for Your Project
The right transition does more than close a gap. It protects the edge, manages movement, and tells the eye how to read the room. That's why the best wood to tile transition ideas are rarely chosen at the end of the job. They're selected when the floor heights, room lines, moisture exposure, and material palette are still being shaped.
For straightforward conditions, metal thresholds remain a dependable choice. They're especially effective in kitchens, mudrooms, and entries where the seam needs edge protection and a disciplined line. Bullnose and beveled tile edges work better when you want the tile to finish itself, particularly in handcrafted interiors where a separate strip would feel too commercial.
More architectural solutions ask a different question. Should the transition disappear, or should it organize the room? If you're defining a wet kitchen zone within an open living area, a patterned border or offset layout can do real design work. If the floor height is difficult, a ramped substrate often produces a better experience than forcing a reducer where it doesn't belong. If the tile meets wood near water, flexible joints and moisture control aren't optional. They're the difference between a detail that ages gracefully and one that starts failing at the perimeter.
Handmade cement tile raises the bar in a good way. It has enough visual presence that a generic transition often feels underspecified. Original Mission Tile's collections, whether classic patterned squares, hexagons, arabesques, terracotta, or brass-accented designs, give you enough range to either quiet the seam or celebrate it. That flexibility is valuable because not every room wants the same answer.
I usually tell clients and builders to judge the transition against three things. First, how the room functions. Second, how the materials move. Third, how visible the seam will be every day. If the detail supports all three, it's probably the right one.
For early planning, even a simple estimating tool can help clarify layout and quantities before the detailing gets more specific. A Room Sketch 3D flooring calculator is a useful starting point for mapping the extent of wood and tile zones.
Use these ideas as a framework, then adapt them to the architecture instead of forcing a stock answer. The strongest projects treat the transition as part of the design language from the beginning, not a strip someone picks from a bin on install day.
Original Mission Tile brings that level of intention to the material itself. Explore Original Mission Tile for handmade cement tiles, in-stock patterns, custom design options, and installation guidance that helps you turn a necessary floor junction into a lasting architectural detail.