You're probably looking at an old tile floor and thinking the same thing most homeowners and even some contractors think at first: if the existing tile is already flat and hard, why tear it all out?
That instinct is understandable. Demolition is loud, dirty, and expensive in both time and disposal. Tiling over tile can spare you the mess, but only when the existing installation is sound enough to act as part of the new assembly. If the old layer is failing, the new layer then inherits that failure.
That's the part people underestimate. Learning how to install tile over tile isn't mainly about spreading mortar and setting new pieces. It's about deciding whether the old floor deserves to stay. A clean-looking tile surface can still hide loose bond, structural movement, trapped moisture, or just enough added height to create problems at every doorway in the room.
For standard ceramic or porcelain, that decision is already serious. For handmade cement tile, it matters even more. Cement tile is dense, beautiful, and unforgiving of a weak substrate. Its matte, porous surface also changes how you handle sealing and grouting. A rushed overlay can ruin both the bond and the finish.
Is Tiling Over Tile a Good Idea
A tile-over-tile job can save a room from days of dust, debris, and substrate repair. It can also trap a bad installation under an even heavier finish and turn a manageable problem into a full replacement later. Whether it is a good idea comes down to structure, bond, and material choice, not convenience.
An overlay works only when the existing tile is acting like a sound part of the assembly below it. The old surface has to stay put under foot traffic, accept the prep system you plan to use, and carry the added thickness and weight without creating new trouble at transitions, cabinets, or appliances. If you want a practical example of where that trade-off starts, this guide on a concrete over tile floor DIY approach shows why the substrate decision comes first.
When it makes sense
Tiling over tile makes sense on a floor that is flat, well bonded, dry, and stable, where demolition would create more disruption than value. I see it used most often in occupied kitchens, retail refreshes, and older homes where tearing out the existing tile risks damaging a mortar bed or finished walls that are otherwise worth preserving.
The method itself is recognized in industry practice. MAPEI lists tile-over-tile systems that require a properly prepared existing surface, a bonding primer, and the right mortar for the new tile assembly, as shown in its tile over tile installation guidance. That should tell you what this method really is. It is a system build, not a shortcut.
A sound overlay can perform well for years. A marginal one usually fails at the weakest original tile.
When it is the wrong move
Tiling over tile is the wrong choice if the old installation shows hollow areas, cracked tile, recurring moisture, substrate movement, deteriorated grout, or obvious height conflicts. It is also a poor choice when no one can tell you what is under the tile and the floor already feels suspect. In that case, removal buys clarity.
Height alone takes many overlay jobs off the table. Adding primer, mortar, and new tile can interfere with dishwasher clearance, exterior door swing, toilet flange height, stair riser consistency, and transitions into wood flooring. Those are not cosmetic details. They affect function, code, and safety.
Handmade cement tile raises the standard further. Cement tile is heavy, porous, and less forgiving than many glazed porcelains if the substrate moves or moisture is mishandled. On a weak overlay, the common failures are not subtle. You see cracked grout, lippage at edges, shading problems from improper sealing, and staining that gets locked into the face.
The right way to judge it
The first question is not whether you can bond new tile to old tile. In many cases, you can. A more important question is whether the existing assembly deserves to stay in service as the base for a finish you expect to last.
If the answer is yes, tile over tile can be a smart method. If the answer is uncertain, tear-out is usually the better craft decision.
The Critical Go/No-Go Decision When to Tear Out Old Tile
The success of a tile-over-tile installation depends on one hard truth. The old floor must be 100% solidly bonded. Not mostly solid. Not solid except for one corner near the dishwasher. Every tile matters, because one weak area can telegraph failure into the new surface.

Start with the tap test
Use a hard object and tap every existing tile. A properly bonded tile sounds solid and sharp. A hollow sound tells you the adhesive bond underneath has failed or weakened. That tile has to come out, and once you start finding multiple hollow tiles, the honest answer is usually full removal.
This isn't overly cautious. It's basic bond logic. New tile can't stabilize a failed layer below it.
Use this go or no-go checklist
- Bond check: Tap every tile. Any hollow-sounding tile is a no-go until removed.
- Damage check: Look for cracked, loose, or missing tiles.
- Grout condition: Inspect grout lines for breakdown, movement, or areas that have turned sandy and weak.
- Moisture signs: Watch for mildew, staining, darkened grout, or recurring dampness.
- Flatness and movement: Walk the floor and feel for bounce, deflection, or ridges.
- Perimeter clearance: Check doors, trim, cabinets, appliances, and transitions.
- Structural confidence: If you don't know whether the floor system can handle the added assembly, stop and verify before tiling.
A tile overlay succeeds or fails before the first new tile is set.
What failure looks like in the field
The common mistake is treating prep as cosmetic. It isn't. The existing tile is now part of the substrate, so any weakness in it becomes a weakness in the finished floor.
A widely cited warning from Mr. Handyman's guidance on installing tile over tile is worth taking seriously: skipping mechanical abrasion can reduce bond strength by 60%, and failure rates are 40% higher than single-layer installs when subfloor integrity isn't verified. Those two mistakes. poor bond prep and ignored structure. account for a huge share of bad overlays.
If you're comparing overlay methods, it helps to review a hands-on breakdown of concrete over tile floor DIY methods because many of the same judgment calls apply. Surface soundness still comes first.
Tear-out is required when you find any of these
| Condition | What it means | Decision |
|---|---|---|
| Hollow tiles | Bond failure under existing finish | Tear out failed areas, often full removal |
| Loose or cracked tile | Movement already exists | Full repair before any new finish |
| Moisture or mold | Ongoing underlying issue | Solve source first |
| Soft or bouncy floor | Structural movement below tile | Stop and evaluate framing/subfloor |
| Height conflicts | Doors, appliances, thresholds won't clear | Rework plan or remove old tile |
A clean old floor can fool people. Soundness is what counts, and if you don't have it, tear it out.
Calculating Load and Height The Hidden Structural Risks
A tile overlay adds more than style. It adds weight and thickness, and both can create problems that don't show up until after the room is finished.

The tile itself is only part of the load. Mortar, primer, patching, and any underlayment changes all count. Height is just as practical. A floor that gains too much build-up can interfere with doors, alter stair transitions, trap appliances in place, and create awkward threshold lips that feel wrong every time you walk through the space.
What the numbers actually mean
Many online guides are often too vague on this matter. According to Tiles of Europe's discussion of tiling over tile, adding 1.5 inches of cement board plus two tile layers can increase floor load by 25% beyond original design, and an added weight of 15–20 lbs/ft² can surpass the standard 16-inch joist capacity in many homes.
That doesn't mean every floor is unsafe. It means you can't assume capacity.
If the home is older, if the room has noticeable movement, or if the tile you plan to install is heavy, the floor system needs a closer look. In some remodels, the smarter money goes into subfloor correction or framing reinforcement before any finish work starts.
If the floor has visible cracks in nearby slab areas, settlement signs, or other structural symptoms, resources on concrete and masonry fixes for homeowners can help you identify when the problem extends beyond tile alone.
What to check before you proceed
Use a tape measure, a straightedge, and your eyes. You don't need to overcomplicate the first pass.
- Joist spacing: Standard 16-inch spacing is common, but capacity still depends on span, lumber condition, and overall framing.
- Deflection signs: Look for bounce underfoot, sagging transitions, cracked grout, or baseboards separating slightly from the floor.
- Door swing and trim: Measure the finished height, not just the tile thickness. Include primer, mortar, and the new tile.
- Appliance clearance: Dishwashers and under-counter appliances can become difficult to remove after the floor height increases.
- Transition planning: Adjacent flooring may need reducers or rebuilt thresholds.
When a floor is already close on height, even a technically sound overlay can be the wrong practical choice.
If you need a clearer sense of what the floor build-up is doing below the finished surface, a guide to installing a subfloor correctly is useful context. It helps you trace where stiffness and failure resistance really come from.
For handmade cement tile, I'd be more conservative than I would with a basic light ceramic. It's not because cement tile is fragile. It's because a premium finish deserves a floor assembly that won't move.
Prepping the Surface for a Permanent Bond
A tile-over-tile job usually fails at the bond line, not in the new tile. If the old surface is still carrying grease, soap residue, wax, sealer, or loose glaze, the mortar is being asked to stick to contamination instead of substrate.

Old tile has two common problems. It is too slick, and it is rarely as clean as it looks. Good prep solves both by removing contaminants and giving the bonding system a surface it can grip.
Clean for bond, not appearance
Start with a serious degreasing wash. Use TSP or a heavy-duty cleaner rated for tile and stone-safe prep work, then scrub the floor as if you are removing years of maintenance products, because you usually are. The National Tile Contractors Association's technical reference on tile-over-tile methods also calls for cleaning the existing surface before abrasion and priming, as outlined in its tile-over-tile installation discussion.
Kitchen floors are the worst for hidden contamination. Bathrooms are close behind. If rinse water still beads up or the surface feels slick after it dries, clean it again.
Let the tile dry fully before sanding. Wet residue and sanding dust make a paste that stays in the scratches you are trying to create.
Abrade the glaze until the surface has tooth
Glossy ceramic and porcelain need mechanical profile. A 60-grit pad on an orbital sander works well on open areas. On harder or tighter surfaces, a carborundum stone or disk gives better control around edges and near walls.
The goal is not to grind through the tile. The goal is to break the factory finish across the whole field, including perimeter pieces and high spots on old lippage. Run your hand over the floor after vacuuming. It should feel uniformly dull and slightly coarse.
If it still feels smooth, keep going.
Vacuum thoroughly, then wipe or wash off the dust. Fine powder left on the tile can interfere with primer just as surely as grease can.
A skim coat over the old grout joints is often worth the extra pass. It reduces the chance of the old joint pattern telegraphing into the new work and gives small-format tile a flatter setting surface. Let that coat cure before primer if the product data calls for it.
For broader assembly questions, this guide to underlayment for tile floors helps clarify when surface prep alone is enough and when the floor build-up needs a more careful plan.
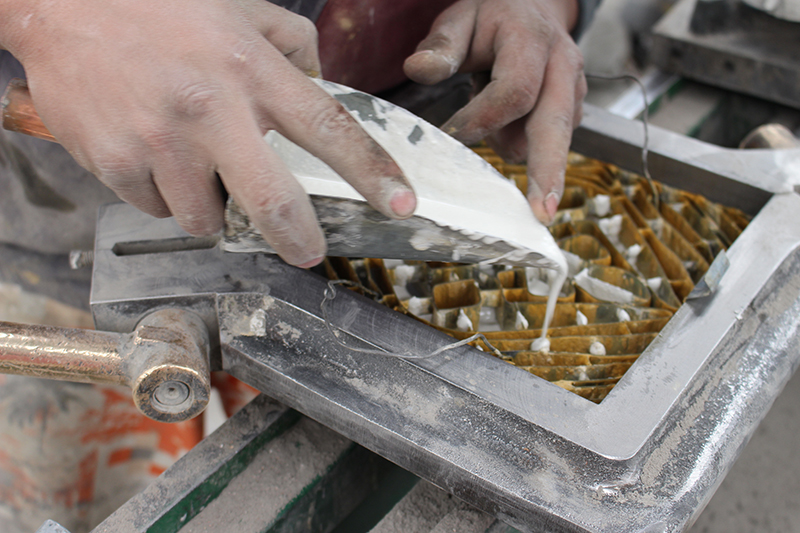
Here's a useful visual reference before moving to primer and mortar:
Prime with a system made for non-porous tile
After cleaning and abrasion, apply a bonding primer approved for dense, non-absorptive surfaces. Product choice matters here. Use the primer and mortar as a system, not as a mix of whatever is on the shelf. Manufacturers such as MAPEI and other setting-material brands publish tile-over-tile primers for exactly this application, and their instructions on mixing, open time, and cure condition should govern the job.
Some floors can be set successfully with the right polymer-modified mortar over a properly prepared surface. Others benefit from a dedicated bonding primer first. The trade-off is simple. Extra prep time costs less than a failed floor.
For handmade cement tile, I take an even stricter view. Cement tile is porous, heavier than many ceramic products, and far less forgiving of movement or bond failure beneath it. Any dust left behind, any weak skim, or any missed glossy patch can show up later as cracked grout, hollow spots, or staining trouble during finishing.
Use this sequence:
- Degrease and scrub the old tile with TSP or a heavy-duty cleaner.
- Rinse completely so no cleaner film is left behind.
- Abrade the glazed surface until the finish is uniformly dull and rough.
- Vacuum and wipe down the dust so primer contacts tile, not powder.
- Skim low grout joints if needed to flatten the setting plane.
- Apply the specified primer for your tile-over-tile system.
- Let it reach the required cure or tack stage before setting tile.
The same discipline applies on walls, especially behind cooking areas where grease contamination is common. If you are also installing a stove backsplash, surface prep matters just as much there as it does on a floor.
Poor prep does not always fail on day one. It fails after service starts. The floor sounds hollow, grout begins to crack, and the bond lets go where the surface was never adequately ready.
Installation Setting and Grouting Your New Tile
A tile-over-tile installation succeeds or fails during setting. Once mortar is on the floor, every decision affects bond, coverage, height, and long-term movement.

Lay out the room before mixing mortar
Snap control lines and dry-lay enough tile to see the room, not just the first few rows. Start from the layout that gives you the best visual balance through the main sightline and at the most visible thresholds. In older houses, I trust the lines I establish, not the walls.
Order extra tile before the first bag of mortar is opened. The Tile Council of North America advises allowing for cuts, waste, and attic stock, with the amount varying by tile type and layout complexity in its material estimating guidance.
Check doors, casing, appliances, and transitions one more time here. This is the last clean point to catch a bad height decision before it becomes an expensive one.
Use a mortar rated for tile over tile
Old tile is a low-absorption surface, so bond strength matters more than speed. Use a mortar approved by its manufacturer for going over properly prepared existing tile, and follow that system exactly. The ANSI A118 standards spell out the performance categories for mortars and other setting materials, which is the right place to verify whether the product fits this application through the Tile Council of North America reference to ANSI installation materials standards.
Trowel size depends on the tile, the flatness you achieved in prep, and the coverage you are getting in the field. Pull tiles periodically and inspect the back. Mortar should be transferred across the tile, not sitting in neat ridges with voids between them. On floors, especially with larger formats, back-buttering is often the difference between a solid installation and hollow spots later.
Work in small sections. If the mortar skins over, scrape it up and reapply fresh material. Setting into skinned mortar is one of the quiet ways a floor fails.
Special handling for handmade cement tile
Handmade cement tile needs a cleaner, slower installation approach than glazed ceramic or porcelain.
The face is porous. Pigment sits near the surface. If mortar smears, dirty rinse water, or grout haze are allowed to sit, the stain can become part of the tile. Use a penetrating sealer approved for cement tile before grouting, and test it on a sample or spare piece first. The Ceramic Tile Foundation on cement and encaustic tile care outlines why pre-sealing and careful cleanup matter on these products.
Keep joints clean as you set. Do not force heavy cement tile down with a twisting motion that pushes mortar into every joint. Set it firmly, beat it in evenly, and move on. Good spacing and clean edges matter more with artisan tile because minor irregularities are part of the look, but sloppy setting still reads as sloppy.
Grouting and cure time
Let the mortar cure before grouting, based on the mortar manufacturer's instructions and the site conditions. Over old tile, drying can take longer because moisture has fewer places to go. Cool rooms, dense tile, large-format pieces, and limited airflow all slow that cure.
Choose grout by joint width and by the tile itself. Unsanded grout is generally used in tighter joints. Sanded grout is used in wider joints where shrinkage resistance matters. For handmade cement tile, epoxy and heavily pigmented grouts need extra caution unless the tile maker and sealer manufacturer both approve them. I prefer mockups here because a small test panel will tell you more than a label.
Wash grout with discipline. Use clean water, change it often, and do not flood the floor. On cement tile, the goal is to remove residue without driving dirty water into the face.
After grouting, honor the cure time before traffic, washing, or sealing. If the floor ties into wall work, details on installing a stove backsplash can help you coordinate joint lines, cuts, and finish choices across the room.
Final checks before calling it done
A proper punch list catches problems while they are still fixable.
| Check | What to confirm |
|---|---|
| Coverage | Tiles are fully supported with no rocking or hollow-sounding corners |
| Alignment | Joint width stays consistent and the layout holds its lines |
| Perimeter | Cuts are clean and movement gaps are left where required |
| Doors and trim | Finished height clears, swings, and transitions properly |
| Surface cleanliness | No cured haze or pigment residue remains on the face |
| Sealing | Cement tile and grout are sealed where the system requires it |
A finished overlay should feel solid underfoot, stay flat through seasonal changes, and clean up without revealing haze, cracks, or loose edges.
Frequently Asked Questions About Tiling Over Tile
How does tile-over-tile change with large format tile
Large format tile raises the stakes. Bigger pieces show every dip, ridge, and out-of-plane spot in the old surface, so a floor that looked serviceable under small tile can fail a flatness check once the tile size increases.
That usually means more surface correction before setting begins. It also means better mortar coverage, tighter control of lippage, and a realistic look at finished height. On floors, I treat large format overlays as a geometry problem first and a setting problem second.
What are the early signs that an overlay is failing
Failure rarely starts with a dramatic break. It starts with hairline grout cracks that return after repair, a new hollow sound where the floor used to ring solid, loose transition strips, or isolated corners that feel sharp underfoot because the tile has lifted slightly.
Watch doorways, appliance fronts, and long runs that get sun or temperature swings. Those areas often show movement first. If moisture is involved, staining at grout joints or persistent darkening can point to a deeper problem behind the original tile.
Can you tile over tile if the old installation has hairline cracks
Sometimes, but the crack pattern matters. A single hairline crack in grout is different from repeated cracking that traces the same line through multiple tiles. Repeating cracks usually mean movement in the substrate or a control joint that was ignored.
If the old surface is cracked because the structure moves, a new layer will not solve it. The Tile Council of North America movement joint guidance is a good reference for where movement accommodation is required and why those joints cannot be buried without a plan.
What changes if the new tile is handmade cement tile
Handmade cement tile adds weight, thickness, and moisture sensitivity. That combination deserves a stricter review of the floor system, especially on framed floors where deflection, buildup, and finished height can all tighten your margin for error.
The setting bed also needs discipline. Cement tile can draw moisture from mortar and grout differently than dense porcelain, and the face can stain during installation if the sealer, grout, and cleanup method are not compatible. I always want a mockup with the exact tile, grout color, sealer, and wash process before the main installation starts.
Can radiant heat stay on during a tile-over-tile installation
No. Heat should be off long enough for the substrate, old tile, mortar, and new tile to stay within the product manufacturer's temperature range during installation and cure. Turning the system on too soon can speed moisture loss, weaken bond development, and telegraph stress into fresh grout joints.
Bring the system back gradually after the full cure period. Fast temperature swings are hard on overlay work.
Is a tile-over-tile floor harder to repair later
Yes, and that is one of the trade-offs owners should understand before choosing an overlay. Future repairs can be more difficult because matching height at transitions is harder, removing one failed tile can disturb the layer below, and replacement tile may no longer align cleanly with existing trims, cabinets, or adjacent rooms.
Overlay saves demolition today. It can complicate service work years from now. That is not always a deal breaker, but it should be part of the decision.
If you're planning a tile project and want materials that reward proper installation, Original Mission Tile offers handmade cement tile with the depth, character, and artisan finish that make careful prep worth it. Their team can help homeowners, designers, and builders choose the right tile for floors, walls, and custom applications.