When you hear “pool tile cleaning,” you might picture someone just scrubbing away at the waterline. But it’s so much more than that. It’s the process of carefully removing calcium scale, stubborn algae, and general grime to bring back your tile’s original beauty and prevent serious long-term damage.
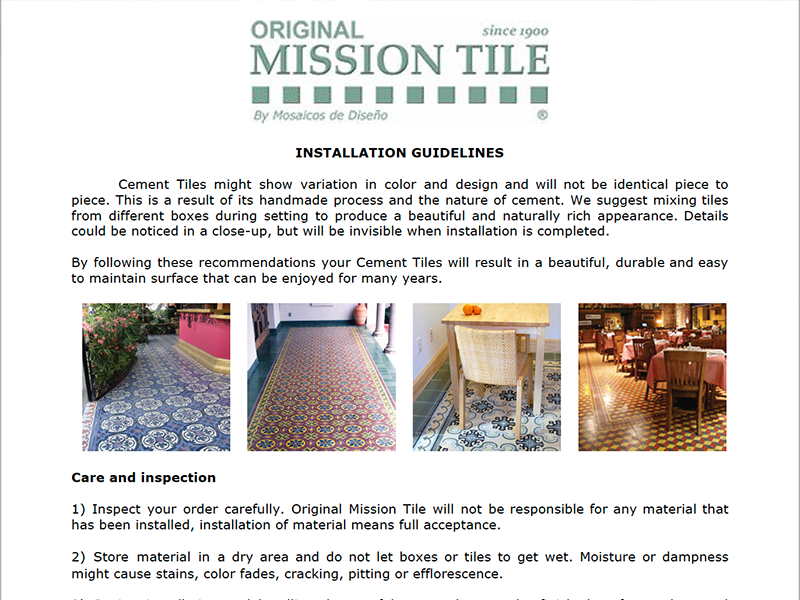
Getting it right means using specialized cleaners and tools that are a good match for your specific tile—whether that’s durable porcelain, delicate glass, or porous, handmade cement tiles. This guide will walk you through exactly what you need for a sparkling finish that lasts.
Why Pool Tile Cleaning Is Essential
Ignoring your pool’s tile line does more than just drag down your backyard’s vibe. That chalky white buildup or greenish slime is a warning sign of bigger issues that can cause permanent damage if you let them slide. Honestly, keeping your tiles clean is a core part of pool maintenance, protecting both the look and the structure of your investment.
Protecting Your Investment
Think of proper cleaning as preventative care, not just a cosmetic touch-up. The mineral deposits and algae that build up at the waterline can actually etch and stain tile surfaces over time. This is especially true for porous materials like handmade cement tiles, where stains can seep deep into the tile body and become almost impossible to get out.
The financial side of this is huge. Homeowners are spending more on high-quality pool care, a trend you can see in the booming global pool cleaning and maintenance market. Valued at USD 26.92 billion in 2025, it’s projected to climb to USD 36.09 billion by 2029. That growth shows just how much people value professional-grade maintenance to protect their pools.
By dealing with buildup early, you sidestep the need for costly tile replacement or aggressive restoration services that could damage your tile down the road. It’s the smartest way to protect the value and lifespan of your pool.
Preserving Pool Health and Safety
That gunk on your tiles isn’t just ugly—it’s a breeding ground for bacteria and algae. These contaminants throw off your pool’s water chemistry, making your sanitation system work overtime and driving up your chemical costs. Not to mention, a slippery biofilm along the waterline is a real safety hazard.
A consistent cleaning routine makes for a healthier swimming environment by:
- Removing the organic buildup that algae loves to feed on.
- Preventing rough calcium deposits that can scratch swimmers.
- Keeping your water chemistry balanced by getting rid of contaminants at the source.
For those of us in certain regions, knowing how to handle local challenges like hard water is a game-changer. You can find more targeted advice in a complete guide specifically for Arizona pool tile cleaning. No matter where you live or what kind of tile you have, this guide will give you the confidence to tackle the job right.
Choosing the Right Cleaners for Your Pool Tiles
Before you grab a scrub brush, the single most important decision you’ll make is picking the right cleaning solution. This isn’t just about getting the grime off. Using the wrong product can do more than just fail to work—it can permanently damage your beautiful tile. The same cleaner that makes glazed porcelain sparkle could etch and ruin handmade cement tiles in minutes.
It all starts with knowing exactly what kind of tile you have. Glazed ceramic and porcelain are the workhorses of the pool world. Their tough, non-porous surfaces can handle most specialized pool tile cleaners designed to dissolve that stubborn white line of calcium buildup. But materials like natural stone, glass, and especially handmade cement tiles demand a much lighter touch.
For these more sensitive surfaces, a pH-neutral cleaner is your safest bet. An aggressive, acidic cleaner will strip the sealant right off and can even eat away at the surface of cement or stone, leading to ugly pitting and faded color. The golden rule? Always start with the mildest cleaner that will get the job done. You can always step it up if you need to, but you can’t undo damage.
Don’t Guess—Match the Cleaner to the Material
Seriously, this part is non-negotiable. Using an incompatible cleaner is a fast track to a very expensive mistake. A heavy-duty scale remover meant for ceramic could be a disaster on other materials.
Our handmade cement tiles, for example, look their best with gentle care because harsh chemicals can disrupt their unglazed, porous surface. On the other hand, standard glazed tiles give you a lot more leeway. You can get a better sense of general upkeep for common materials by reviewing this guide on how to clean ceramic tile.
Here’s a quick cheat sheet for pairing cleaners with common pool tile types:
- Glazed Ceramic & Porcelain: These durable tiles are tough enough for most commercial pool tile cleaners formulated for calcium and scale.
- Glass & Mosaic Tile: Stick with gentle, pH-neutral cleaners or a simple vinegar-and-water mix. Anything abrasive or too acidic can easily scratch or cloud the glass.
- Handmade Cement & Natural Stone: These are the most delicate. Only use cleaners specifically labeled as safe for natural stone or cement—these will always be pH-neutral.
Comparing Cleaners for Your Pool Tile
Once you know your tile type, you can confidently choose your cleaner. Your options range from simple household mixes to powerful commercial formulas. Each has its place, and understanding the pros and cons will save you a world of trouble.
The real goal here is effective cleaning, not just blasting your tile with the strongest chemical you can find. A methodical approach with the right product always beats brute force.
This table breaks down the most common choices to help you pick the right tool for your job.
| Cleaning Agent | Best For Tile Type | Pros | Cons & Cautions |
|---|---|---|---|
| Vinegar & Water (DIY) | Glass, Ceramic, Porcelain | Inexpensive, eco-friendly, and easy to find. Works well on light mineral haze and everyday grime. | Not strong enough for heavy calcium buildup. Its acidic nature can damage cement and some natural stone tiles. |
| Commercial Pool Tile Cleaners | Glazed Ceramic, Porcelain | Highly effective on stubborn calcium scale, oils, and scum. Formulated specifically for pool environments. | Can be too harsh for delicate tiles. Requires careful handling—always use gloves and eye protection. |
| pH-Neutral Specialty Cleaners | Handmade Cement, Natural Stone, Glass | Safely cleans without risking damage to sensitive, porous, or unsealed surfaces. It protects the tile’s color and integrity. | Often costs more and may require more elbow grease on very tough, set-in stains. |
Ultimately, choosing the right cleaner is about protecting your investment. A few extra minutes of research upfront will ensure your pool tile stays beautiful for years to come.
Mastering Manual and Mechanical Cleaning Techniques
Alright, you’ve picked the right cleaner for your tile—now it’s time to get to work. The real secret to a sparkling pool isn’t just the chemical you use; it’s how you use your tools. This is about smart technique, not brute force. You want to lift those stubborn stains without leaving a single scratch on your tile or grout.
For most routine cleanups, especially on tough porcelain or ceramic tiles, a good stiff-bristle nylon brush is your best friend. It has just enough grit to scrub away light mineral haze and algae spores without dulling a glazed finish. The trick is to work in small, circular motions. Stay consistent and methodical, covering every inch of that waterline.
Before you dive in, a little prep work goes a long way. This three-step process is simple but non-negotiable for getting the job done right.

As the visual shows, lowering the water, grabbing your gear, and choosing the right cleaner are the foundation for a safe and successful cleaning session.
Tackling Tough Scale with a Pumice Stone
See those thick, crusty calcium deposits that your brush just won’t budge? A pumice stone can feel like a magic eraser for that kind of buildup. But this tool comes with a huge warning label.
Crucial Safety Note: Never, ever use a pumice stone on delicate surfaces like glass, mosaic, or handmade cement tiles. It’s far too abrasive and will cause permanent scratches. Save it only for tough-as-nails materials like porcelain.
If you’ve confirmed your tiles can handle it, here’s how to use it safely:
- Keep it wet. Both the stone and the tile need to be wet at all times. Dry scrubbing is a guaranteed recipe for scratches, so dip the stone in the pool water often.
- Use gentle pressure. Let the stone’s gritty texture do the heavy lifting. Pressing harder won’t speed things up, but it will increase your risk of damaging the tile.
- Work methodically. Rub the stone over the scale in one direction until the deposit disappears, then give the area a good rinse to wash away any gritty residue.
Using a Pressure Washer Safely and Effectively
For a big pool or a serious layer of grime, a pressure washer can seem like the ultimate shortcut. And it can be—but get it wrong, and you’ll blast grout right out of the joints or even chip a tile. Success here is all about control.
First, you don’t need an industrial-strength monster. A pressure washer that can be set between 1,200 and 1,500 PSI is plenty powerful for cleaning tile. Go any higher, and you’re just asking for trouble with your grout.
Next, your nozzle choice is everything.
- Go wide. Use a 25 or 40-degree wide-angle nozzle. This spreads the pressure out, cleaning a wider path without concentrating a destructive jet of water in one spot.
- Never use a zero-degree nozzle. That red tip is a laser. It will cut right through your grout and can easily crack a tile.
When you start spraying, keep the nozzle at least 18-24 inches away from the tile. Find a less visible spot to test your pressure and angle first. Then, use smooth, sweeping motions—back and forth—instead of lingering on one spot. This gives you a consistent clean without causing any focused damage.
While these manual methods are essential for detailed work, many pool owners are turning to automation. The global robotic pool cleaner market was valued at USD 2.01 billion in 2024 and is expected to hit USD 4.52 billion by 2032. This huge jump shows a clear shift toward tools that make upkeep easier. You can read more on this trend in the full robotic pool cleaner market analysis. No matter what tool you’re using, though, the core principles of working safely and methodically are what will give you that professional-quality finish.
Advanced Strategies for Tough Stain Removal
Regular scrubbing takes care of the daily grime, but some pool tile stains are just in a different league. When you’re up against those stubborn, seemingly permanent marks, it’s time to shift gears from general cleaning to a more targeted attack. Figuring out exactly what kind of stain you have is always the first move.

The usual suspects are calcium deposits, but not all scale is created equal. Knowing the difference between the two main types is critical because they demand completely different removal methods. Trying to scrub away hard scale with a gentle cleaner is a total waste of time, while getting too aggressive with a simple deposit can end up damaging your beautiful tile.
Conquering Calcium Carbonate Buildup
Calcium carbonate is the more common—and more forgiving—of the two. You’ll spot it as a flaky, crusty white deposit hanging out right at the waterline. This stuff appears when your pool’s pH, alkalinity, or water temperature gets too high, causing calcium to drop out of the water and cling to any available surface.
Fortunately, it comes off pretty easily with a mild acid or a specialized scale remover. Here’s a method that works:
- Let the Cleaner Dwell: Grab a gel-based pool tile cleaner or mix up a 50/50 solution of white vinegar and water. Apply it directly to the dry scale and let it sit for 10–15 minutes. This is the most important part—you need to give the solution time to work its magic and break down the mineral bonds.
- Scrub It Away: With a stiff nylon brush or a non-abrasive scrub pad, work the cleaner into the scale. You should see the deposits start to fizz and lift right off the tile.
- Rinse It Clean: Once the scale is gone, give the area a good rinse with fresh water. This neutralizes any leftover cleaner so it doesn’t mess with your pool chemistry.
A quick word of caution for porous surfaces like handmade cement tiles: always start with the gentlest method first. A cleaner that’s too acidic can eat away at the tile itself. If you’re not sure, it’s worth reading up on https://originalmissiontile.com/how-to-clean-your-cement-tiles/ before you start scrubbing.
Tackling Tenacious Calcium Silicate
If you’re seeing a hard, grayish-white scale that looks and feels more like concrete and laughs at your attempts to scrub it, you’re probably dealing with calcium silicate. This is the tough stuff. It forms over a long time, usually in pools with consistently high calcium and pH levels.
A simple chemical cleaner isn’t going to cut it here. You need to bring in some mechanical muscle.
- Pumice Power: A pumice stone can be a lifesaver, but you have to use it correctly. Crucially, both the stone and the tile must be soaking wet at all times. This prevents scratching. Rub the wet stone gently over the silicate deposit in small circles until it starts to break down. Just remember, this is only safe for tough surfaces like porcelain or ceramic tiles.
- Stain Erasers: You can also find specialty pool stain erasers or detailing sticks. They’re made from fine abrasive materials that work well for small spots without being too harsh.
When you’re faced with really stubborn mineral buildup, the same principles used for tackling stubborn water stains on other tough surfaces can apply here. It’s all about using the right tool for the job.
Eliminating Algae and Rust Stains
Beyond calcium, a few other unwelcome stains can pop up. Organic and metallic stains each have their own kryptonite, so you have to treat them specifically.
Green and Black Algae Stains
Sometimes, even after you’ve killed off an algae bloom, it leaves behind ugly green, yellow, or black stains. For these, a chlorine-based attack is your best bet.
- Spot Treatment: Mix up a thick paste using granular chlorine and a little bit of water.
- Application: Plaster the paste right onto the stain and let it sit for a few hours.
- Final Scrub: Grab a stiff brush, give the area a good scrub, and rinse it all off. Really stubborn spots might need a second round.
Ugly Rust Marks
Rust stains are almost always from a metal object—a lost hairpin, a screw, or even rebar that’s too close to the surface. These orange-brown blemishes require a specific chemical reaction. An ascorbic acid (Vitamin C) based stain remover works wonders here. Just apply it to the rust spot, let it do its thing for a few minutes, and then brush it away.
How to Seal and Protect Your Pool Tiles
You’ve done the hard work and your pool tiles are finally sparkling. It’s a huge win, but don’t fill the pool just yet. If you want that pristine look to last, the final and most important step is locking it all in with a good sealer.
Think of it as an invisible shield for your investment. This is non-negotiable for porous materials like natural stone or our handmade cement tiles. An unsealed cement tile is like a sponge, just waiting to soak up pool chemicals, minerals, and algae, which leads to deep, stubborn stains. Sealing stops that from ever happening.
Choosing and Applying the Right Sealer
For a pool environment, a high-quality penetrating sealer is the only real option. Unlike topical sealers that just form a film on the surface (which can get slippery and peel), a penetrating sealer soaks deep into the tile’s pores. It creates a barrier from the inside out that repels water and stains without changing the tile’s natural look or feel.
Correct application is everything. Start with a surface that is perfectly clean and—this is critical—bone-dry. If you trap even a hint of moisture under the sealer, you’ll end up with cloudy spots and a weak bond that fails way too soon.
Here’s the process that works every time:
- Apply a Thin, Even Coat: Grab a dense foam roller or a specialized sealer mop. The goal is a consistent, thin layer. Don’t let it get sloppy and puddle up in the grout lines.
- Let It Soak In: Give the first coat time to penetrate the tile. This usually takes about 15–20 minutes, but check the manufacturer’s guide. You want it to soak in, not dry completely on the surface.
- Wipe Away the Excess: Before it dries, take a clean, lint-free cloth and wipe off any extra sealer sitting on the surface. This is the secret to avoiding that tacky, hazy residue that ruins the finish.
- Add a Second Coat (If Needed): For extra-thirsty materials like new cement tiles, a second coat is often a good idea to ensure you’ve got total coverage. Just repeat the same steps.
And don’t forget the grout! It’s just as vulnerable as the tile. Sealing it prevents mildew and stains from creeping in and ruining the whole look. Our guide on the best grout sealers for floor tile has some great tips that are just as relevant for pools.
Give It Time to Cure
This is where patience really pays off. The sealer needs time to fully cure and create its protective bond, a process that can take anywhere from 24 to 72 hours. It all depends on the product you used, the temperature, and the humidity.
Rushing this is the single biggest mistake people make. If you fill the pool or let sprinklers hit the tile before the sealer has fully cured, you’ll weaken its defenses and dramatically shorten its lifespan. Always, always follow the manufacturer’s curing instructions to the letter.
During this window, keep everyone off the tile and protect it from rain. A couple of days of inconvenience will buy you years of easier maintenance and better protection.
Build a Simple Maintenance Routine
Once your tiles are sealed and the pool is full, a little upkeep goes a long way. This is about prevention, which is way easier than a full-scale cleaning assault later on.
- Brush the Waterline Weekly: Grab a soft-bristle pool brush and give the waterline a gentle scrub once a week. This five-minute task stops scum and mineral haze from getting a foothold in the first place.
- Keep Your Water Balanced: Test your pool water regularly. Keeping the pH, alkalinity, and calcium hardness in the ideal ranges makes a huge difference. Balanced water is less likely to cause scaling. Aim for calcium hardness levels between 200–400 ppm.
- Keep Water Moving: If you have a waterfall or an infinity edge, don’t just let it sit there. Run your water features consistently. The constant flow prevents water from just sitting and evaporating, which is what leaves those ugly mineral deposits behind.
Combine a great initial seal with a simple, consistent routine, and you’ll transform pool tile cleaning from a dreaded annual project into a quick, manageable part of your pool care. Your tiles will stay looking like the beautiful centerpiece they’re meant to be.
When to Call in a Pool Tile Cleaning Pro
Doing it yourself can feel great, but there are definitely times when even the most determined pool owner should put down the brush and call for backup. Knowing when to make that call is the key to protecting your investment and preventing some seriously expensive, irreversible damage.
Let’s be honest, some jobs just need specialized gear and experience that go way beyond elbow grease.
Think of it as a simple cost-benefit analysis. Spending a few hundred dollars on a professional service is a no-brainer if it saves you from a multi-thousand-dollar tile replacement nightmare. There’s a reason the swimming pool cleaning services market is so huge—it’s expected to hit USD 8.8 billion in 2025, up from USD 8.6 billion the year before. Homeowners see the value in expert care. You can dig deeper into the industry with these localized insights on the U.S. market.
Problems That Are Beyond a DIY Fix
Some issues are giant, flashing red signs that it’s time to pick up the phone. If you’re staring down any of these, it’s best to get an expert opinion.
- Stubborn Calcium Silicate: This isn’t that flaky white stuff you can sometimes scrub off. This is the hard, grayish scale that feels like concrete. It laughs at your chemical cleaners and pumice stones. The pros use bead-blasting equipment to safely wear away the scale without chipping or cracking the tile—a process that’s just not safe or practical for a homeowner to attempt.
- Widespread Efflorescence: See a chalky white powder that keeps coming back no matter how many times you clean it? That’s likely efflorescence, and it’s a symptom of a deeper moisture problem coming from behind the tile. A pro can figure out the root cause, which might mean a waterproofing or grout repair job, not just another surface scrub.
Trying to blast away deep-seated issues without understanding the cause is like painting over rust. You’re just hiding the problem, not solving it, and it will absolutely get worse.
When the Tile Itself Is at Risk
Beyond tough stains, any sign of physical damage is a major red flag. Trying to patch up structural problems on your own almost always leads to bigger headaches and much bigger repair bills later on.
Call a professional right away if you spot:
- Cracked or Loose Tiles: A single cracked tile might not seem like a big deal, but it’s an open door for water to get behind your pool shell. This can cause a domino effect, leading to widespread tile failure.
- Crumbling Grout: If your grout is degrading, the entire tile system is compromised. It becomes vulnerable to water damage, and you’ll start seeing more and more tiles pop off.
- High-End or Delicate Materials: Got beautiful (and expensive) glass, mosaic, or handmade cement tiles? The risk of scratching, chipping, or dulling them with the wrong technique is just too high. Professionals are insured and have the specific tools and gentle methods needed to clean these surfaces safely.
Your Pool Tile Cleaning Questions, Answered
When it comes to keeping your pool tiles looking their best, a few key questions always pop up. Getting the right answers from the start helps you work smarter, not harder, and avoid costly mistakes that could damage your beautiful tile. Let’s dive into the most common things we hear from homeowners.
How Often Should I Clean My Pool Tiles?
Consistency is everything. For day-to-day upkeep, a light weekly brushing of the waterline with a soft-bristled brush is your best defense against scum and that hazy film of minerals. It just stops buildup before it gets a chance to bake on.
Beyond that, a proper deep clean is usually something you’ll tackle once or twice a year. But that’s not a hard-and-fast rule. If you’re in an area with particularly hard water or find yourself fighting off algae blooms, you might need to schedule that deep clean more often to keep your tiles looking sharp.
Think of it as proactive maintenance, not reactive scrubbing. A little effort each week makes the big annual clean massively easier and keeps your tile looking fantastic for years.
Can I Use a Pressure Washer on All Pool Tiles?
Definitely not. A pressure washer is a serious tool, and you should only even consider it for tough, durable tile like glazed ceramic or porcelain. Even then, you need to be careful—use a low-pressure setting (stay under 1,500 PSI) and a wide-angle nozzle. The goal is to clean the tile, not blast the grout into oblivion.
Using a pressure washer on more delicate surfaces is a recipe for disaster. It can cause permanent damage to:
- Glass and mosaic tiles, which can chip, crack, or scratch in an instant.
- Natural stone, which can be etched or have its surface pitted by the intense spray.
- Handmade cement tiles, where the high pressure can strip away essential sealants and ruin the unglazed surface.
What Causes the White Scale on My Pool Tiles?
That stubborn white “bathtub ring” around your waterline is calcium buildup, and it shows up in two very different forms. The one you’ll see most often is calcium carbonate—a flaky, crusty deposit that usually comes off with a bit of elbow grease and a mild acidic cleaner.
The real headache is calcium silicate. This stuff is a hard, grayish scale that forms slowly over time. It’s much tougher to remove because it bonds so tightly to the tile surface. Regular chemical cleaners won’t touch it; you’ll often need to step up to mechanical methods, like careful work with a pumice stone or even calling in a pro for bead-blasting.
At Original Mission Tile, we’re passionate about helping you care for your beautiful handmade tiles. If you’re looking for a truly one-of-a-kind look for your next project, explore our custom cement tile collections.