You've got a plywood floor, a stack of tile, and a room that's ready to change. That's the point where many good projects go wrong. Tile looks rigid and permanent. Plywood looks flat and solid. People assume the two naturally belong together.
They don't, unless the floor is built for it.
Tile installation over plywood works when the structure is stiff enough, the wood is protected from moisture, and the tile assembly is allowed to deal with movement the right way. Skip one of those conditions and the failures tend to look familiar: cracked grout, loose corners, hollow spots, stained tile, or a floor that starts sounding tired long before it should.
Premium handmade cement tile raises the stakes. It's heavier, more porous, and less forgiving of shortcuts than basic commodity tile. That doesn't make the job risky. It makes the standards clearer.
Assess Your Plywood Subfloor for Strength
A tile job over plywood is usually won or lost before the first bag of mortar is opened. Cement tile adds weight, and it does not forgive a springy floor. If the structure below can bend, twist, or swell, the finish above will show it.
What matters here is deflection. That is the small amount of movement a wood floor makes under load. Wood can live with that movement. Tile, grout, and the bond coat have much less tolerance, especially with handmade cement tile, where even minor movement can telegraph into hairline cracks, loose corners, or a floor that starts sounding hollow.
One commonly cited reference on preparing plywood before tiling calls for a total wood thickness of 1¼ inches, often built with ¾-inch plywood and a ½-inch second layer, with joists spaced no more than 16 inches apart. That lines up with what experienced installers look for in the field. A single thin layer over wide joist bays is asking too much from the tile assembly.

Start with the framing
If you have access from below, use it. A basement or crawlspace view will tell you more in five minutes than an hour spent staring at the surface.
Check three things first:
- Joist spacing: Floors framed wider than 16 inches on center are more likely to flex between supports.
- Joist condition: Split, notched, water-damaged, or sagging members need repair before tile is even part of the conversation.
- Plane of the floor: A floor can be stiff and still be uneven. Flatness gets handled later, but major dips or crowns often point to framing trouble underneath.
I also pay attention to how the room feels underfoot. Walk it with purpose. Stand near the middle of the span. If dishes rattle in the next room or the surface has a little trampoline effect, stop and investigate. A floor that moves needs to be rebuilt or reinforced before tiling can proceed.
Confirm the plywood build-up
Many homes have one layer of plywood that was perfectly acceptable for vinyl, laminate, or carpet. Tile asks for more. Premium cement tile asks for even better discipline because the material is dense, porous, and expensive to replace if the base was misjudged.
If you find only one ¾-inch layer, adding ½-inch exterior-grade plywood is often the right move. Install that second layer with screws, not nails. Stagger the seams so they do not stack over the joints below, and do not glue the layers together if the assembly is meant to allow a bit of independent movement between sheets. Fastener spacing matters too. Loose fastening leaves the panel free to chatter, and that movement shows up later in the grout lines.
A proper second layer is not just extra thickness. It improves how the load is shared across the floor.
Know when repair stops making sense
Some plywood can be saved. Some should be removed without debate.
Replace panels that are delaminated, swollen at the edges, softened by leaks, or patched so heavily that you no longer have a trustworthy base. Surface cosmetics do not matter here. Structural integrity does. If you want a clearer picture of how a sound base should be built, this subfloor installation guide is a solid reference.
Budgeting for this stage also helps keep the project honest. Once the finish floor comes up, many DIY installers discover they need more plywood, more fastening, or framing repairs they did not price at the start. A planning tool like DreamKitchen.ai kitchen remodel costs can help you set a realistic allowance for subfloor repairs, underlayment, and tile materials before you commit to the finish layer.
The practical standard is straightforward. The floor should feel solid, sound dry, and show no meaningful bounce under load. If it cannot meet that standard, fix the structure first. That is how you protect the tile work above it.
Prepare Plywood for a Flawless Tile Base
A strong floor still needs proper surface prep. Good structure doesn't excuse a dirty, swollen, oily, or uneven surface. Tile work depends on bond, and bond depends on preparation.
The first pass is simple, but not casual. Remove old adhesive residue, sweep thoroughly, vacuum the dust, and scrape anything proud of the surface. Paint specks, drywall mud, grease near kitchen work zones, and bits of old vinyl backing all interfere with adhesion. Plywood should feel dry, clean, and firm under your hand.

Fix surface defects before they telegraph upward
Tiles don't hide bad carpentry. They reveal it.
Check the plywood for raised joints, voids, edge swell, and localized dips. Sand high spots carefully. Fill minor voids with a suitable patching or leveling product that's compatible with the assembly you're building. Replace any section that has turned soft or furry from past water exposure. That kind of damage doesn't get better once it's trapped below tile.
Pay close attention to seams and fasteners:
- Re-seat loose areas: Add screws where the panel has any chatter or movement.
- Set proud fasteners: Screw heads should sit flush, not stand above the plane.
- Address panel edges: Any swollen seam should be corrected before underlayment goes down.
Treat moisture as a structural issue
Most DIY advice mentions waterproofing in passing. That's not enough, especially in bathrooms, entries, laundry areas, or kitchens where water doesn't stay politely in one place.
According to discussion from professional tilers on plywood floors, the major gap in common guidance is moisture-induced delamination. Plywood rots easily when exposed to water, and pros often recommend tanking any ply with a waterproofing system to prevent rot-driven adhesive failure.
Plywood can look sound on installation day and still become the weak link if moisture gets into it later.
“Tanking” means applying a waterproofing membrane over the prepared surface or over the selected underlayment in the wet zone assembly, following the membrane manufacturer's sequence for corners, joints, penetrations, and changes of plane. The exact product can vary, but the principle doesn't. Wood needs protection from repeated moisture exposure.
Don't confuse flat with ready
A floor can be clean and still not be suitable for tile if it isn't flat enough for the tile size you've chosen. Use a long straightedge and mark problem areas before you mix anything. Correcting plane issues after the tile is down usually means forcing tile into shape with mortar. That leads to poor coverage, uneven faces, and stressed bond lines.
A sound prep routine looks like this:
- Clean completely
- Re-secure movement
- Repair or replace damaged plywood
- Flatten the surface
- Waterproof where exposure justifies it
That order matters. Waterproofing over a dirty or moving floor only seals the problem in.
Choose the Right Tile Underlayment for Plywood
Set tile straight onto plywood and the floor may look fine for a while. Then the seasons change, the wood shifts, and the tile assembly starts paying for that movement. An underlayment layer gives the tile a better working surface and, just as important, helps manage the stresses that plywood brings to the job.
The two primary underlayment choices for interior floors are cement backerboard and an uncoupling membrane.
What each system does
Cement backerboard gives you a dense, stable panel under the tile. It does not add structural strength to a weak floor, but it does provide a predictable surface for thin-set and tile.
Uncoupling membranes solve a different problem. They are used to help the tile layer handle some of the minor movement that naturally occurs in wood-framed floors. That matters more with premium finishes, and it matters a lot with handmade cement tile, which is heavier, more porous, and less forgiving of a moving base than many DIY guides admit.
As noted in this guidance on tiling over plywood subfloors, mortars used over plywood should meet ANSI A118.11. The same source also notes that cement board should be fastened with screws on the manufacturer's schedule, commonly every 8 inches, with joints taped using alkali-resistant fiberglass mesh and finished with thin-set.
Underlayment options for plywood subfloors
| Feature | Cement Backerboard | Uncoupling Membrane |
|---|---|---|
| Primary role | Provides a rigid tile-ready panel | Helps separate tile from subfloor movement |
| Weight | Heavier and bulkier to carry and cut | Lighter and easier to move around the site |
| Cutting and fitting | Dustier and more labor-intensive | Faster to trim and dry-fit |
| Height impact | Adds more build-up | Usually helps keep transitions lower |
| Water management | Needs proper treatment at seams and wet areas | Often preferred when moisture control is part of the assembly |
| Best fit | Straightforward rooms, conventional installs | Movement-sensitive floors, large tile, premium finishes |
Which one works better in practice
Cement board still has its place. On a dry interior floor with simple geometry and enough height to spare, it is a reliable, familiar assembly. Installed correctly, it performs well and gives the setter a firm surface to work over.
Uncoupling membranes earn their value on floors that are more likely to move, at tight transitions, and anywhere the finish material deserves extra protection from seasonal wood behavior. That usually includes handmade cement tile. If I am setting a premium tile with visible character and real material cost behind it, I want an assembly that respects the tile instead of asking it to absorb plywood movement.
Choose the underlayment based on floor movement, moisture exposure, tile type, and finished height. Initial material cost matters, but repair cost matters more.
For a closer look at product types and where each one fits, see this guide to underlayment for tile floors.
What doesn't work well
Three failure points show up again and again:
- Using the wrong bonding material: Plywood requires the correct mortar standard. Premixed mastics and generic products cause trouble fast in this assembly.
- Treating backerboard like plywood skin: Cement board has to be bedded, fastened, and have its seams treated properly. Loose panels and untaped joints telegraph problems into the tile layer.
- Expecting underlayment to fix structural defects: Neither backerboard nor membrane can compensate for a soft, damaged, or undersized subfloor.
A successful tile floor over plywood works as an assembly. The underlayment is the layer that decides whether that assembly has a fighting chance.
Lay and Bond Original Mission Cement Tiles
A cement tile floor can look perfect at noon and reveal every mistake by sunset. Crooked pattern lines, hollow corners, stained faces, and tight perimeters all show up fast once the mortar starts to grab. This stage rewards calm hands and a fixed routine.
Start with layout before you open the mortar. Cement tile has visual weight, especially patterned pieces, so the room needs to read correctly from the main sightlines. Set control lines from the doorway, island, hall approach, or cabinet run that people notice. Then dry-lay enough tile to see where cuts fall and how the pattern turns at the edges.

Approach handmade cement tile with care and confidence
Cement tile behaves differently from glazed ceramic. The face is porous, the body is dense and heavy, and small variation from piece to piece is part of the material. Premium tile deserves a setting method that accounts for that reality.
Use the polymer-modified mortar specified for the underlayment and tile assembly. Mix it to the manufacturer's water ratio, let it slake if required, then remix. Mortar that is mixed loose for convenience gives up strength and makes it harder to keep the tile plane flat.
Spread mortar with the notch size that fits the tile, and comb the ridges in one direction. Back-butter when the tile or the substrate calls for it. Full support matters on cement tile because unsupported corners and voids tend to show up later as cracked edges, drummy spots, or lippage you cannot ignore once the floor cures.
A reliable setting routine includes a few habits that save expensive tile:
- Dry-sort from several boxes: Blend shade and surface variation across the room.
- Keep the face clean as you work: Pigment, mortar residue, and dirty water can mark cement tile quickly.
- Lift a tile periodically: Confirm the mortar is transferring well and the ridges are collapsing.
- Use leveling clips only as a fine-tuning aid: They help hold plane, but they do not correct a floor that was not prepared properly.
Large tile leaves less room for error
Bigger pieces ask more from the floor and from the installer. Any dip, crown, or twist in the assembly shows up across the face of the tile, and handmade cement tile does not hide those faults.
As noted in this installer discussion on tile over plywood, larger tile installations over wood framing are commonly paired with a stiffer floor assembly and an uncoupling membrane over double-layer plywood. That matches what experienced installers already know in the field. Once tile size increases, a marginal subfloor becomes an expensive gamble.
Many installations fail at this stage because the setter tries to force a premium tile through a substrate that is only good enough on paper. If the floor still has visible variation, fix it before you continue. Mortar is for bonding tile, not for correcting broad waves in a plywood assembly.
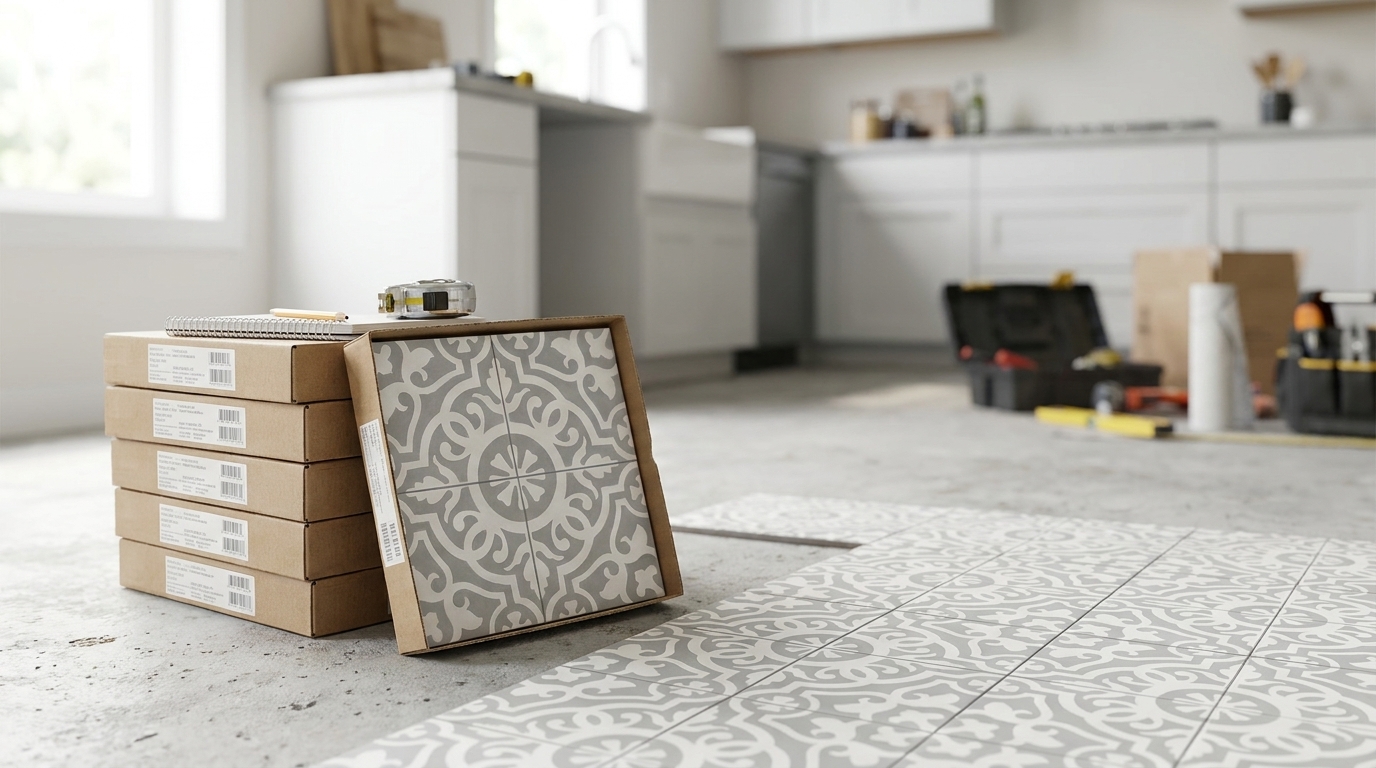
Here's a helpful visual reference before you start setting in earnest:
Set with control
Place each tile into fresh combed mortar and slide it slightly across the ridges to collapse them. Check joint width, pattern alignment, and face height constantly. Cement tile rewards steady pace over fast pace.
I also watch the bucket water and sponges closely on this material. Dirty cleanup water can stain the face, and overhandling the surface creates work you will regret later. If the tile line calls for it, review the manufacturer guidance and compare product options in this guide to sealers for cement and ceramic tile before grouting day arrives.
Leave movement space at walls, cabinet bases, fixed islands, and transitions. Do not jam those edges tight with mortar or grout. Wood structures move, and the tile assembly needs room to tolerate that movement without pushing stress back into the field.
Good tile setting over plywood is repetitive, exact, and a little unforgiving. Done properly, it gives handmade cement tile the support and clean presentation it was made for.
Grout Seal and Finish Your Tile Installation
The floor can look nearly done when the last tile is set, but at this point, many cement tile jobs are either protected or ruined. Grout and sealer aren't cosmetic afterthoughts. They control staining, help define the pattern, and protect a porous surface from jobsite mistakes and everyday use.
Seal before you grout
Handmade cement tile should be treated with respect before grout ever touches it. Because the surface is porous, grout pigment can lodge in the face of the tile if you leave it unprotected. A proper pre-grout sealer creates a barrier that makes cleanup far safer and far cleaner.
Use a sealer suitable for cement tile and follow the manufacturer's cure guidance. Don't flood the floor. Apply evenly and keep it off any area where the product instructions say it may interfere with bond or grout performance.
If you need a primer on product types and how they behave, this overview of ceramic tile sealers helps clarify the differences in protective finishes.
Grout with control
Mix grout to the recommended consistency and work manageable areas. Force it fully into the joints, then clean diagonally across the tile with a well-wrung sponge. On cement tile, over-washing creates its own problems. So does waiting too long and letting haze lock onto the face.
A steady approach works best:
- Protect first: Make sure the pre-sealer has been applied and cured as directed.
- Pack the joints fully: Shallow joints collect dirt and weaken the finish.
- Clean in passes: Don't try to finish the whole room with one bucket of dirty water.
- Buff haze at the right time: Too early smears. Too late hardens the residue.
Honor movement at the edges
Perimeter joints matter. Every tiled floor needs room to respond to seasonal change, structural movement, and daily service conditions. That means using flexible movement accommodation where the tile meets walls, cabinetry, thresholds, or other restraining surfaces.
Don't grout those perimeter gaps solid. Rigidly locking the field to the room edges invites stress into the tile layer. The symptom often shows up later as a crack in grout or a fractured tile near the boundary, but the cause started with a floor that wasn't allowed to move as a system.
Field note: A perfect grout joint in the middle of the room won't save a floor that was pinned hard at the perimeter.
Finish with the final protective coat
After the grout has cured appropriately, apply the final sealer specified for the tile and grout assembly. On cement tile, this is what helps the surface resist staining and maintain the soft, matte character people choose it for in the first place.
The goal isn't a plastic-looking film. The goal is a protected surface that still looks like real cement tile.
Maintain and Troubleshoot Your Cement Tile Floor
Six months after the install, the calls usually sound the same. The floor looked perfect at handoff, then a chair got dragged across the surface, a strong cleaner dulled a traffic path, or a wet area near the sink started looking darker than the rest. That stage is not about rehashing the installation. It is about knowing how cement tile behaves in daily service and catching small issues before they become permanent ones.
Cement tile over plywood can perform beautifully for years, but it does expect disciplined maintenance. Premium handmade tile has depth, variation, and a softer, more natural face than fired porcelain. That is part of its appeal. It also means the finish coat and sealer deserve more respect than many DIY guides give them.
What regular care actually requires
Start with dry soil control. Grit under shoes acts like sandpaper and wears the sealed surface first in the lanes you use every day.
For routine cleaning:
- Use a dust mop, soft broom, or vacuum without an aggressive beater bar.
- Wash with a pH-neutral cleaner made for sealed cement or natural stone surfaces.
- Wipe spills promptly, especially oil, wine, coffee, citrus, and colored soap products.
- Use felt pads under chairs, stools, and movable furniture.
- Set mats at exterior doors and in front of sinks.
Resealing is part of ownership, especially on floors that see kitchen traffic, pets, or frequent wet mopping. If water stops beading or the tile starts to absorb spills faster than it did after installation, inspect the sealer and renew it with a product compatible with the original finish.
Service problems that show up after installation
The failures I see late are often use-related, not installation-related. That distinction matters because the repair approach changes.
| Symptom | Likely cause in service | What to do |
|---|---|---|
| Dull or chalky traffic lanes | Cleaner too alkaline or too acidic, abrasive dirt, or repeated scrubbing with harsh pads | Clean with a suitable pH-neutral product, test a refresher or resealer in a small area, and stop using the offending cleaner |
| Dark spots near sink, entry, or pet bowls | Moisture sitting on a worn sealer or penetrating through neglected joints | Dry the area fully, inspect grout and sealer condition, reseal if the tile is absorbent, and correct the moisture routine |
| Fine scratches or scuffed finish | Furniture legs, grit, metal chair glides, or dragging appliances | Protect furniture feet, clean away grit, and assess whether the sealer can be refreshed without replacing tile |
| White residue at edges or wet zones | Mineral deposits from repeated water exposure or cleaner residue left on the surface | Use a cleaner approved for the tile finish, rinse with clean water, dry the surface, and reduce standing water |
| One area stays dirty-looking after mopping | Soil trapped in a weakened sealer or dirty wash water repeatedly spread across textured tile | Deep clean with the right product, change rinse water more often, and reseal if the protective layer has worn thin |
Focus on removing the underlying cause instead of only addressing the symptom. A stained spot that keeps returning usually points to moisture exposure or a failed protective layer. A floor that keeps looking hazy often has a cleaning problem, not a tile problem.
When a repair is simple, and when it is time to investigate
Some issues are surface-deep. Worn sealer, residue buildup, minor scratching, and isolated staining can often be corrected with careful cleaning, targeted refinishing, and a fresh protective coat.
Other signs call for a closer look. If tiles sound different after a plumbing leak, if staining appears in a repeating pattern along a dishwasher or exterior wall, or if grout at a doorway stays dark long after the rest of the floor dries, moisture may be moving through the assembly. Plywood does not forgive chronic wetting. At that point, drying the surface and adding more sealer is not enough.
A well-built cement tile floor should age with use, not break down from it. Give it the right cleaner, keep water and grit under control, and treat changes in color, sheen, or moisture behavior as early warnings. That is how a handmade tile floor keeps its character without drifting into avoidable repair work.
If you're planning a floor with handmade cement tile and want materials backed by long craft tradition, explore Original Mission Tile. Their collections, custom capabilities, and installation resources make them a strong fit for homeowners, designers, and builders who want a floor that's built with intention from the first layer to the final pattern.