The secret to successfully cleaning stone tiles isn’t some complicated formula. It’s actually pretty simple: know what you’re working with and always, always use a pH-neutral cleaner.
Unlike mass-produced ceramic tile, porous natural stone and handmade cement tiles are incredibly sensitive. Using the wrong product—like common household vinegar or bleach—can cause permanent etching, strip color, and ruin the finish you paid for.
Know Your Tile Before You Clean It

Before a single drop of cleaner hits your floor, the most important step is to identify your material. Is it a natural limestone, polished marble, pigmented cement, or rustic zellige? Each one has its own personality and its own rules for care. A mistake here can be costly and irreversible.
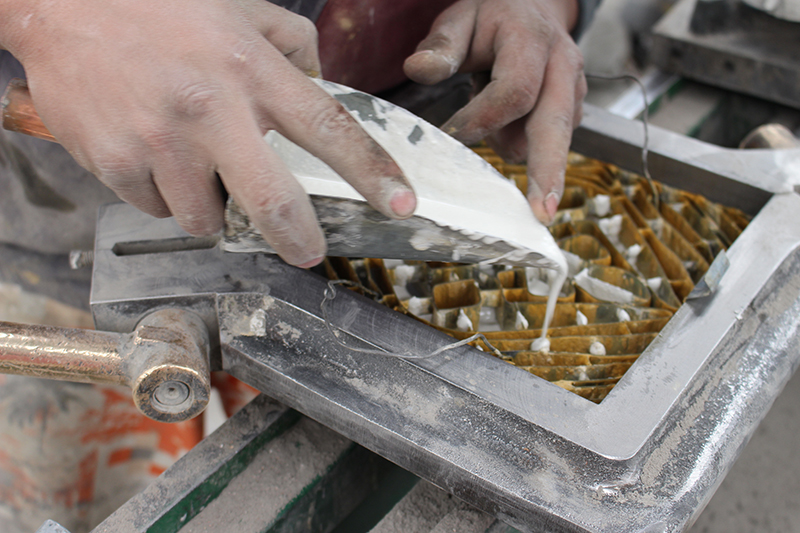
For example, the beautiful, raw finish of our handmade cement tiles comes from a mix of cement, marble dust, and natural pigments. Their natural porosity makes them a sponge for acids, which will quickly etch the surface and dull the vibrant patterns you fell in love with.
It’s the same story for natural stones like marble and limestone. These are calcium-based, which makes them extremely vulnerable to acidic spills. A little bit of lemon juice or a quick wipe-down with a vinegar-based cleaner can create dull spots that mar the entire surface.
The goal isn’t to treat your floors like delicate artifacts you can’t walk on. It’s about using the right techniques to protect them. This simple knowledge prevents damage and keeps your beautiful floors looking their best for years.
Quick Guide to Common Stone and Cement Tiles
To help you get started on the right foot, this table breaks down the core traits of common handmade and natural tiles. Their beauty lies in their natural variation, which also means they need mindful maintenance.
| Tile Material | Key Characteristic | Primary Sensitivity | Recommended Cleaner Type |
|---|---|---|---|
| Cement (Encaustic) | Pigmented, highly porous | Acids, harsh chemicals | pH-Neutral |
| Marble | Veined, polished or honed | Acids, scratches, abrasives | pH-Neutral |
| Limestone | Earthy, often has fossils | Acids, harsh chemicals | pH-Neutral |
| Terrazzo | Speckled, composite | Depends on chips, but generally acid-sensitive due to cement base | pH-Neutral |
| Zellige | Glazed, irregular surface | Harsh chemicals, abrasive scrubbing (can damage glaze) | pH-Neutral |
Understanding these basic differences is the first step in a cleaning routine that actually works. We see it all the time—a well-intentioned cleaning effort gone wrong simply because the material wasn’t respected.
If you’re ever unsure about your tile, it’s always smart to test any new cleaner on a small, hidden spot first, like inside a closet or under a rug. For a deeper look at different materials, exploring the various types of tile can give you even more confidence. This knowledge empowers you to choose the right products and methods, ensuring your floors stay stunning.
Gathering the Right Tools and Cleaners
Getting your stone or cement tiles truly clean comes down to what’s in your cleaning closet. It’s that simple. Using the wrong tools or chemicals can cause damage you can’t undo, so getting your supplies in order is the most important first step. This isn’t about buying expensive gear; it’s about making smart choices that protect your investment from day one.
The goal is to lift away dirt and grit without scratching the tile or damaging its sealant. For natural stone and handmade cement tiles, anything abrasive is the enemy. Your entire toolkit should be built around soft, effective supplies.
Essential Cleaning Tools for Stone Floors
Having the right tools ready to go keeps you from grabbing something in a pinch that could cause serious harm. So, forget the wire brushes, green scrubby pads, or that old vacuum with beat-up plastic wheels that can gouge your beautiful floor.
Here are the tools we consider non-negotiable for cleaning stone and cement tiles:
- Soft-Bristle Broom or Dust Mop: Your first line of defense against daily dust and debris. A gentle broom or a dry microfiber mop is perfect for grabbing fine particles without a single scratch.
- High-Quality Microfiber Mop: When it comes to wet mopping, a good microfiber mop is key. Its tiny fibers actually lift dirt out of the tile and grout lines instead of just sloshing it around. If you need some recommendations, our guide on the best mop for tile floors has some great options.
- Two Buckets: Always use a two-bucket system when you mop. One bucket is for your cleaning solution, and the other holds clean rinse water. This simple habit stops you from putting dirty water right back onto your floor. It’s a game-changer.
- Wet-Dry Vacuum (Shop-Vac): For a really deep clean, a wet-vac is your best friend. After scrubbing, it pulls all the dirty water and dissolved grime out of the porous surface—something a mop just can’t do.
Choosing a Safe and Effective Stone Cleaner
This is where so many people make a costly mistake. The single most important rule is to only use pH-neutral cleaners. The pH scale runs from 0 (very acidic) to 14 (very alkaline), and 7 is neutral. Common household products like vinegar, lemon juice, or anything with bleach are highly acidic and will literally eat away at the tile.
An “etch” isn’t a stain; it’s a chemical burn that physically damages the tile’s surface, creating a dull, discolored spot. While stains can often be removed, etching is typically permanent without professional restoration.
Avoid all-purpose household cleaners, even the ones that claim to be gentle. Many contain detergents or acids that are completely unsafe for sealed, porous surfaces like cement and natural stone.
Your Never-Use List:
- Vinegar and lemon-based cleaners (acidic)
- Ammonia or bleach (alkaline and harsh)
- Abrasive powder cleaners (e.g., Comet, Ajax)
- All-purpose sprays with unspecified ingredients
- Steam mops, which can degrade the sealer over time
Instead, look for a product made specifically for natural stone or a gentle, pH-neutral soap. Brands like Lithofin and EcoProtec offer excellent, safe options like Lithofin Wash & Clean or EcoProtec Stone & Tile Aftercare. They’re designed to clean without stripping the protective sealant on your tiles.
No matter what, always test a new cleaner on a small, hidden spot first—like under a rug or inside a closet. This little step can save you from a huge headache down the road.
Your Daily and Weekly Cleaning Routine
The secret to keeping handmade stone tile beautiful isn’t about back-breaking scrubbing or harsh chemicals. It’s actually much simpler: create a small, consistent habit of gentle care. This approach is what stops abrasive dirt and grime from building up, which is the real culprit behind scratches and a dull finish on cement and natural stone floors.
Think of it this way—your floor’s biggest enemy is tiny particles of sand, grit, and dirt. Every time someone walks across the floor, these particles act like sandpaper, slowly wearing down the sealant and scratching the tile surface. Your daily goal is to get that grit off the floor before it can do any damage.
This kind of proactive maintenance has become so important that a whole industry has grown around it. The global market for natural stone cleaning is booming as homeowners and businesses realize that expert care is a smart investment, especially in North America where handmade tiles are so popular. You can learn more about the growth of these expert services from Forights Consultancy.
Daily Upkeep: A Simple Sweep
Your most important task is a quick dry clean, every single day. It only takes a few minutes, but it makes a massive difference in how your floors will look years from now.
- Use a Soft-Bristle Broom: A broom with soft, flagged bristles is great for catching fine dust without being too aggressive on your tile’s finish.
- Or a Dry Microfiber Mop: Even better is a large, flat microfiber dust mop. It uses static to cling to dust, hair, and grit instead of just pushing it around.
The idea is to get this done before the day’s foot traffic really begins. It’s a tiny habit that pays huge dividends by preventing the need for more intensive cleaning later.
Pro Tip: Put high-quality doormats at every single entrance. A good mat can trap up to 80% of the dirt and debris that would otherwise get tracked onto your beautiful floors. It’s the single easiest and most effective preventative step you can take.
Your Weekly Damp-Mop Ritual
Once a week—or more often in busy areas like kitchens and entryways—it’s time for a damp mop. The goal here isn’t to soak the floor, but to gently lift away any grime that a dry sweep missed. How you mop is just as important as what you mop with.
First, always give the floor a thorough dry sweep or vacuum. If you try to mop a gritty floor, you’re just making a muddy, abrasive paste that will scratch the tiles.
The best approach by far is the two-bucket system. It might sound like something only the pros do, but it’s an incredibly simple trick that makes a world of difference.
- Bucket One: Fill this with your pH-neutral cleaning solution, diluted according to the directions.
- Bucket Two: Fill this one with clean, plain rinse water.
Here’s the process: Dip your mop into the cleaning solution, wring it out until it’s just damp, and then mop a small section. Before you put the mop back in the cleaning bucket, rinse it out completely in the plain water bucket, wringing it dry. This one extra step keeps you from spreading dirty water all over your clean floor.
And while you’re thinking about protection, put felt or rubber pads on the bottom of all your furniture—chairs, tables, sofas, everything. This is a cheap and easy way to stop the constant scuffs and scratches that happen with daily movement, preserving your tile’s finish for years.
How to Deep Clean and Revive Your Floors
Even with the best daily habits, there will come a time when your stone or cement tile floors just look… tired. Over months and years, microscopic dirt and grime work their way deep into the pores of the tile and grout, creating a dull haze that regular mopping simply can’t touch.
This is when it’s time for a deep clean. Think of it as a restorative reset for your floors. It’s more involved than your weekly mop-up, but it’s absolutely something you can tackle yourself. The goal is to lift out that embedded grime, not just smear it around. Done right, this process can bring back that original vibrancy and even extend the life of your sealer.
How often? It really depends on your home. A busy kitchen might need this treatment twice a year, while a low-traffic guest bath could go for years without one.
Preparing for the Deep Clean
First things first: get every last bit of loose dirt off the floor. Go over the entire area with a soft-bristle broom, followed by a thorough pass with a vacuum using a brush attachment. This step is non-negotiable. If you skip it, you’ll just be turning dry dust into mud, making your job harder.
Next, get your toolkit ready. You’ll want:
- A high-quality, pH-neutral deep cleaner. We’ve seen great results with professional-grade products like Lithofin Power Clean or LTP Grimex.
- A soft-bristle scrub brush, preferably one on a long handle to save your back.
- A wet-dry vacuum—often called a shop vac. This is the secret weapon.
- One clean bucket for your cleaning solution.
The Deep Cleaning Process
Start by mixing your concentrated cleaner with warm water in the bucket. Always follow the manufacturer’s dilution instructions for an “intensive wash” or “deep clean,” as they’ll be different from the ratios for daily mopping.
Now, work in small, manageable sections—a 5×5 foot area is a good size to start with. Apply the cleaning solution generously to the floor, making sure the tile and grout are fully saturated.
Let the solution sit and do its work for 5–10 minutes. This dwell time is critical; it gives the cleaner a chance to get into the pores and start breaking down that stubborn, ingrained dirt. Keep an eye on it—if you see it starting to dry, just add a little more solution to keep the surface wet.
Once the time is up, it’s time to scrub. Gently agitate the entire section with your soft-bristle brush. Use circular motions on the tiles and work back and forth along the grout lines, which is where grime loves to collect. You’ll see a dirty slurry start to form as the brush lifts everything up.
The Most Important Step: Now for the game-changer. Use your wet-dry vacuum to suck up all of that dirty slurry. This is what separates a true deep clean from a frustrating mopping session. A mop always leaves some dirty water behind, which settles right back into the tile as it dries. A wet-vac removes it completely, leaving nothing but a truly clean surface.
After vacuuming the slurry, give the section a final rinse. All you need is a clean mop head lightly dampened with plain water to pick up any lingering cleaner residue. Then, you’re ready to move to the next section and repeat the process until the entire floor is done.
The simple, consistent habits from your daily routine are what make this deep clean easier and less frequent. This visual guide below recaps the core of that essential routine.

These three actions—sweeping, mopping, and protecting—are the foundation of long-term stone tile care and directly reduce the buildup that deep cleaning targets.
For outdoor stone installations like patios or pool decks, the process is similar but has its own unique challenges. This excellent guide to swimming pool deck cleaning is a great resource for tackling exterior surfaces.
Finally, let your floors dry completely before walking on them or moving furniture back. This can take several hours, so plan accordingly.
A Practical Guide to Sealing Your Tiles

Sealing your stone or cement tiles isn’t just a recommendation—it’s the single most important step you can take to protect your investment. Think of it as an insurance policy for your beautiful handmade tiles. It creates a crucial barrier against stains, moisture, and daily wear that would otherwise sink right into the porous surface.
Without a proper seal, everyday spills like coffee, wine, or cooking oil can quickly become permanent reminders. Taking the time to seal ensures your tile looks just as stunning as the day it was installed.
Understanding Sealers: Penetrating vs. Topical
The world of tile sealers can feel a bit overwhelming, but it really boils down to two main types: penetrating and topical.
- Topical Sealers: These act like a coat of varnish, creating a protective film that sits on top of the tile. They often add a sheen (from satin to high-gloss) and offer great stain protection, but they can also change the natural look and feel of the tile.
- Penetrating (or Impregnating) Sealers: These are the real workhorses for handmade tiles. They soak into the pores of the tile, creating a shield from within without altering the surface texture. This is key to preserving the beautiful, silky matte finish of our cement and natural stone tiles.
For the artisan tiles we love, a high-quality, water-based penetrating sealer is almost always the right call. It protects the tile while honoring its natural, intended aesthetic. You can find more specific recommendations for different materials in our guide to ceramic and stone tile sealers.
How to Know When It’s Time to Reseal
A new installation always needs sealing before you grout, and often a second time after the grout has fully cured. But what about years down the road? How do you know when it’s time to reseal?
Luckily, there’s a simple test you can do yourself.
The Water Drop Test: Just put a few drops of water on your tile in a high-traffic area. If the water beads up, your sealer is still doing its job. But if the water soaks in and darkens the tile within a few minutes, that’s your sign—the protective barrier has worn down, and it’s time to reseal.
As a general rule, a busy kitchen floor might need resealing every 3-5 years. A lower-traffic bathroom, on the other hand, could go for 5-7 years.
Resealing Your Tiles: A Step-by-Step Guide
Resealing is a straightforward project that restores that vital protection to your floors. The first step is to give the floor a thorough deep clean using a pH-neutral cleaner and let it dry completely for at least 24 hours. Any trapped moisture can ruin the new sealer’s ability to bond with the tile.
Once everything is clean and bone-dry, the process is simple:
- Apply the Sealer: Pour a small amount of your penetrating sealer into a paint tray. Using a small foam roller or a clean, lint-free cloth, apply a thin, even coat over the tiles. Work in manageable sections.
- Let It Soak In: Allow the sealer to penetrate the tile for the time recommended by the manufacturer, usually 5-15 minutes. You’ll see it soak into the more porous areas.
- Remove All Excess: This is the most important part. Before the sealer dries on the surface, use a clean, dry microfiber cloth to wipe away all of the excess. If you let it dry on top, it creates a hazy, sticky film that’s a real headache to remove.
- Repeat if Needed: For very porous tiles or for the very first seal, a second coat might be necessary. Just wait a couple of hours before applying the next coat, following the same steps.
- Let It Cure: Give the floor plenty of time to cure as specified by the manufacturer—typically 24-72 hours—before you allow any foot traffic or move furniture back.
And don’t forget the grout! Learning how to seal tile grout perfectly is just as important as sealing the tiles. Grout is also porous and can become a magnet for dirt if left unprotected. By sealing both, you ensure a beautiful, durable surface that will truly stand the test of time.
Common Questions About Cleaning Stone Tiles
Even with a perfect cleaning routine, life happens. A guest spills red wine, the grout in the entryway starts to look a little tired, or you notice a strange dull spot on your floor. We get these kinds of questions all the time from homeowners trying to solve real-world problems.
Knowing how to react can be the difference between a quick fix and a permanent headache. Here are our answers to the most common troubleshooting scenarios for handmade cement and natural stone tile.
Can I Use a Steam Cleaner on My Stone Tiles?
This is a big one, and our answer is always a firm no. We strongly advise against using a steam mop or steam cleaner on any sealed, porous tile—that includes cement, limestone, marble, and terrazzo.
High-temperature steam is incredibly aggressive. It can quickly break down and strip the protective sealant right off your tile. Once that seal is compromised, the tile is wide open to staining and moisture damage. While it might feel like you’re deep cleaning and sanitizing, you’re actually fast-tracking the need for a full strip and reseal.
Think of your sealant as the clear coat on a car. A steam cleaner is like a pressure washer blasting that protective layer away, leaving the paint underneath exposed to the elements.
It’s a classic case of the “convenience” not being worth the long-term risk. Stick to your pH-neutral cleaner and a good mop.
How Do I Clean Dirty Grout Without Harming the Tile?
Dingy grout lines can ruin the look of a beautiful floor, but cleaning them requires a delicate touch, especially with acid-sensitive cement or stone tile. Most commercial grout cleaners are loaded with harsh acids or bleaching agents that can easily etch or discolor the edges of your tiles.
The safest and most effective approach is to start with a more concentrated version of your daily pH-neutral cleaner.
- Mix a Stronger Batch: In a spray bottle or small bowl, mix your go-to stone-safe cleaner with less water than you would for mopping.
- Apply and Dwell: Spray or brush the solution directly onto the grout lines. Let it sit for 10-15 minutes to loosen the grime.
- Scrub Carefully: Use a dedicated grout brush (or even an old toothbrush) to scrub the lines. The trick is to keep the bristles focused on the grout, not the tile.
- Rinse and Dry: Wipe the area with a clean, damp cloth to lift all the dirt and cleaning solution, then dry the area.
For really stubborn stains, an oxygen-based bleach powder (like OxiClean) mixed into a paste with water is a much safer alternative to chlorine bleach. It lifts organic stains without the harsh acids that burn stone. As always, test it on an inconspicuous spot first.
What’s the Best Way to Handle a Red Wine or Oil Stain?
Accidents happen. Whether it’s in the kitchen or the living room, the absolute number one rule for spills on porous tile is speed. The faster you act, the less time the liquid has to work its way through the sealer and into the tile itself.
Here’s your game plan for common spills:
- Acidic Spills (Wine, Coffee, Juice): Blot, don’t wipe! Wiping just spreads the stain. Immediately blot the spill with a dry, clean cloth. Next, mix up a thick paste of baking soda and water and apply it to the spot. Cover it with plastic wrap and let it sit for a few hours. The poultice will work to pull the stain out of the stone’s pores.
- Oily Stains (Grease, Salad Dressing): Again, blot up any excess oil right away. Then, generously cover the entire stain with a dry absorbent powder like cornstarch or diatomaceous earth. Leave it for at least 24 hours to give it time to draw the oil out, then sweep it up and clean the area with your pH-neutral cleaner.
The growing awareness around proper stone care is clear. The global market for specialized stone cleaners, valued at around $2.5 billion in 2025, is expected to hit $2.8 billion by 2033. This shows just how many homeowners are investing in the right products to protect their surfaces. You can read more about the expansion of the stone cleaner market and the demand for better solutions.
Can I Repair a Minor Etch Mark on My Tile?
First, it’s important to know that an etch is not a stain—it’s a physical change to the surface of the stone. An acidic substance (like lemon juice or a harsh cleaner) has literally eaten away at the finish, leaving a dull or light-colored mark.
For a very light etch on a honed (matte) finish tile, you might be able to fix it yourself with a specialized marble polishing powder.
These powders are a very fine abrasive designed to gently re-hone the surface, blending the dull spot back in with the surrounding area. It’s a careful process of making a paste, hand-buffing the affected spot, and rinsing thoroughly. However, for deep etches or any marks on a polished surface, your best bet is to call a professional stone restoration specialist. They have the tools and experience to fix it without making it worse.
At Original Mission Tile, we believe handmade tiles bring a character and soul to a home that nothing else can. When cared for properly, their beauty is truly meant to last a lifetime. Explore our collections and find the perfect tile to tell your story.
Browse our in-stock and custom cement tile designs at Original Mission Tile