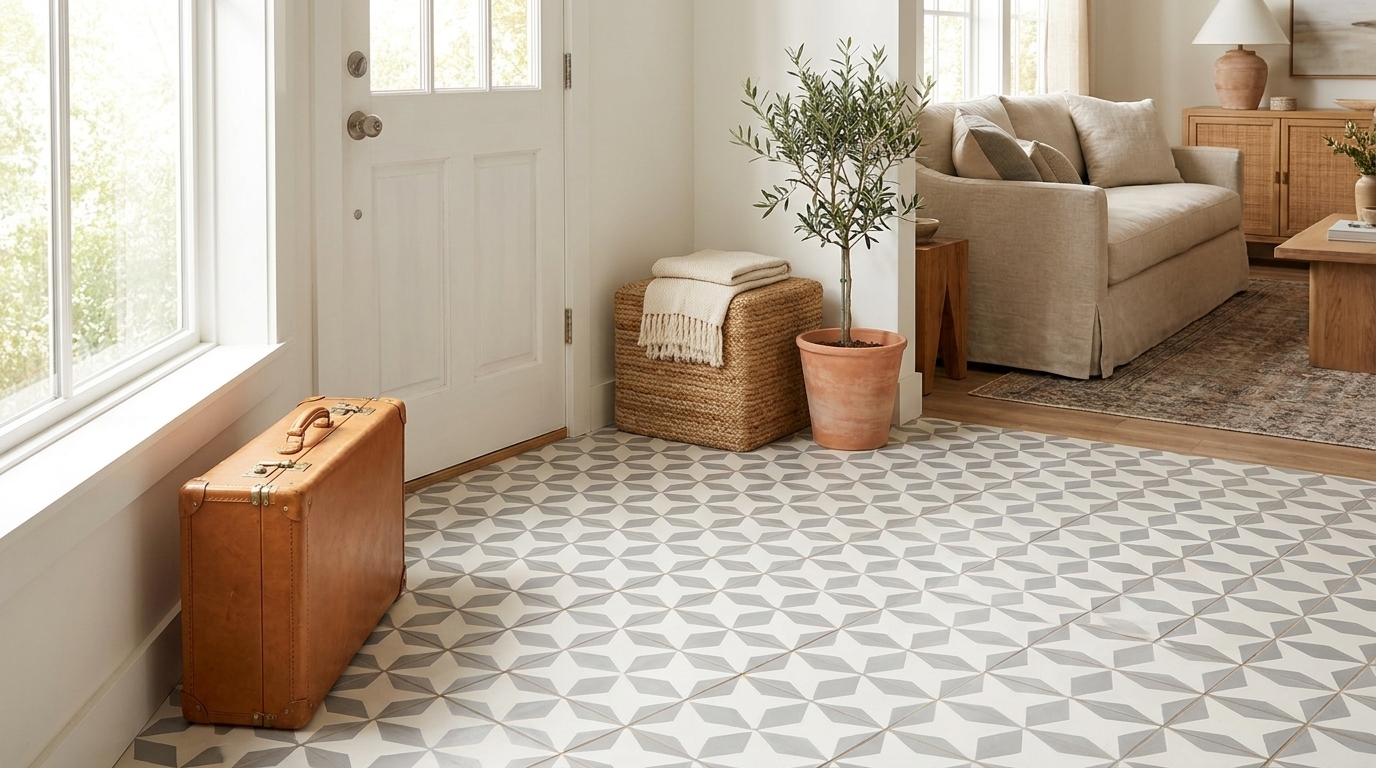
Cracked grout isn’t just a cosmetic annoyance; it’s an open invitation for trouble. Ignoring those little fractures allows water to creep behind your tiles, setting the stage for much bigger headaches like mold, rotting wood, and eventually, loose tiles. Tackling these cracks early is one of the smartest things you can do to protect your investment and stop a small fix from turning into a massive, expensive tear-out.
Why Ignoring Cracked Grout Is a Costly Mistake
That tiny hairline crack in your shower might look harmless, but think of it as a breach in the armor of your tilework. Grout is the mortar holding the whole fortress together. When it fails, the entire system is at risk. The most immediate threat is water—and where it goes, damage follows, turning a beautiful bathroom or kitchen into a restoration nightmare.
Every crack, no matter how small, becomes a tiny channel for water to get where it absolutely shouldn’t. This moisture soaks into the backer board and subfloor, creating the perfect damp, dark playground for mold and mildew. This isn’t just about musty smells; it can create real health risks, especially for anyone with allergies or breathing issues.

From Cracks to Structural Damage
If left alone, that persistent moisture can lead to serious structural decay. I’ve seen wooden subfloors turn to mush, wall studs weaken, and the very adhesive holding the tiles fail completely. This is when tiles start popping loose or “tenting” up as the foundation beneath them gives way.
The damage doesn’t always stay put, either. Water has a way of traveling, showing up in adjacent rooms, staining the ceiling below, or warping nearby drywall. If you’ve let it go this long, you might find yourself needing to learn about fixing water-damaged drywall to deal with the fallout.
A simple cracked grout repair might cost you an afternoon and less than $50 in materials. A full bathroom remodel because of water damage? That can easily top $10,000, involving not just new tile but subfloor repair and serious mold remediation.
Understanding Why Grout Fails in the First Place
To stop cracks from coming back, you need to know what caused them. It’s not always a sign of a bad tiling job, although that’s a common reason. A few key culprits are usually at play:
- Bad Mix: If too much water or polymer additive was used when the grout was first mixed, it cures weak. It becomes brittle and prone to shrinking and cracking.
- Subfloor Flex: Most homes have wooden subfloors, which naturally expand and contract with humidity and temperature shifts. If there’s too much bounce in the floor, that movement puts stress on the rigid grout until it cracks under the pressure.
- Foundation Settling: All houses settle over time. These subtle shifts can create stress lines right through a tiled surface, often showing up as long, straight cracks.
- No Expansion Joints: This is a classic installer mistake. Where tile meets another surface—like a wall, tub, or countertop—there should be a small gap filled with flexible caulk, not grout. Grout is rigid and will crack 100% of the time in a joint that needs to absorb movement.
At the end of the day, proactive cracked grout repair is cheap insurance for your home. By investing a little time now, you’re protecting the value, safety, and beauty of your space for years to come.
Pinpointing the Root Cause of Your Grout Problem
Before you even think about mixing up new grout, you have to play detective. Fixing a crack is the easy part. The real trick is figuring out why it cracked in the first place so it doesn’t happen again. Just slapping a bandage of new grout over the problem is a temporary fix for what could be a much bigger issue brewing beneath the surface.
The crack itself tells a story. Look closely. Are you seeing a web of tiny, hairline fractures spreading across the grout lines? That often points to a bad mix—usually too much water was added during installation. Or is it one long, straight crack that marches right across several tiles? That’s a bigger red flag, hinting at movement in the floor or wall underneath.
Identifying Structural vs. Superficial Issues
Your first job is to determine if this is a surface-level problem or if something deeper is going on. A few simple checks will tell you a lot.
Start by walking across the tiled area, paying close attention to the spot with the cracked grout. Does the floor feel spongy or have a slight bounce? Any noticeable give or flex is a classic sign of an unstable subfloor. That movement puts constant stress on the rigid grout until it eventually gives up and cracks.
Next, get down and press firmly on the tiles right next to the damaged grout line. Do they move or rock, even a tiny bit? If a tile feels loose or makes a hollow sound when you tap it, the adhesive has likely failed. In that case, regrouting is pointless until you pull up the loose tiles and reset them properly.
Pro Tip: It’s important to distinguish between normal house settling and a serious structural problem. A few minor hairline cracks, especially in newer homes, are nothing to panic about. But if the cracks are wider than 1/8 inch or seem to be getting longer or wider over time, you’re probably dealing with more than just settling.
Investigating Common Environmental Culprits
If the floor feels solid and the tiles are locked in place, it’s time to check for other common culprits. The location of the crack is your best clue. Are the cracks clustered around a tub, shower, or sink? This could mean a slow, hidden leak is seeping into the substrate, causing it to swell and shrink with moisture changes.
Another huge offender is the lack of proper expansion joints. You should never see grout packed into a corner where a tiled floor meets a wall, or where a backsplash meets a countertop. Those joints are designed to absorb movement, and that’s a job for flexible caulk, not brittle grout. If you see crumbled, cracked grout in these corners, you’ve found your problem.
Finally, think about the original installation. Industry data shows that a whopping 55% of grout cracks come from an improper mix—too much water creates weak, porous grout. Another 30% can be traced back to subfloor flex, a common issue in wood-framed homes across the US and Canada. You can dig into the numbers in this tile and grout market analysis. Getting the diagnosis right is the most critical part of the job; it’s what makes the difference between a repair that lasts a few months and one that lasts for years.
Choosing the Right Grout and Tools for a Lasting Fix
The secret to a grout repair that actually lasts isn’t in the application—it starts way before that, right on the store aisle. Get the materials right, and your fix will look professional and hold up for years. Get it wrong, and you’ll be doing this all over again next season.
Walking into the tile section can be a bit overwhelming, but it really boils down to a few key choices. Let’s cut through the noise and figure out exactly what you need to grab for your project.
Sanded vs. Unsanded Grout: The Main Event
This is the first and most important decision you’ll make. The names say it all: one has sand mixed in for strength, and the other is a smoother paste. This one difference dictates everything.
Sanded Grout is the powerhouse of the grout world. That sand isn’t just for texture; it adds bulk and strength, preventing the grout from shrinking and cracking as it dries. Think of it as the concrete for your tile. You absolutely need it for any grout line wider than 1/8 inch.
- Best for: Most floor tiles, wide-set wall tiles, and any area that needs to be rock-solid.
- Heads up: The sand can scratch delicate surfaces. Keep it away from highly polished marble, glass, or certain metal tiles unless you’ve tested it first.
Unsanded Grout is the opposite. It’s a much stickier, smoother mix designed to squish into tight spaces. Use this for any joint that’s 1/8 inch or narrower. Its fine consistency packs in tight without leaving the tiny air pockets that can weaken a grout line.
- Best for: Backsplashes with tight spacing, delicate mosaic tiles, and polished stone where you can’t risk scratches.
- The big no-no: Never use it in wide joints. It will shrink as it cures, pulling away from the tile edges and cracking almost immediately.
Epoxy and Other Specialty Grouts
Sometimes, a standard cement-based grout just won’t cut it. That’s where the specialty players come in.
Epoxy Grout is the superhero option. It’s a two-part system with resins and a hardener that creates a non-porous, plastic-like finish. This makes it virtually stain-proof and waterproof—perfect for kitchen counters, shower floors, or entryways that see a lot of grime. It’s pricier and a little trickier to work with, but its durability is second to none.
Flexible Grout (often a color-matched caulk) is your go-to for any joint where tile meets another surface. Think corners where walls meet, or where tile touches a cabinet, bathtub, or countertop. These “changes of plane” are guaranteed to move, and rigid grout will always crack there. A flexible, sand-textured caulk absorbs that movement beautifully.
Choosing the right product is only half the equation; you also need to know how much to buy. Nothing is more frustrating than running out of grout mid-project. Use a calculator to figure out exactly what you’ll need. Check out our guide for an easy way to calculate your grout quantity before you head to the store.
To make things even clearer, here’s a quick guide to help you pick the right grout for the job.
Grout Selection Quick Guide
| Grout Type | Best For (Joint Width) | Ideal Application | Key Benefit |
|---|---|---|---|
| Sanded Grout | Wider than 1/8 inch | Floors, showers, high-traffic areas | Strength & crack resistance |
| Unsanded Grout | 1/8 inch or narrower | Delicate tiles, vertical surfaces, tight joints | Smooth finish, no scratching |
| Epoxy Grout | Any width | Kitchens, bathrooms, high-stain areas | Stain-proof & waterproof |
| Flexible Caulk | Any width (at corners) | Where tile meets another surface | Flexibility to absorb movement |
This table should help you confidently grab the right bag or tube without any second-guessing.
Assembling Your Grout Repair Toolkit
You don’t need a truckload of tools, just the right ones. Using the proper gear makes the job faster, safer, and gives you a much cleaner result.
Here’s the essential lineup:
- Grout Removal Tool: This could be a simple, cheap grout saw (a carbide-grit blade on a handle) or an oscillating multi-tool with a grout blade. The power tool is faster, but the hand tool gives you more control around delicate tiles.
- Shop Vacuum: Don’t skip this. After you scrape out the old grout, a vacuum is the only way to get all the fine dust and debris out. A clean joint is essential for a strong bond.
- Grout Float: This is a rubber-faced trowel used to press the new grout into the joints. Get one with a firm but flexible rubber face—it helps you pack the joints tightly at a 45-degree angle, which eliminates air pockets.
- Grout Sponge: This isn’t just any old sponge. A proper grout sponge is dense with rounded edges to help you smooth the grout lines without pulling out too much material.
- Two Buckets & a Margin Trowel: One bucket for mixing your grout, another for clean rinse water. A margin trowel is the perfect shape for scooping and mixing small batches of grout to that perfect peanut-butter consistency.
The Challenge of Color Matching
A perfect structural repair can look awful if the new grout sticks out like a sore thumb. Don’t just guess the color. Grout fades and discolors over time from sunlight, cleaning, and moisture.
Your best bet is to carefully chip out a clean, dry piece of the old grout and take it with you to the store. Hold it directly against the color samples on the grout bags or the plastic sample sticks.
One last tip: grout always dries lighter than it looks when it’s wet. If you’re stuck between two shades, it’s often safer to go with the one that looks slightly too dark in the store.
Your Action Plan for Removing and Replacing Grout
With the detective work done, it’s time to roll up your sleeves. This is where your careful planning and material selection pay off. The process of removing and replacing cracked grout isn’t overly complicated, but it absolutely demands patience and a good eye for detail. A rushed job will look sloppy and fail quickly, so take your time to get a professional-looking, durable repair.
This visual guide shows the typical decision-making flow for choosing the right type of grout for your cracked grout repair project.

It simplifies the choice between sanded, unsanded, and epoxy grout based on the specific needs of your tile installation, which we talked about earlier.
Digging Out the Damaged Grout
The first physical step is the most critical: getting rid of the old, failed grout. Your goal is to carve out a clean, deep channel for the new material to fill. I can’t stress this enough—simply skimming a thin layer of new grout over the old stuff is a recipe for disaster. It will crack and flake off within weeks, and you’ll be right back where you started.
For this job, you can use a manual grout saw or an oscillating multi-tool fitted with a grout removal blade. A manual saw offers more control, which is great for beginners or anyone working with delicate tiles. An oscillating tool is much faster but requires a steady hand to avoid scratching or chipping the tile edges.
Whichever tool you choose, the technique is the same: work carefully along the grout line with steady, even pressure.
Your target depth is crucial for a lasting cracked grout repair. You have to remove at least two-thirds of the grout’s original depth. Anything less, and the new grout just won’t have enough mass to form a strong, lasting bond.
Once the bulk of the old grout is gone, use a utility knife or a pointed tool to scrape the edges of the tiles clean. The cleaner the joint, the better the new grout will adhere.
Preparing the Joints for New Grout
With the old grout out, it’s cleanup time. This step is non-negotiable. Any lingering dust or debris will compromise the bond of your new grout, period.
Grab your shop vacuum and use a crevice tool attachment to thoroughly suck all the dust and loose particles out of the joints. Go over each line multiple times to be sure. After vacuuming, wipe the tiles and joints down with a clean, damp sponge or cloth to pick up any remaining fine dust.
Let the joints dry completely before you even think about mixing your new grout. Any moisture left in the channel can weaken the mix and lead to discoloration down the road.
Mixing and Applying the New Grout
Now for the satisfying part. When mixing powdered grout, always add the powder to the water—not the other way around. This simple trick helps prevent clumps. Add the powder slowly and mix continuously with a margin trowel until it reaches the perfect consistency. It should look and feel like smooth peanut butter.
Let the mixed grout sit for about 5-10 minutes. This is called “slaking,” and it allows the chemicals to fully activate. Give it one final, quick stir before you start applying it.
To apply the grout, scoop some onto your grout float. Holding the float at a 45-degree angle to the tile, press the grout into the joints with firm, diagonal swipes. The diagonal motion is key; it forces the grout deep into the joints and prevents the float from pulling it back out as you go. Work in small, manageable sections, making sure every joint is completely filled.
If this is your first time tackling a larger project, our comprehensive guide on how to tile can provide additional context and confidence.
Finishing for a Clean, Professional Look
After packing the joints in a section, it’s time to clean up the excess. You’ll need to wait about 15-30 minutes for the grout to set up slightly. You’ll know it’s ready when you can press it with your finger and it feels firm, not squishy.
Take your grout sponge, dip it in clean water, and wring it out until it’s just barely damp. A sponge that’s too wet will pull grout right out of the joints and weaken the mix with too much water.
Using light pressure, wipe the sponge diagonally across the tiles to remove the excess grout. Rinse your sponge frequently in a separate bucket of clean water. After the initial cleanup, use the rounded edge of the sponge to gently smooth and shape the grout lines for a consistent, professional finish.
Finally, a thin film called “grout haze” will form on the tiles as they dry. Wait a couple of hours, then buff it off with a clean, dry cloth or a microfiber towel. Resist the urge to scrub it off while it’s still wet—you’ll just smear it around and make a bigger mess.
Sealing and Maintaining Your New Grout Work

You did it. The cracked grout is gone, and fresh, clean lines are in its place. It’s a huge win, but the job isn’t quite finished. What you do next is what turns a good repair into a great one that lasts for years. We’re talking about curing, sealing, and a little bit of upkeep.
Think of new grout like freshly poured concrete—it’s deceptively soft at first. It needs time to fully harden and gain strength through a chemical process called curing. This is where the grout expels excess moisture and forms its final, rock-solid structure. Rushing this is a classic mistake that can undo all your hard work.
The Curing Process: Patience Isn’t Just a Virtue, It’s a Requirement
Before you even think about sealing, your new grout has to cure completely. For most cement-based products, this means waiting at least 48 to 72 hours. No exceptions.
Walking on a freshly grouted floor or letting a shower get wet too soon will leave dents, wash out the color, and wreck its integrity. During this time, let it breathe. Avoid covering it with rugs or anything else that might trap moisture. Sealing it prematurely is even worse—you’ll just trap water inside the grout line, leading to a weak, discolored mess that will fail way sooner than it should. Always check the manufacturer’s bag for the exact curing time.
Choosing and Applying the Right Grout Sealer
Once the grout is fully hardened, sealing is your next line of defense. A good sealer soaks into the porous grout and creates an invisible shield. This is what protects it from moisture and stains, the two biggest enemies of clean grout. Without a sealer, a coffee spill could leave a permanent mark, and daily water exposure in a shower will eventually lead to mildew.
You’ll generally find two main types of sealers:
- Penetrating Sealers: These soak deep into the grout to protect from within, making them perfect for wet areas like showers and bathrooms. They offer heavy-duty, long-lasting defense without changing how the grout looks.
- Topical Sealers: Also called membrane-forming sealers, these create a protective film over the top. They can add a slight sheen and are fantastic for stain resistance on kitchen backsplashes, but they might need to be reapplied more often in high-traffic spots.
If you want a deeper dive, check out our guide on the best grout sealers for floor tile over at https://originalmissiontile.com/best-grout-sealers-for-floor-tile/ to find the perfect fit for your project.
When you go to apply the sealer, precision is everything. Use a small artist’s brush or a roller-tip applicator bottle to put the sealer directly on the grout lines. Be sure to wipe any excess off the face of the tile right away with a clean cloth. If you let it dry on the tile, it can leave a hazy film that’s a real pain to remove.
A Smart Maintenance Plan for the Long Haul
With your grout sealed and protected, a simple cleaning routine is all it takes to keep it looking new. The key is to be gentle. Harsh, acidic cleaners like vinegar or abrasive scrub brushes will eat away at both the sealer and the grout itself, undoing everything you just did.
Stick to pH-neutral cleaners made specifically for tile and grout. A simple weekly cleaning is usually all you need. We’ve seen that when architects and designers spec the right grout and provide a maintenance plan, especially for unglazed surfaces, it can cut down on repair calls by up to 30%. In the long run, this helps their clients save 20-25% on upkeep costs.
Once your grout is repaired, keeping it clean is the best way to make it last. For a complete rundown on the right techniques and products, this excellent guide to cleaning floor tile grout is a fantastic resource. Finally, get in the habit of glancing over your grout lines every few months, especially in bathrooms and kitchens. Catching a small issue early is always better than fixing a big one later.
Got Questions? We’ve Got Answers.
Even the most straightforward repair can leave you with a few head-scratchers. When you’re in the middle of a project, getting a clear answer quickly makes all the difference. Here are the questions we hear all the time about fixing cracked grout.
Can I Just Put New Grout Over the Old Cracked Grout?
This is easily the most common question, and the answer is a hard no. Skimming a thin layer of new grout over old, failing grout is a classic shortcut that just doesn’t work. The new material is far too thin to create a solid bond, and it’s guaranteed to chip, flake, and crack in no time, putting you right back where you started.
For a repair that actually lasts, you have to dig in. The rule of thumb is to remove at least two-thirds of the old grout’s depth from the joint. This is non-negotiable. It creates the clean, deep channel the new grout needs to lock onto the tiles and cure into a strong, stable line.
How Long Should I Wait to Seal My New Grout?
Patience is a virtue, especially after you’ve finished grouting. You absolutely must wait for the new grout to cure completely before you even think about applying sealer. Curing is the chemical process where the grout hardens and pushes out moisture—it’s what gives the final repair its strength.
Most cement-based grouts need between 48 and 72 hours to fully cure. If you seal it too early, you trap moisture inside the grout line. This not only weakens the grout dramatically but can also cause discoloration and mildew down the road. Always check the manufacturer’s instructions on the bag for the specific cure time.
Don’t rush the cure. A properly cured grout line is the bedrock of a lasting repair. Sealing it too soon undermines the whole project, leading to premature failure and creating a perfect breeding ground for mildew.
My Grout Cracked Again After I Fixed It. Why?
This is one of the most frustrating things that can happen. You put in the work, and a few weeks later, the cracks are back. When this occurs, it’s almost always a sign of a bigger, underlying problem that patching the grout alone can’t solve.
Here are the usual suspects:
- Subfloor Movement: This is the #1 reason for recurring grout cracks. If the subfloor beneath your tile has any flex, bounce, or movement, the rigid grout will crack under the strain every single time. Grout has no give.
- Missing Expansion Joints: Grout will always crack where tile meets a different surface, like a wall, bathtub, or countertop. These joints need a flexible material like caulk—not rigid grout—to absorb the natural expansion and contraction.
- Improper Mix or Curing: If your grout mixture had too much water, it would have cured weak and brittle. Likewise, if the area was exposed to foot traffic or water before the grout fully cured, its internal structure was compromised from the start.
First, check for any bounce in the floor. If the subfloor feels solid as a rock, re-trace your steps to see if the mix was off or the joint needed caulk instead. A good diagnosis is the key to a permanent fix.
At Original Mission Tile, we believe in giving you the knowledge to care for your beautiful tile. From choosing the perfect handmade cement tile to keeping it looking timeless, we’re here for you. Explore our collections and find more resources at https://originalmissiontile.com.